
Technology Information for Using Google Earth Pro
If you choose to use Google Earth Pro, your first two steps are the same as using Google Earth Web. You must download the file and save the file. Files are linked at the top of each episode page. The Google Earth Pro software is available for free download and installation. You can also find additional help info at the Google Earth Pro Help page.
Step 1. Click to Download the Google Earth File for this episode at the top of the weekly blog story.
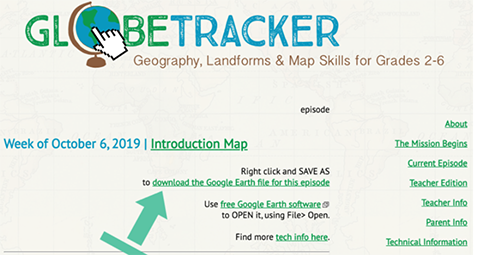
2. Save the file wherever you wish on your device.
3. Open your Google Earth Pro
New to Google Earth Pro?
You do not need to be an expert to use Google Earth Pro to follow Geo and Meri’s mission.
Google Earth Skills You Need to Know:
- Where to find Navigation controls, Layers, and Places in Google Earth. This Feature Tour gives you a tour of the basic tools. Practice moving between places on the Earth and zooming in using the navigation controls.
- How to play a tour. Watch this video from Google Earth on how to PLAY a tour or read the text directions for Playing Tours (below the video).
- How to view photographs of locations.
- How to measure distances using Google Earth Pro. (optional)
- How to find and view the scale legend. (optional)
- How to view lines of longitude and latitude. (optional)
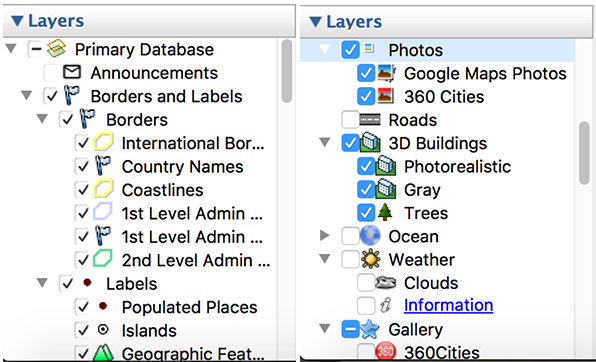
How to set the layers for the best use of Globetracker's Mission:
Open the Layers panel at the left by clicking the triangle if it is not open already. Use the small triangles at left to open the layers where you want only certain parts of the layer. The triangle will point down when open. Check the boxes so you can see:
Borders and Labels
> International Borders
> Country Names
Oceans
3D Buildings
Photos
> Google Maps Photos
> Gallery (many additional photo options)
This computer will "remember" these layer choices each time you open Google Earth Pro unless you change them.
These are local settings on each machine. Make the layer settings on the machine you will use for class!
As you become more adept with Google Earth Pro, you may want to play with other layers as part of class discussions. You can change them any time you are on Google Earth for a new “view.”

This is the toolbar across the top of the screen. One of the neatest features of Google Earth Pro is the ability to Show Historical Imagery (you set the year). Here you can view what a location located liked on a given date (approximately). Check it out as you connect history with your geography. Click on the image towards the middle of the toolbar that has the green arrow circling the top of the image (7th image from the left). Next to that button is the Sun. Click on the Sun to show sunlight across the landscape. You can use the time slider to select the time of day you wish to view. XZ
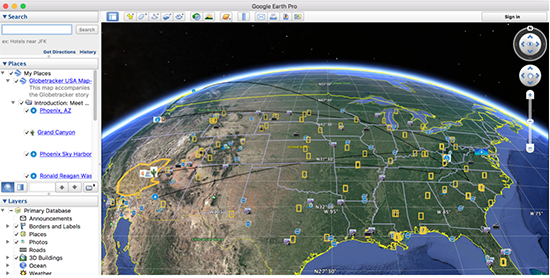
How to work with My Places on Google Earth Pro:
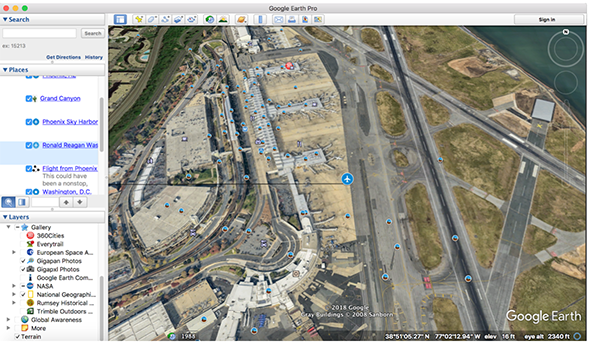
My Places shows up to the left of your map. Click on the name of the location in the My Places section. You can see, for example, that Phoenix has a star, while the Grand Canyon is labeled with a cactus. Click on the name of the location to read more about that location. There are also additional images, videos, and links to more information about the location.
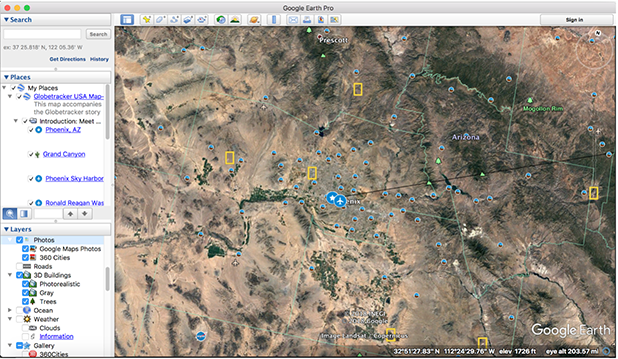
How to view photographs of locations:
If you want to view more photos, be sure you have clicked the various photo options in the Photos and Gallery layers. You can view pictures shared by people around the globe. The photos are visible as small blue photo circles as you zoom (see image below). Images may also appear as small yellow rectangles or red circles (if you have checked additional boxes in the Gallery). To view the photos, just click on the small blue circles (or other icons, based on the options chosen.)
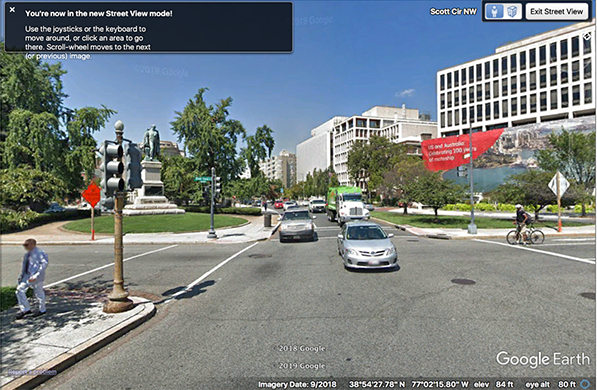
There is a street view option, same as with Google Earth Web, simply click the yellow character on the right hand side and drag to the area that you wish to view. This is also where you will find the tool to zoom in.
Measuring Distances in Google Earth:
You can have Google Earth Pro measure distances between points "as the crow flies" using the Ruler tool available at the top of the Google Earth main screen.
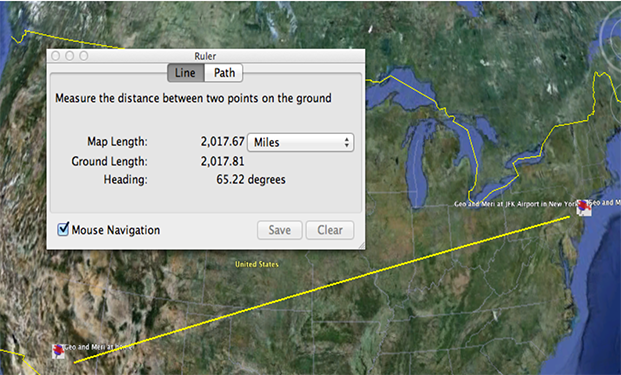
Click the ruler to turn it on. Your cursor will change to a crosshair. Click one location then another to measure the distance between them. The Ruler window that pops in front should be changed to miles or your preferred unit of measurement. Click the CLEAR button in the Ruler window to remove the line and measure something else.
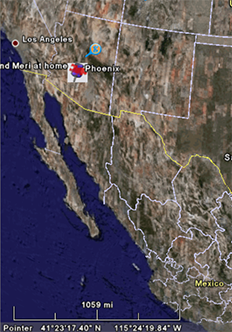
View the scale legend:
You can turn on a dynamic scale legend to show in the bottom left of the main Google Earth Pro window. Simply go to the View menu and click Scale Legend> The scale will change constantly as you zoom in and out.
Note: For younger students who have not grasped the concept of proportion, this changing scale may be very confusing. TeachersFirst recommends turning it on AFTER you finish zooming in or out.
If you use the scale legend on an interactive whiteboard, you can estimate using the scale, then check your estimate using the Ruler tool to measure distances.
Viewing lines of longitude and latitude:
Google Earth Pro is a wonderful way to reinforce Geo and Meri's explanations of longitude and latitude. To turn on the lines, simply go to the View menu and click Grid. The lines will appear on the main map and stay in place no matter how much you zoom or navigate the globe:
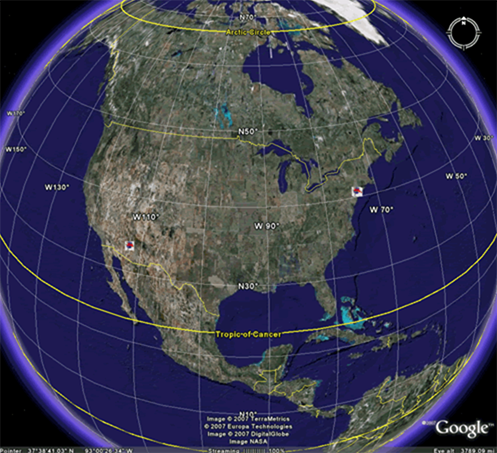
Use this view on an interactive whiteboard and have students use the pens to mark locations by longitude and latitude using the lines. If you click a location, Google Earth will tell you its coordinates. Click a location, then RIGHT click and go to Properties. The full coordinates of longitude and latitude (down to the seconds) will be shown. TeachersFirst's main offices are in a town at Latitude 38°57'8.37"N and Longitude 77°21'22.78"W. Can you find it?