
In Part 1 of this blog, we introduced you to Padlet. We discussed applying the SAMR Model and the Triple E Framework using Padlet in your instruction. Today’s post offers detailed instructions for using this tool and shares classroom ideas.
Padlet:
If you are new to Padlet or a frequent user, you have likely noticed the numerous additional options recently added. Despite the introduction of new templates and options, they all maintain a familiar format. You’ll still use the standard + sign to add notes, just like in the original version. This means that exploring these new additions should be relatively straightforward, with only a slight learning curve.
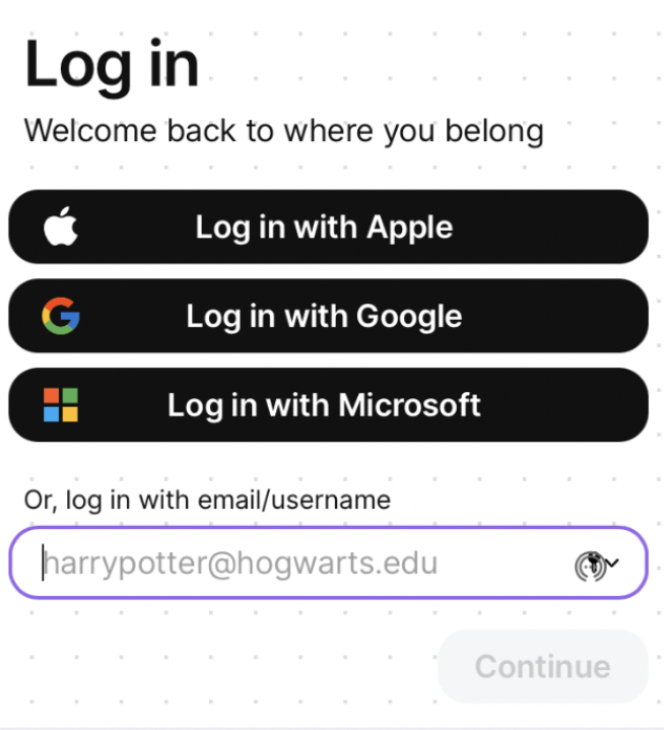
Let’s walk through how to sign up for Padlet and use this powerful tool step by step. You can create an account using your email address or by signing in with your Apple, Google, or Microsoft account.
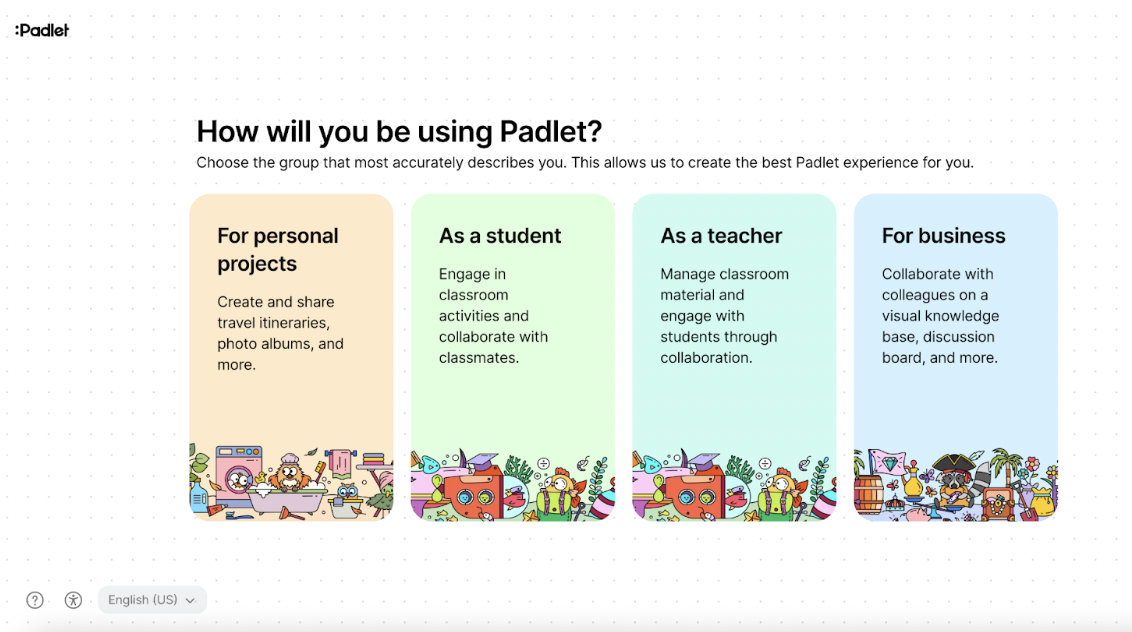
When you arrive at the site, you will be prompted to share whether you are using it for personal projects, as a student, as a teacher, or for business. All options are free, so just click the one that most closely matches your intentions.
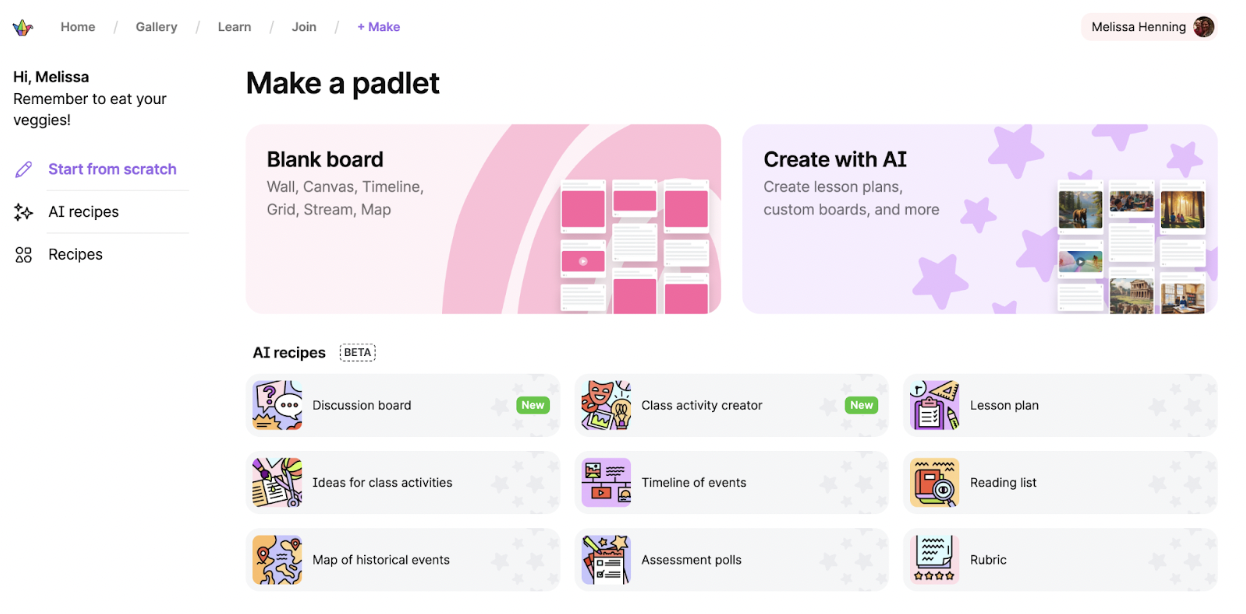
Once logged into the site, you are presented with numerous options. To begin with, you can start on your own from scratch (on the left sidebar). Other options include Blank board and Create with AI. The Blank board is basically the original Padlet options, including Wall, Canvas, Timeline, Grid, Stream, and Map. They have also added Create with AI, which creates lesson plans, custom boards, and much more. In addition, they have added “Recipes,” which we will discuss later in this post.
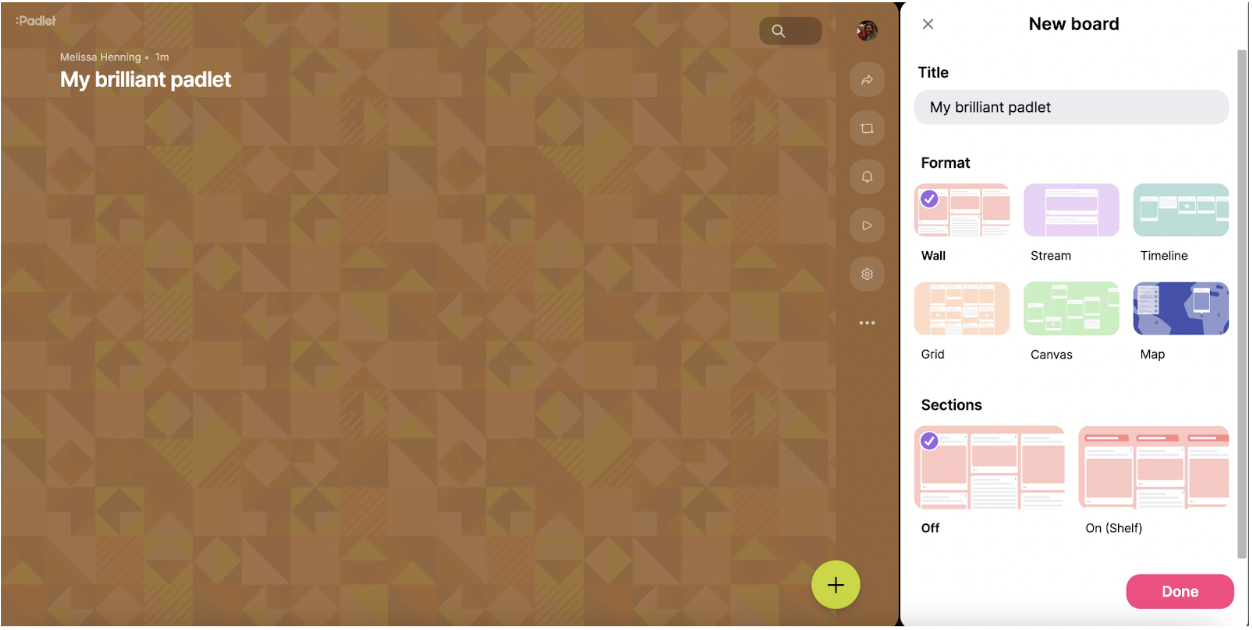
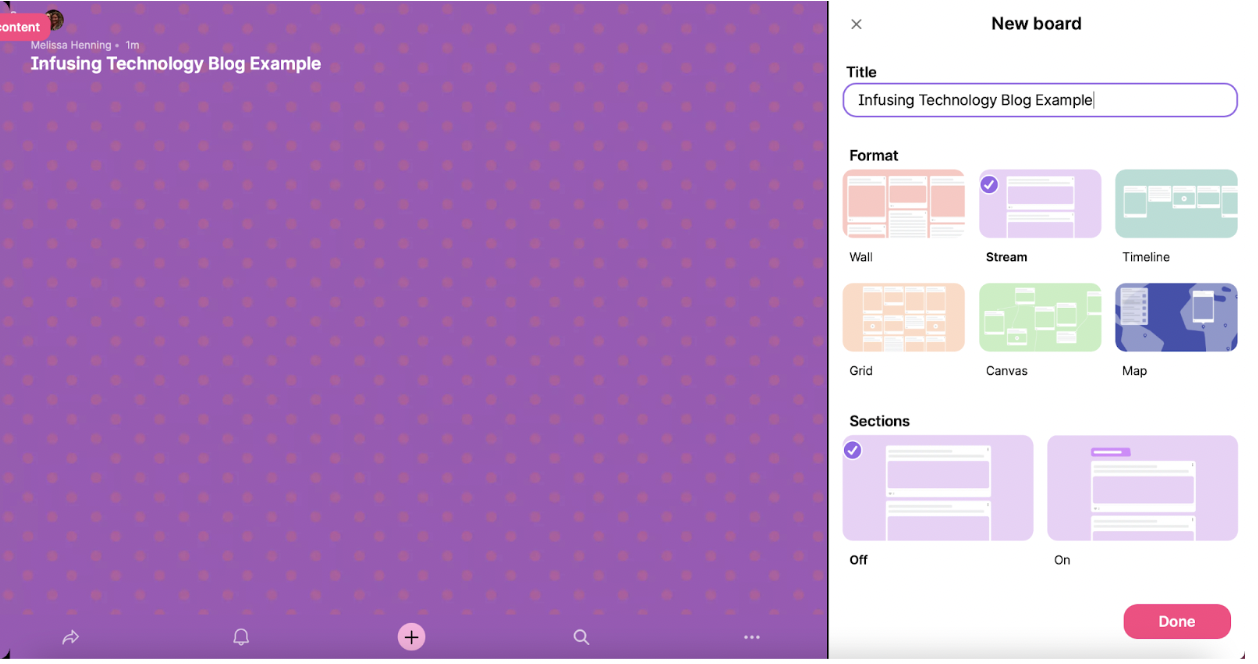
We will begin by looking at the Blank board options. When you click to create the new board, you can add your title and then choose the format you want from the options shared on the right side of the image below. In addition, you have many options to change the look of your Padlet, from choosing different themes and backgrounds to determining if students can comment on other posts.
The other main option was to Create with AI. If you choose this one, you are presented with this fill-in-the-blank page. Be as specific as you wish to pinpoint what you want to create. As with most AI tools, you can redo the prompt if you are unsatisfied.

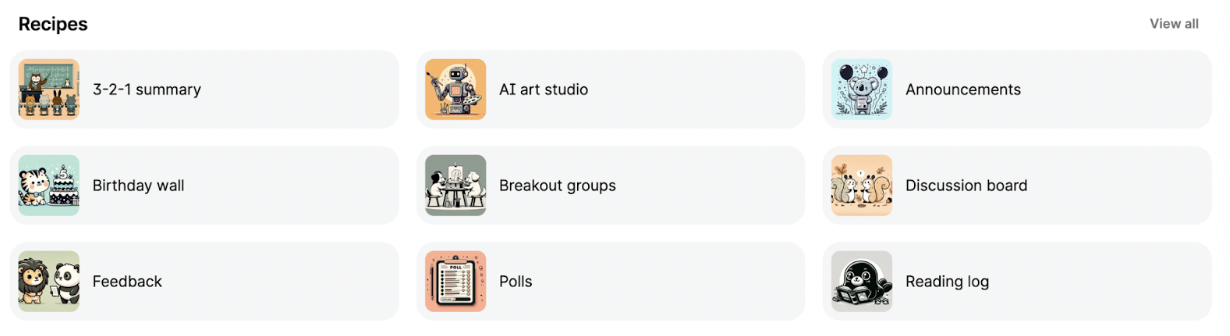
An additional feature of the AI additions is the “Recipes,” found on the left sidebar when arriving at the site. Below is a short sample of recipes; there are many additional options.
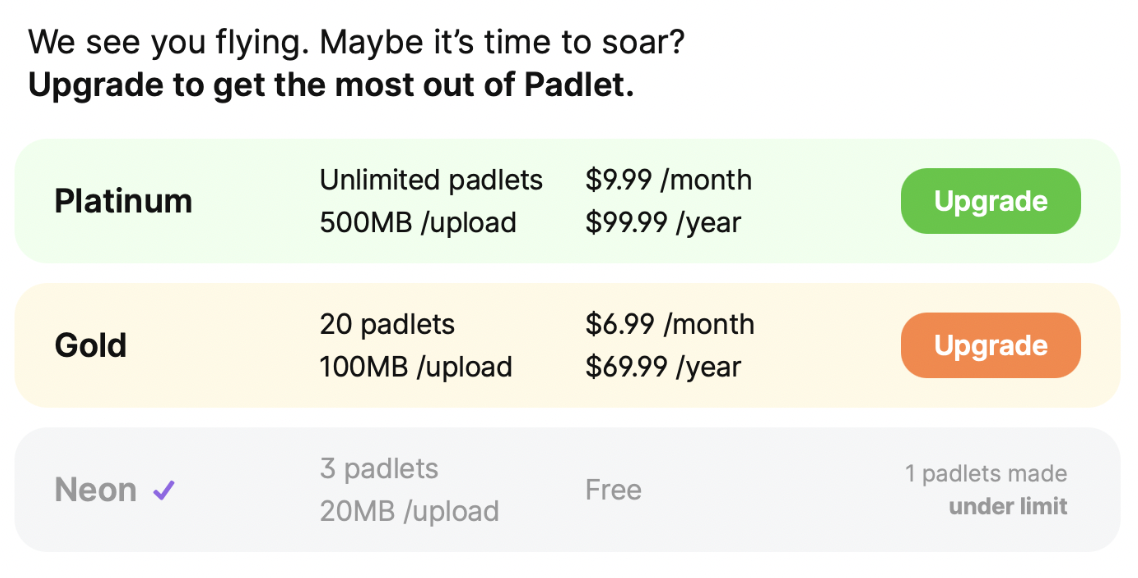
If you are wondering what is free, here is a detailed list. The NEON plan is the free plan. This plan includes three Padlets per email address/registration. While this may not seem like much, you can remove Padlets from your account when you no longer need them.
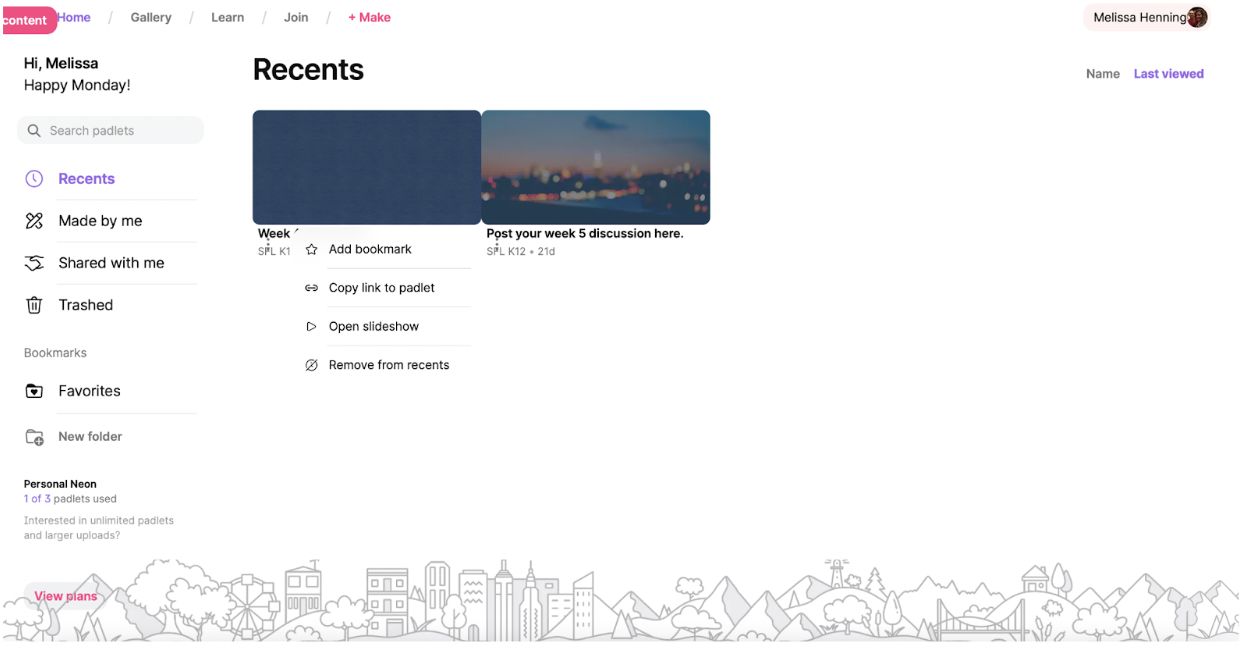
Once you are logged in and ready to begin, you will see this home page. If you are ready to create, click + Make (pink text at the top). There are also links to Gallery and Learn, two other places you want to check out.
The Gallery offers some of the same activity options shared with the AI Recipes, and many additional boards. The benefit of using this method of searching is that you can narrow down by category or use the search boxes. You can search by grade, template, or category. See the examples in the image below.

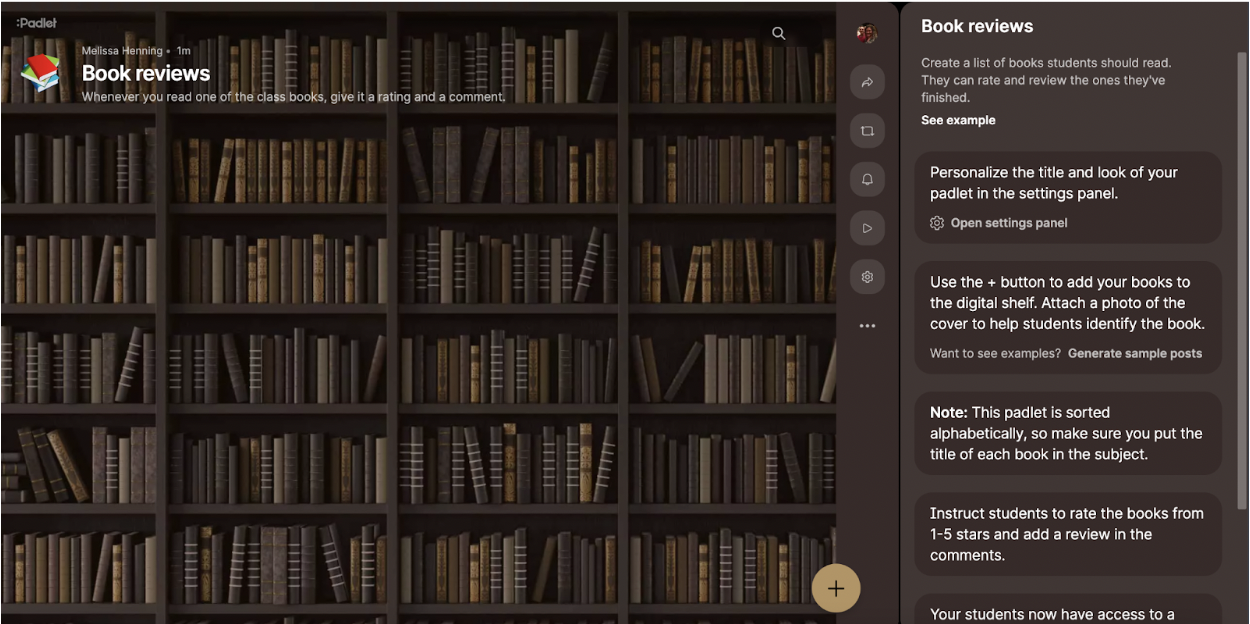
One recipe (AI) example is Book reviews (as shown below). This example is full of great ideas, from instructing students to rate the books using 1-5 stars (using the reaction option) to using the + button to add books to a digital bookshelf and attaching photos of the covers!
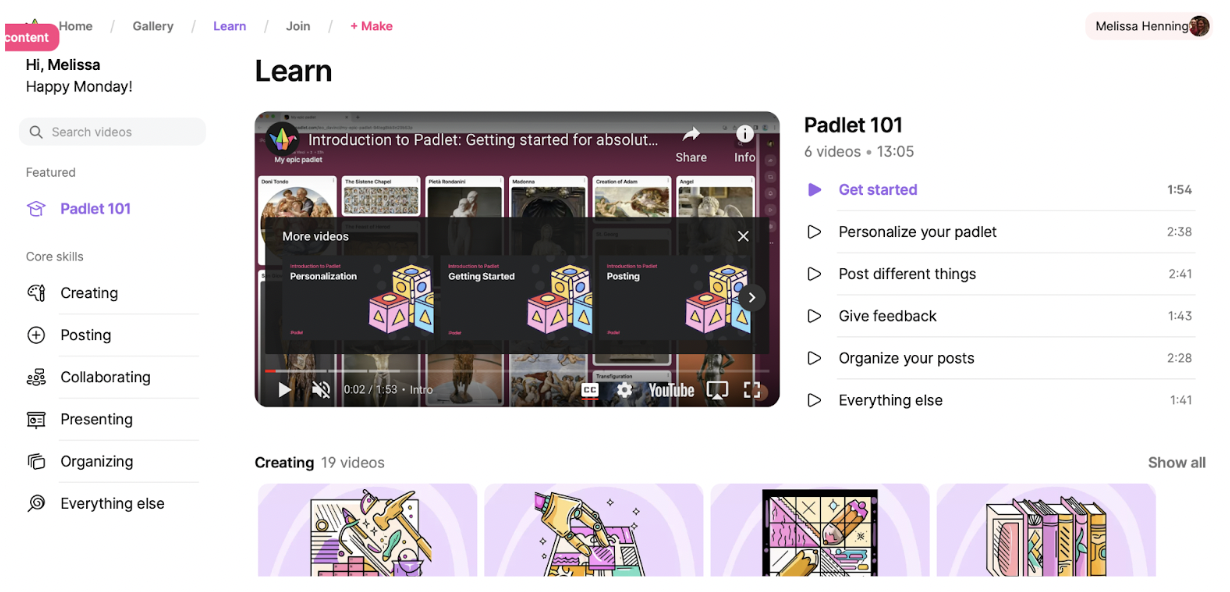
If you are somewhat new to Padlet or want to freshen up on the many recent additions, don’t miss the Learn option (top left of the main page) to find how-to videos on a variety of topics. There are videos about using Padlet and Creating on Padlet. These are also ideal to share with your students who may be new to Padlet.
Below is the New board. You can add a title, change the format, and determine whether you want one stream or separate sections (such as different headings).
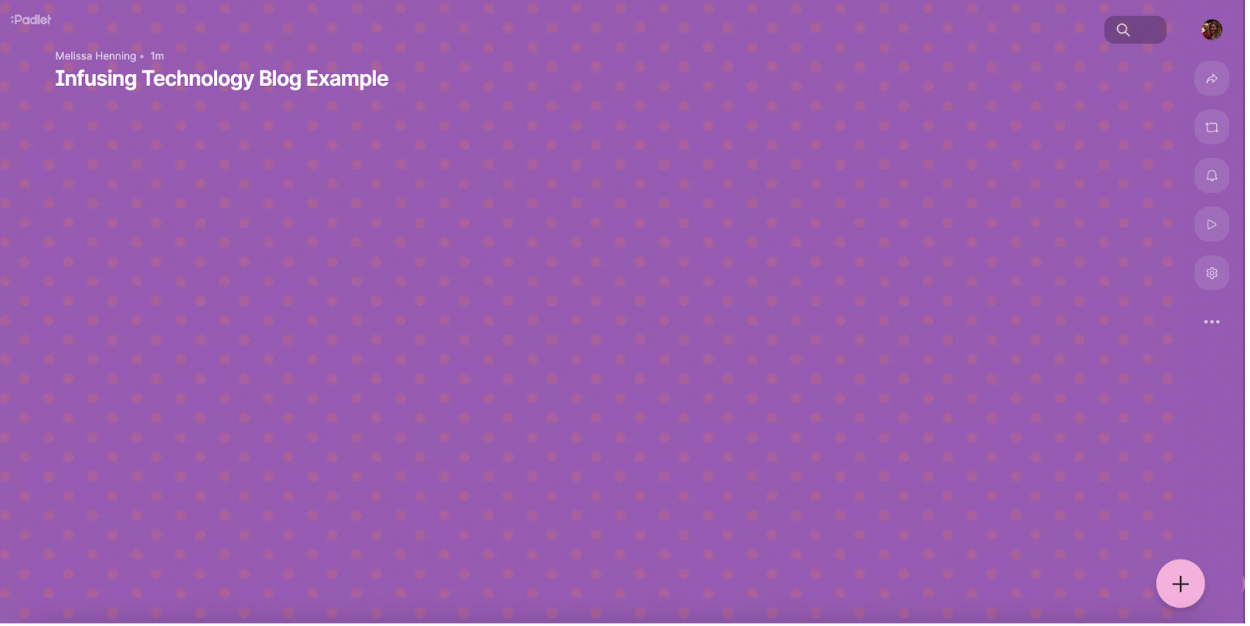
Once you click Done, you are ready to begin. To add a post, click the pink button on the bottom right side. Depending on your color scheme, the + sign may be a different color. There are also several import icons on the right side. At the top are a sharing button, a remake button, an activity panel, a slideshow option, and settings. Let’s take a deeper look at the sharing and settings options.
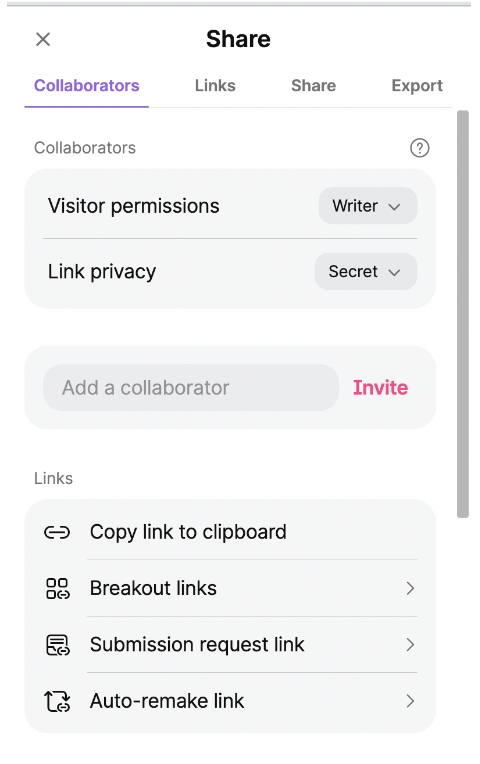
Within the Share area, you can invite collaborators (great for group work) and set permissions for visitors to be writers or editors. You can also link private/secret or public (more on that later).
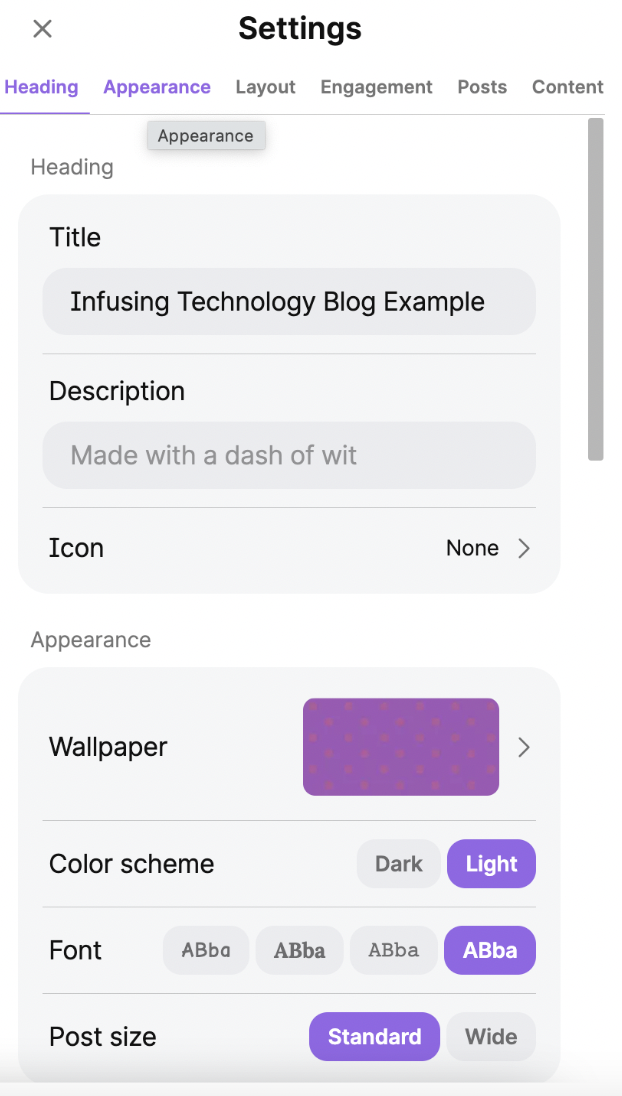
The Settings area offers many different ways to personalize your Padlet. You can change the title, description, background, wallpaper, and font size.
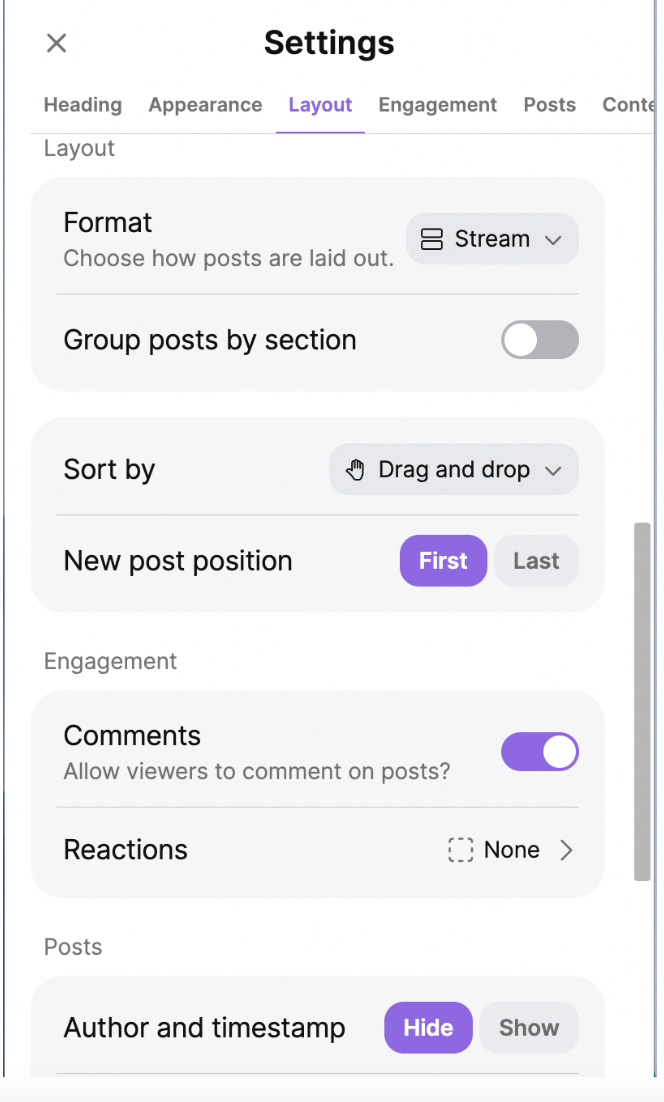
Under Settings, you can change the format/layout, decide whether new posts should appear at the top or the bottom, enable comments, and allow commenters to add reactions.
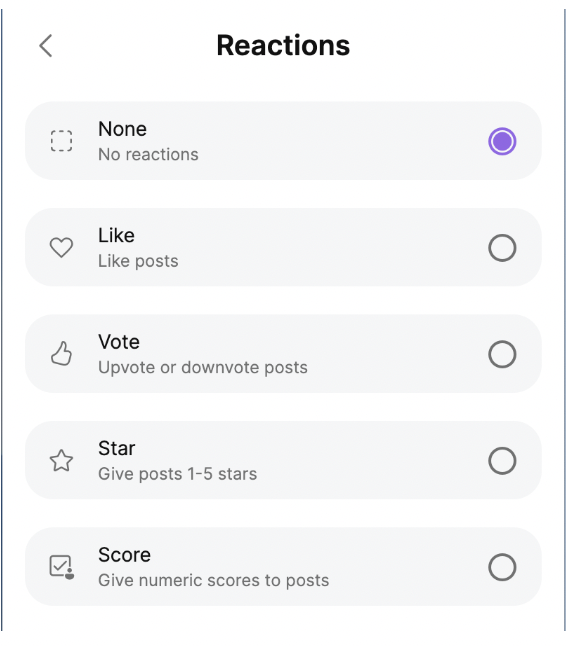
Under Reactions, there are five options. The first is no reactions. Other options include liking a post, upvoting or downvoting a post, giving a post 1-5 stars, or giving a numeric value to the post. Be thoughtful when considering whether to include reactions so students are offering positive feedback and not using the platform to be harsh.
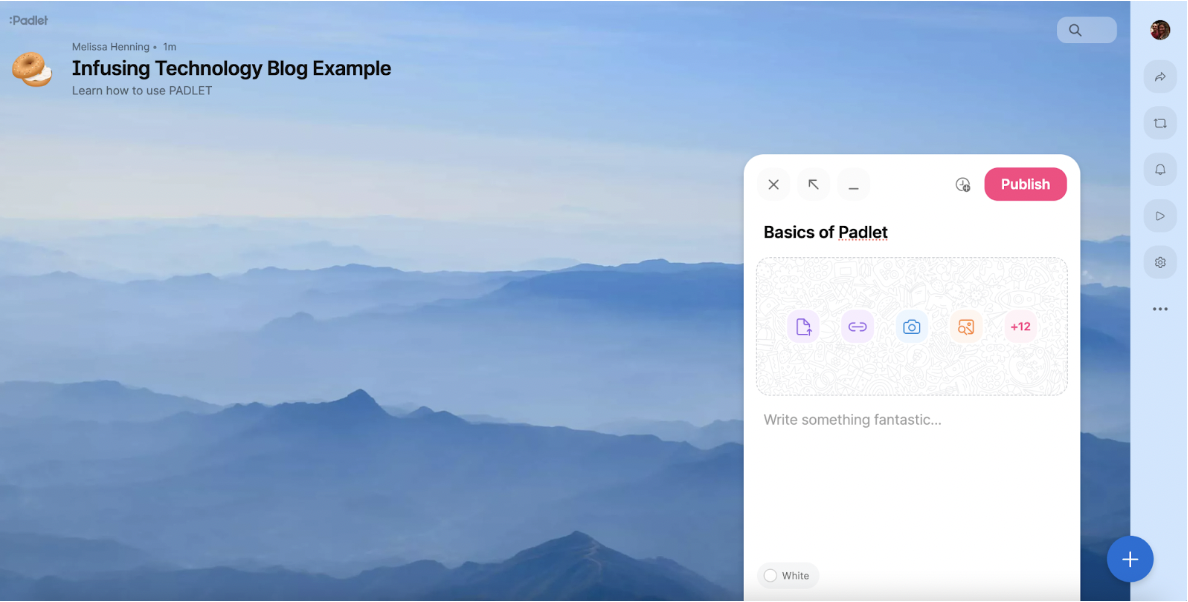
We are now ready to make a post. To begin, click the + sign (now blue) at the bottom right side. A white box pops up with numerous options to add to your post. Click the +12 to see the possibilities, including a photo, recording a video (or audio), inserting a link, and more.
Here is the complete list of sharing options. Three newer features include Poll, Google Drive (adding something directly from your Drive), and I Can’t Draw. The I Can’t Draw allows AI to create what you describe and draw for you. Note that there is also a screen recorder, camera, Image search, YouTube, and more. Add the URL, and Padlet does the rest for the options, such as YouTube or Link.
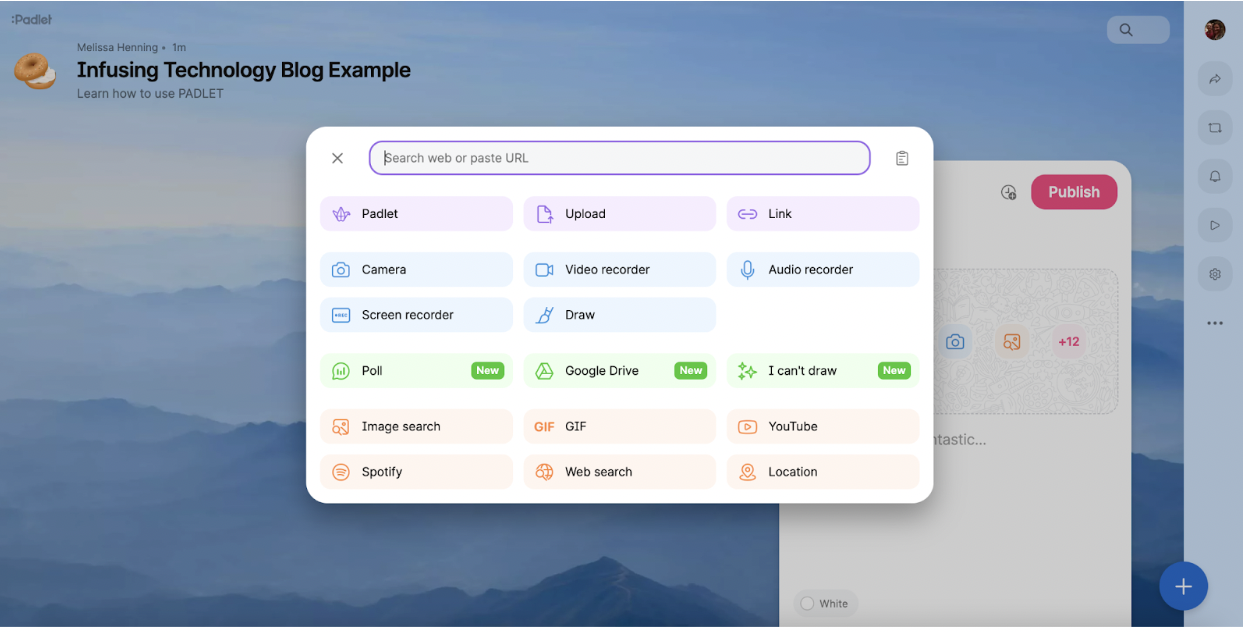
If you click Image Search, a dialog box will pop up, allowing you to choose between multiple media types (image, GIF, YouTube video, Spotify audio file, or Web resource). Type your search topic, select a media type, and hit Enter. The search feature is excellent for curating various items on the same topic.

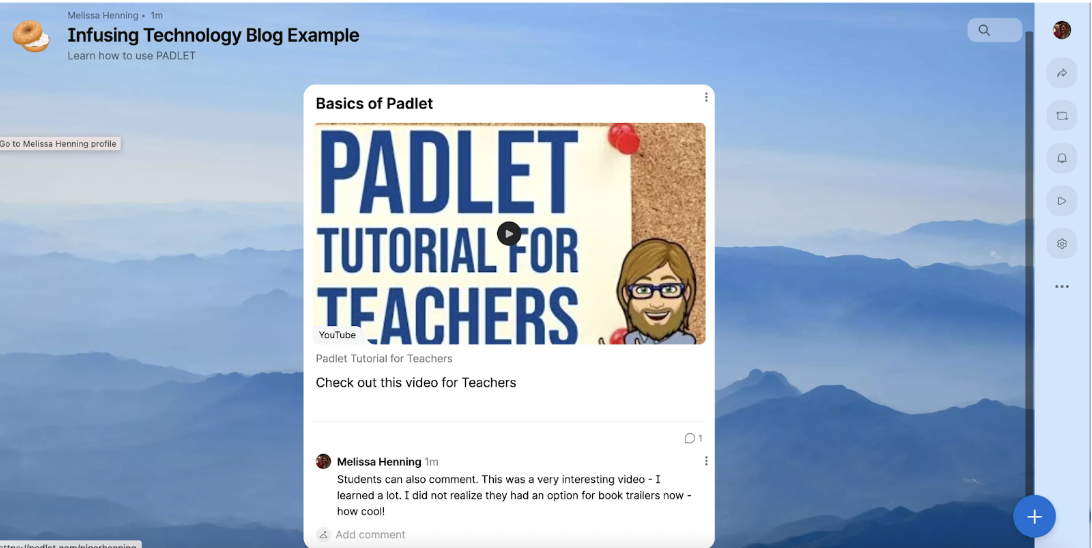
Now that the URL has been included and I added the text, I can click Publish to add my post to the Padlet.

If you turn on comments, this is what a comment would look like. We did not choose to turn on the reaction options for this sample.
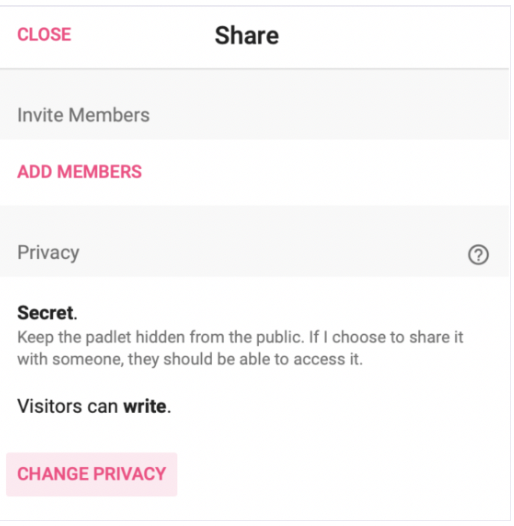
Once you are finished, it is time to click the Share button! You can invite members, and this is where you can change the privacy setting. Click on Change Privacy to switch from private/secret to public Padlet.
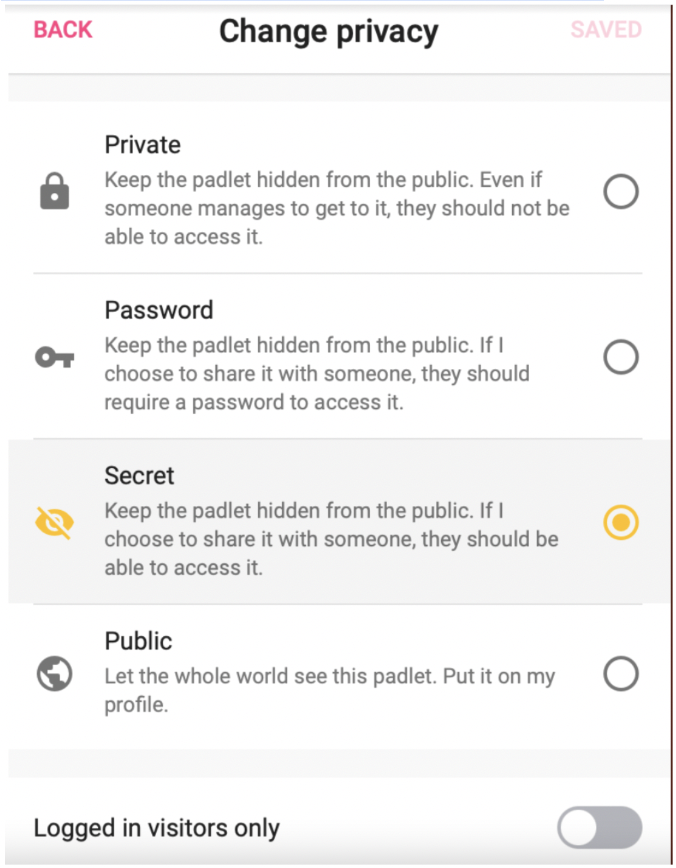
Here are the full privacy options. We recommend keeping the Padlet Secret (hidden from the public) when using the tool in the classroom.
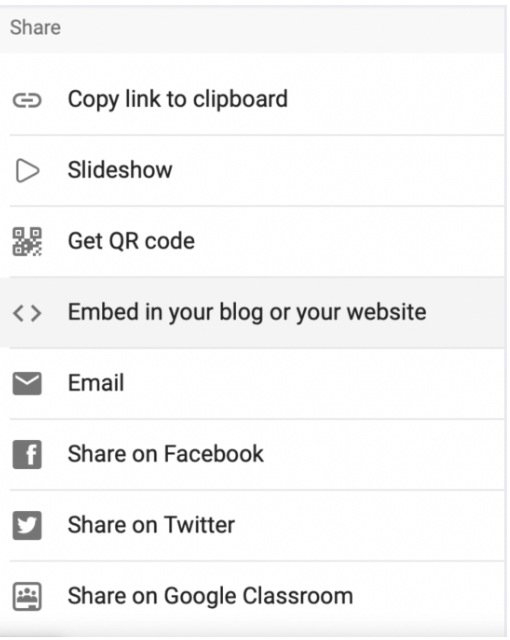
Finally, it is time to Share! You have many options, from simply copying the link and sharing the URL to embedding the Padlet into your class website (or blog) and many others (see image below).
Classroom Implementation Ideas:
Padlet is a versatile online collaboration tool for creating virtual boards to share ideas, brainstorm, and organize information. Start from scratch or use templates like timelines and maps. Padlet’s AI can generate interactive activities based on topics and objectives. Users can post text, images, videos, and files as digital sticky notes. You can personalize your Padlet with a customized appearance and allow comments or reactions. Teachers also can moderate posts. Add links, images, polls, drawings, videos, and more to responses. For free accounts, you get 3 Padlets per email address. Padlet is available on the web, Android, and iOS with slight variations.
Padlets can be infused in all subject areas and for many project options. This tool is an excellent way for students to practice writing, collaboration, written expression, and more. To get started on classroom implementation ideas, here is a list of ten ready-to-go templates available at Padlet (many AI-created) that you may find helpful in your instruction.
- Art Showcase: Students can post artwork along with a title and description. Peers can view, comment, and react to their classmates’ work.
- 3-2-1 Summary: Ask students what they learned, what they want to know more about, and what questions they still have.
- Character Sheet: Students invent or outline the personality, backstory, and motivation of a character (could be fictional, from a book, or based on a real person).
- Concept Map: Use the mapping templates to visualize and connect ideas or concepts with this ready-to-go concept map, which can show relationships and links between people or objects.
- Debate: Encourage healthy debate with this template, which offers ideas for students to share their opinions, either in favor or against specific ideas. Turn on the commenting feature so the classmates can comment and debate.
- Hopes and Fears: Students can share and voice what they are excited about (or hopeful about) and what they may be nervous about or fear. Consider turning off names in the required feature settings so students appear anonymous.
- Lab Report: Students can document photos, experiments, results, observations, and more using this template.
- Podcast: Students can use the audio option on the posts to record, share, and explore various topics using audio content as a podcast. Each student can add their clip to have a class podcast.
- Project Planner: Students can use this template to track the progress of items on their to-do list, in progress, and completed. They can set deadlines, create actionable steps, and share completed projects. A project planner would be helpful for collaborative groups or individuals.
- Show and Tell: Students can create a community by sharing a photo, video, or drawing about something they enjoy or find interesting.
Padlet is a flexible and diverse tool that allows students to showcase many learning styles (from writing to speaking and more), develop collaboration skills, and more. Here are some lesson ideas for any subject:
- Create digital portfolios for students to showcase their work.
- Organize research notes and sources for essays.
- Conduct peer reviews on writing assignments.
- Create an introductory Padlet where students can say hello, tell a bit about themselves, and share a photo of something important to them.
- Create a class Padlet with “Class Happenings and Highlights.” Share the link with families and students. Visitors can post items and add comments to your stickies. (We suggest taking advantage of the moderation option in this situation).
- Share book recommendations and reviews.
- Collaborate on solving math problems.
- Host virtual science fair presentations.
- Plan and track progress on long-term assignments.
- Create a Padlet as an exit ticket related to any lesson’s content. You could save time by creating one Padlet for the entire week (or even month) in a Shelf layout and adding the daily question in a new column each time.
- Share a Padlet to use for collaboration during remote learning lessons.
- Create a Padlet for student reflection after a lesson in any subject.
- Create a timeline Padlet sharing the order of steps in an assignment. Students can add comments to specific stickies to ask questions about each step.
- Use the Shelf layout for group work. Each group can have its own shelf to collaborate, share questions, or learn information.
- Create interactive timelines for history lessons.
- Use Padlet to facilitate language exchange with international pen pals.
- Use Padlet to organize information by units (in any content area). Use whatever layout works best for you to share links to websites, games to use for practice, links to create tools or project options, videos to learn additional information, and more.
- Use Padlet as a Q&A board in your class. Rather than stopping mid-lesson or sending an email from home, students can post any questions to the Padlet, and you can address the questions with the entire class or individual students.
- Share, discuss, and debate current events.
- Create and organize study guides for a test.
- Create multimedia vocabulary walls in English, literature, world language classes, or other subjects.
- Design virtual gallery walks for student work – art, music, writing, and more. Students can record videos or audio, too!
- Sequence historical events, such as the Battle of Gettysburg, the Holocaust, or other events (use the timeline layout).
- Identify various countries using the map layout (add images, videos, and text).
- Discuss the three branches of the US government (use the Shelf layout and create three columns for the information).
- Identify and describe the lifecycle of a frog or butterfly(use the Timeline layout).
- Sequence and discuss the phases of the moon (Timeline layout).
- Students can create math problems for the class to answer and have the questions shared on a Wall layout. Students can use the commenting features to answer math problems.
- Have students use the Draw option to respond to math problems you post on a Padlet.
- Use the Shelf layout to create columns to discuss novels. Add a column related to the characters, settings, themes, and other literary concepts you teach.
Additional Video Tutorials and Review:
- TeachersFirst Review: Padlet
- Blog: Padlet Gazette
- Video: Padlet 2024 Spring Release
- Video Playlist: New Padlet Features (YouTube Playlist)
Have you used Padlet? Then, share your activities in the comments below!