
Story Maker is a simple digital storytelling tool for elementary students to write a story. Students can practice their writing skills, add color, add additional pages, and then save (or print) when finished. Story Maker is part of the ABCya site, offering countless free web games, interactives, and learning experiences.
| Grade level | Story Maker is recommended for grades K-5. However, many of the features (such as the primary looking notebook paper) seem designed for grades K-2. I would also consider this for special needs students in intermediate grades (3-5). |
| Purpose | The purpose of this tech tool is to create online stories. The interface is easy enough for the youngest student to understand. Students can create multi-page books to include color and their own drawings. Many drawing tools are provided. |
| Web/App | While ABCya does offer some of their activities in the app version, Story Maker is currently only available on a web browser. |
| What is included for free? | ABCya’s Story Maker is FREE on web browsers. However, there are some advertisements. At the time of this blog post, there is no app for the Story Maker. ABCya does offer a collection of apps for both iOS and Android devices, but most are not free. |
| Ease of Use | Story Maker is extremely easy to use. The drawing instruments are pictures and students simply click to use those. The colors are also “click to choose.” The writing portion is easy to begin with a simple click of the writing icon |
| Privacy | No registration is required to use Story Maker. When students begin their project, the tool does ask for their name, which is included on all pages. The work is not saved online, but rather saved to your computer or printed. So privacy should not be a concern. |
| Access | This site does not require Flash or any other special software. |
| Accessibility | Story Maker does not offer audio options for those learning to read. This tool would not work for those that are visually impaired. Hearing-impaired students would have no issues using this site. Story Maker would work well for students with dysgraphia or other small motor delays, as students can type the words rather than write. The simplicity of this tool would make it an easy option for ESL students. The images make the navigation very simple for even the youngest students. Students could use the drawing option only with simple “kid writing.” |
| Capacity | There is no limit on how many stories one can create. Individual students can create their own stories. There is no option for online collaboration; students may work together at the same computer. |
| ISTE Standards for Students | Creative Communicator
6B – Students create original works or responsibly repurpose or remix digital resources into new creations. 6D – Students publish or present content that customizes the message and medium for their intended audience. * Common Core Standards are listed on the Story Maker site. |
Triple E Framework
The Triple E Framework, created by Dr. Liz Kolb, is built on the belief that “effective technology integration begins with good instructional strategies and not fancy tools.” Dr. Kolb wrote a book on the topic: Learning First, Technology Second. Technology can be used to Engage in learning goals, Enhance learning goals, or Extend learning goals. We can use this framework to decipher why we are using specific tools in the classroom. Here is a rubric we can use to evaluate Story Maker (and any others) using the Triple E Framework. Use the rubric as you decide if a tool is a good fit with your learning goals and why you should (or shouldn’t) use the technology tool in the lesson.
- Engage in learning goals: The students are more focused on the task because Story Maker is allowing them to create a book that represents the content learning goals (for example, learning the lifecycle of a butterfly). There are no games, badges, or extras to distract from the process of learning.
- Enhance learning goals: By using Story Maker to share concepts, questions, and information students can assess their comprehension and demonstrate a more sophisticated understanding of the topic by creating their own original work. They are using higher-order thinking skills to organize the story and creativity to design the pages.
- Extend learning goals: Dr. Kolb describes extended learning as an opportunity for students to connect and collaborate outside of the regular school day. It is also described as a bridge between the school day and real-life experiences. The third point of extending learning is allowing students to use everyday skills. This tool does not allow students to connect and collaborate. However, creating a digital book allows students to build skills that they will use in their everyday lives, outside of the classroom environment. Students are learning improved typing skills, how to construct their thoughts, and how to use digital tools (such as Story Maker). This will help students in future assignments that require typing. It will also help to prepare students for learning beyond the classroom, as they will need to use digital tools, typing skills, and/or be able to construct their thoughts in their future classes, employment, and personal life.
SAMR Connection
The SAMR Model, by Dr. Ruben Puentedura, suggests that technology implementation yields four types of outcomes for students. We can use this model as a guideline to analyze how we are incorporating technology tools in the classroom.
- Substitution: This particular tool is a great example of Substitution. Students are substituting writing and drawing on paper, and are now using typing and the art tools to create the story.
- Augmentation: Story Maker could be considered Augmentation since the art tools available are not something that students can typically add to the written paper and add a flair of creativity to the stories.
- Modification: The tool could be considered Modification if you have students take screenshots of their pages and copy those images into Google Docs. From there, allow students to seek (and give) peer feedback.
- Redefinition: The most transformational outcome in the SAMR model could be achieved by adding the use of an additional tool, FlipGrid (see our blog post related to FlipGrid to learn more about that tool). Students could print their books and read them on a class FlipGrid (video). The teacher could then share the FlipGrid on the class website for students (and families) to view. This allows the books to be shared in a way not previously possible – including audio, video, and collaboration.
Classroom Use Ideas
Social Studies:
- Create a book about the people in your community.
- Create a book about your town.
- Create a book about a famous person.
- Create a book about famous women during Women’s History Month.
- Create a book as a culminating activity after any research project.
Science:
- In STEM, use a science journal to record (and draw) the weather.
- In STEM, use a science journal to describe and draw the lifecycle of a butterfly.
- In STEM, have students create drawings and descriptions related to simple labs and/or experiments.
Math:
- Create a book of math facts (could include any and all operations).
- Create a book to draw and describe a math problem.
- Primary students could create a book of numbers with both drawings and the spelling of the number, or a short story about numbers (1 circle, 2 stars, 3 squares).
- Create a book of shapes for geometry. Have each student create one page to add to the class book of shapes.
Language Arts:
- Primary students could create a book of letters with both drawing and simple words starting with that letter.
- Create a simple poem and add a drawing.
- Create a story with a beginning, middle, and ending (3+ pages).
- Create a simple book report, with drawings.
- Practice spelling words by both drawing and typing onto the lined paper.
- Have each student contribute one page to a class book about a topic of your choice (introductions at the start of the year, who is their hero and why, what is their favorite book, etc.). Print the book, laminate, and bind it together. Put the book in your class library for students to read during reading times. Share the book with families during open houses, back to school nights, or conferences.
Creative Arts:
- In art class, create a book of color with each student adding their favorite color and why.
- In art class, use the drawing features to describe and discuss the different effects of the paintbrush vs spray can vs roller.
- In art class, challenge students to create a drawing and then add a story about their creation.
- In music class, use to write the lyrics to a song and add a drawing.
How to use Story Maker
The opening page does ask for you to type your name. If you prefer students not to share their full name, consider the first name and last initial or first name and student number. You could personalize this title by allowing students to use their first name and the name of their favorite animal, color, or food. Remember, since this information isn’t saved or shared on the ABCya website, privacy is not an issue. However, you will be saving or printing the finished pages.

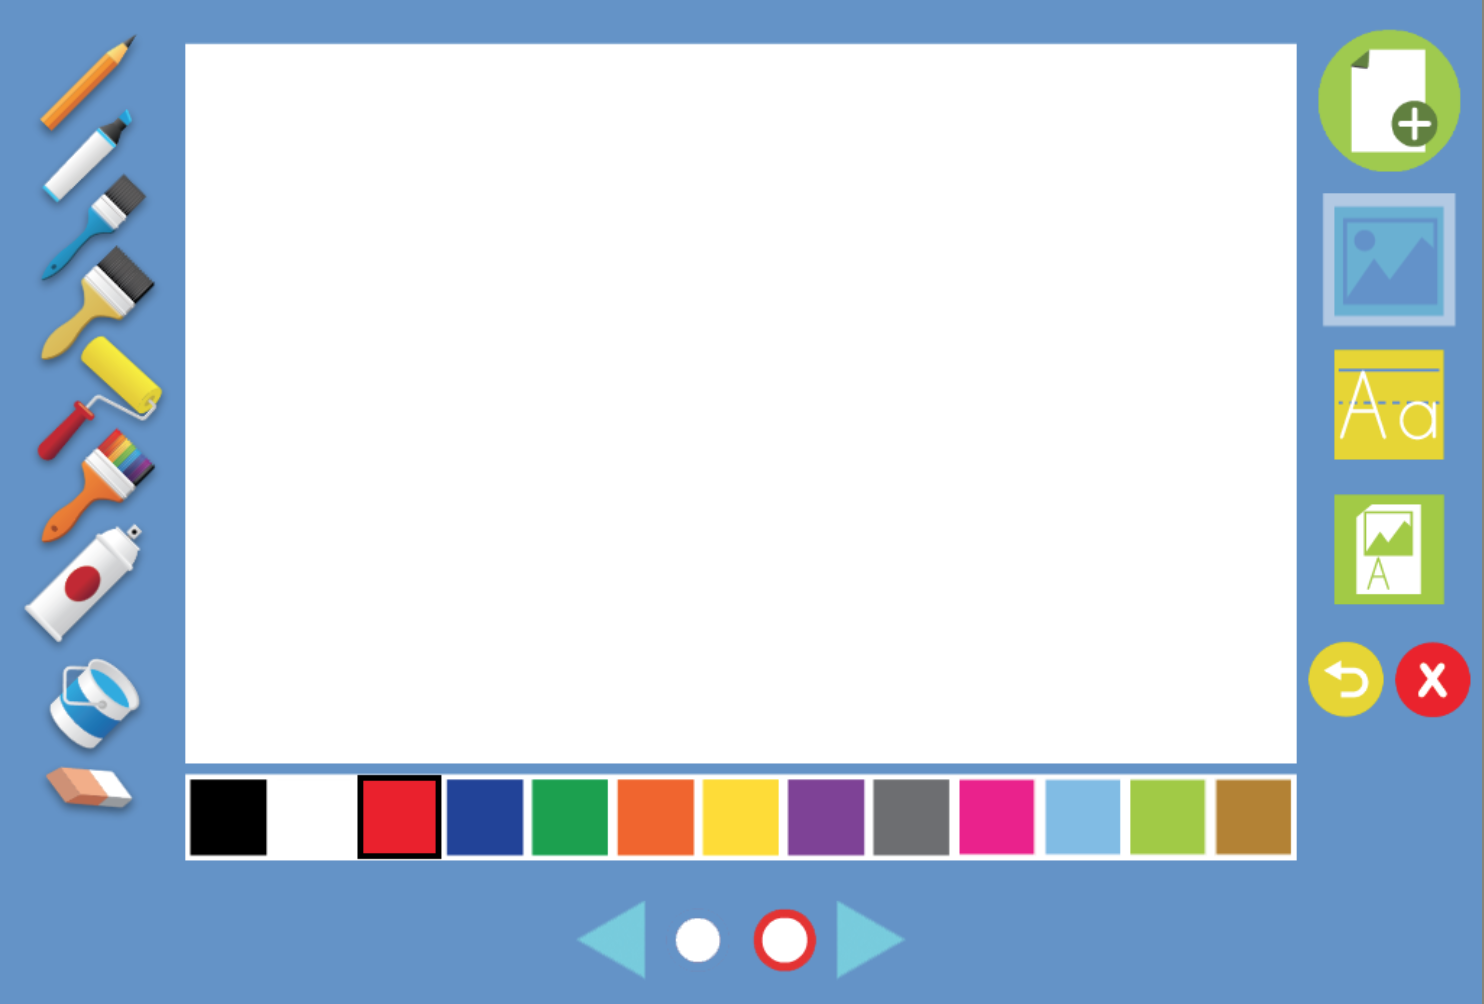
This is the main working page. Along the left, you can see the various drawing options. Don’t miss the eraser at the bottom. (My personal favorite was the rainbow brush.) The right-hand side (from the top) includes an icon to add an additional page, an icon for the drawing page (as shown), an Aa icon to access the lined paper to write the text, and the icon to preview and/or print and save. There are also options (and buttons) to undo and clear the page. The arrows at the bottom allow you to navigate between the pages of text. There appears to be no limit on how many pages you can create within one book.
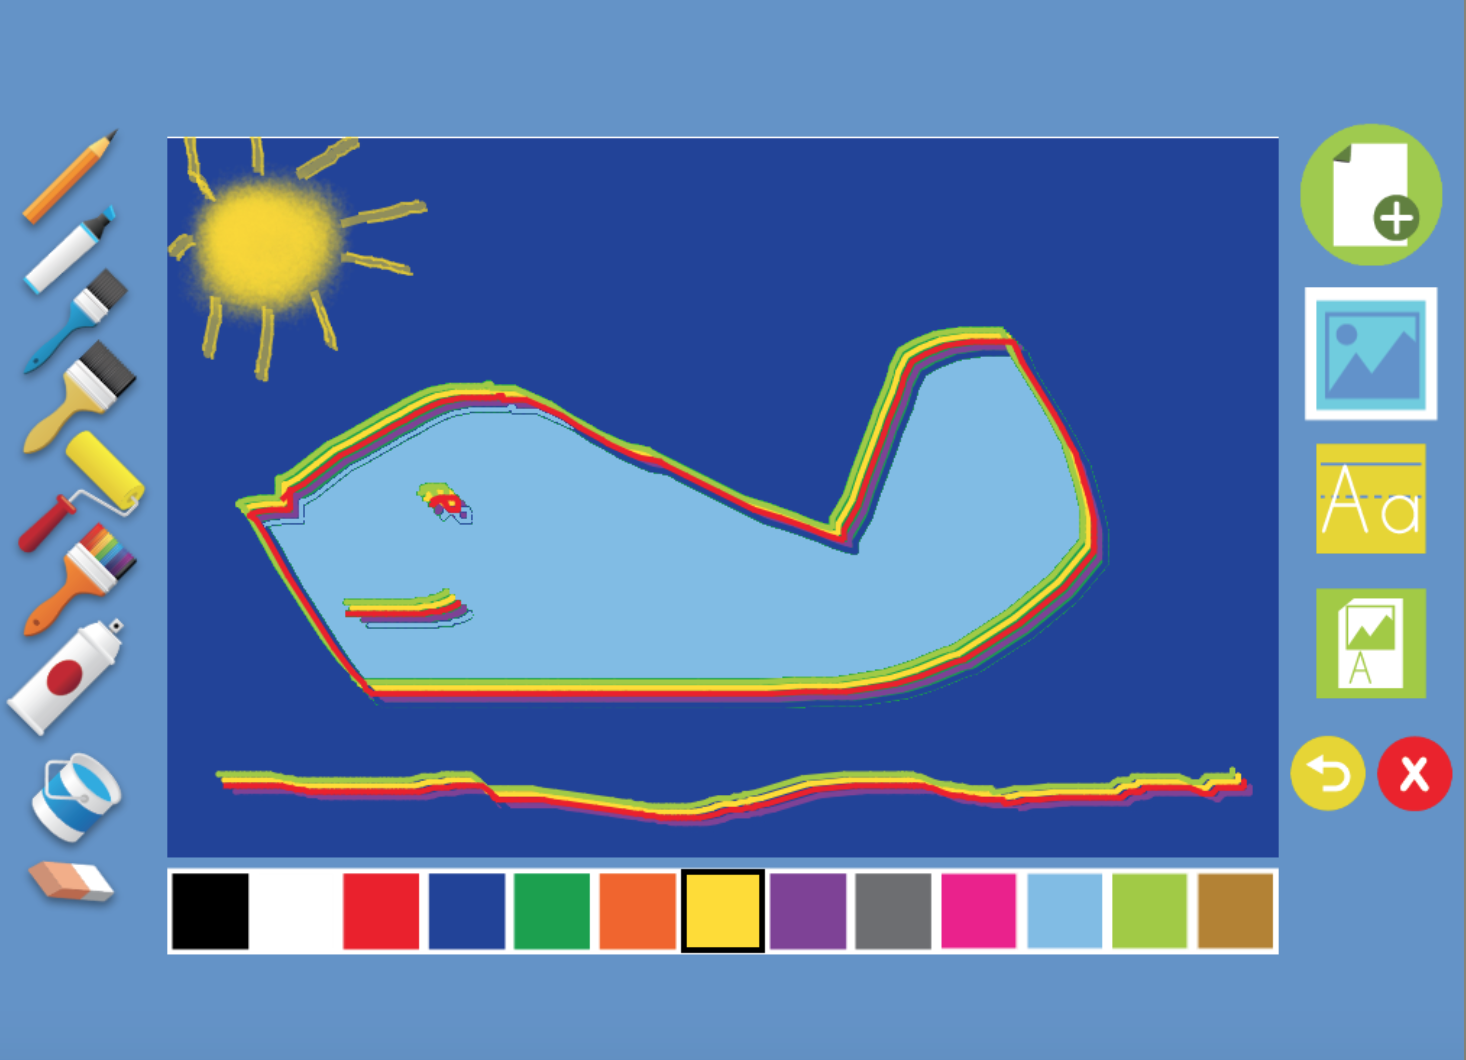
You can add as much color as you wish by including background colors (using the can of paint). This also shows the rainbow brush and the spray paint can (used for the sun). Get creative and have fun; there are so many neat drawing options to explore!
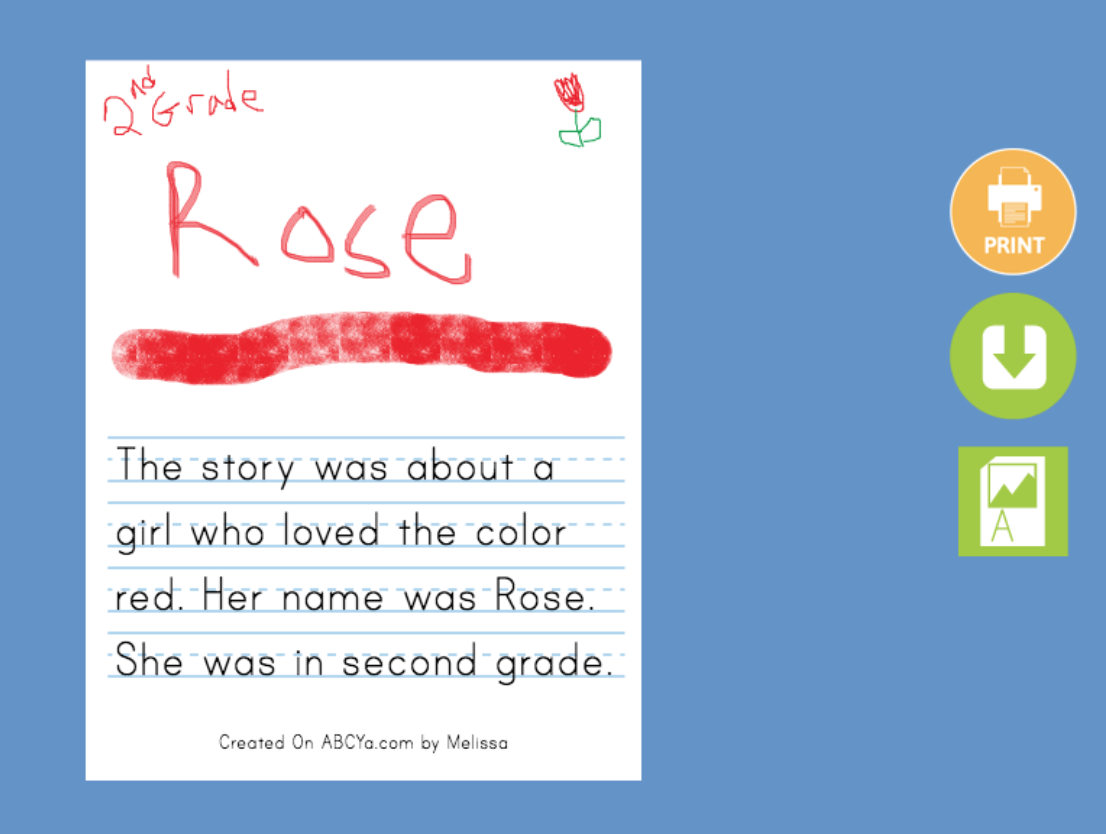
This is an example of the full view of the finished page. The three icons on the right allow you to print, download to your computer, or return to the creation pages. You can use this option to preview the pages as you are working.
Additional Tutorial Videos and Articles