
 In Part 1 of this blog, you were introduced to TES Blendspace. This free tool allows you to create interactive, online lessons. Yesterday we shared an overview of the tool. We also discussed the application of both the SAMR model and the TRIPLE E Frameworks as you integrate TES Blendspace into your instruction. Today’s post offers detailed instructions about how to use TES Blendspace and also classroom use ideas listed by content areas.
How to Use TES Blendspace:
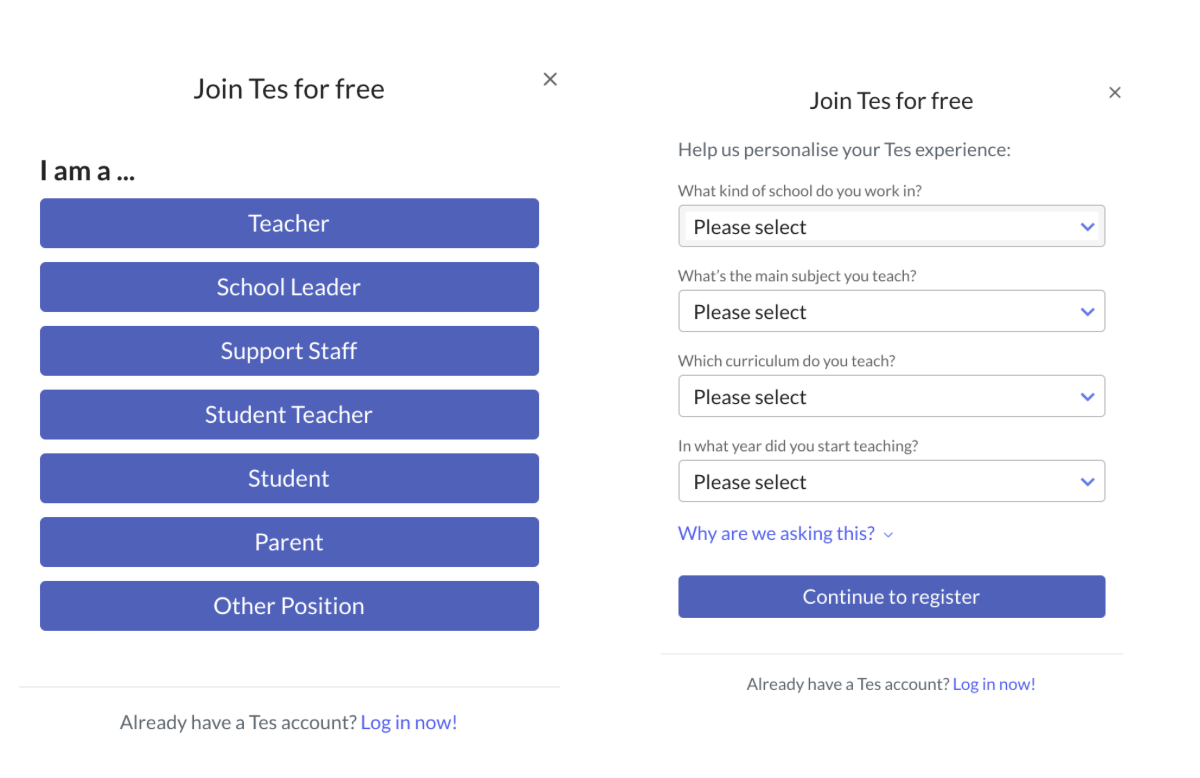
When you arrive at the site, you have the option to Join Free (via web browser) or download from the App Store or Chrome Web Store. Registration is entirely FREE!
Select Register to join us a Teacher (or find your role). The Teacher registration will ask you a few quick questions, and then click to continue to register. You can log-in using an email address or using your Google account. You will be prompted to choose a username and password, and you are ready to create!
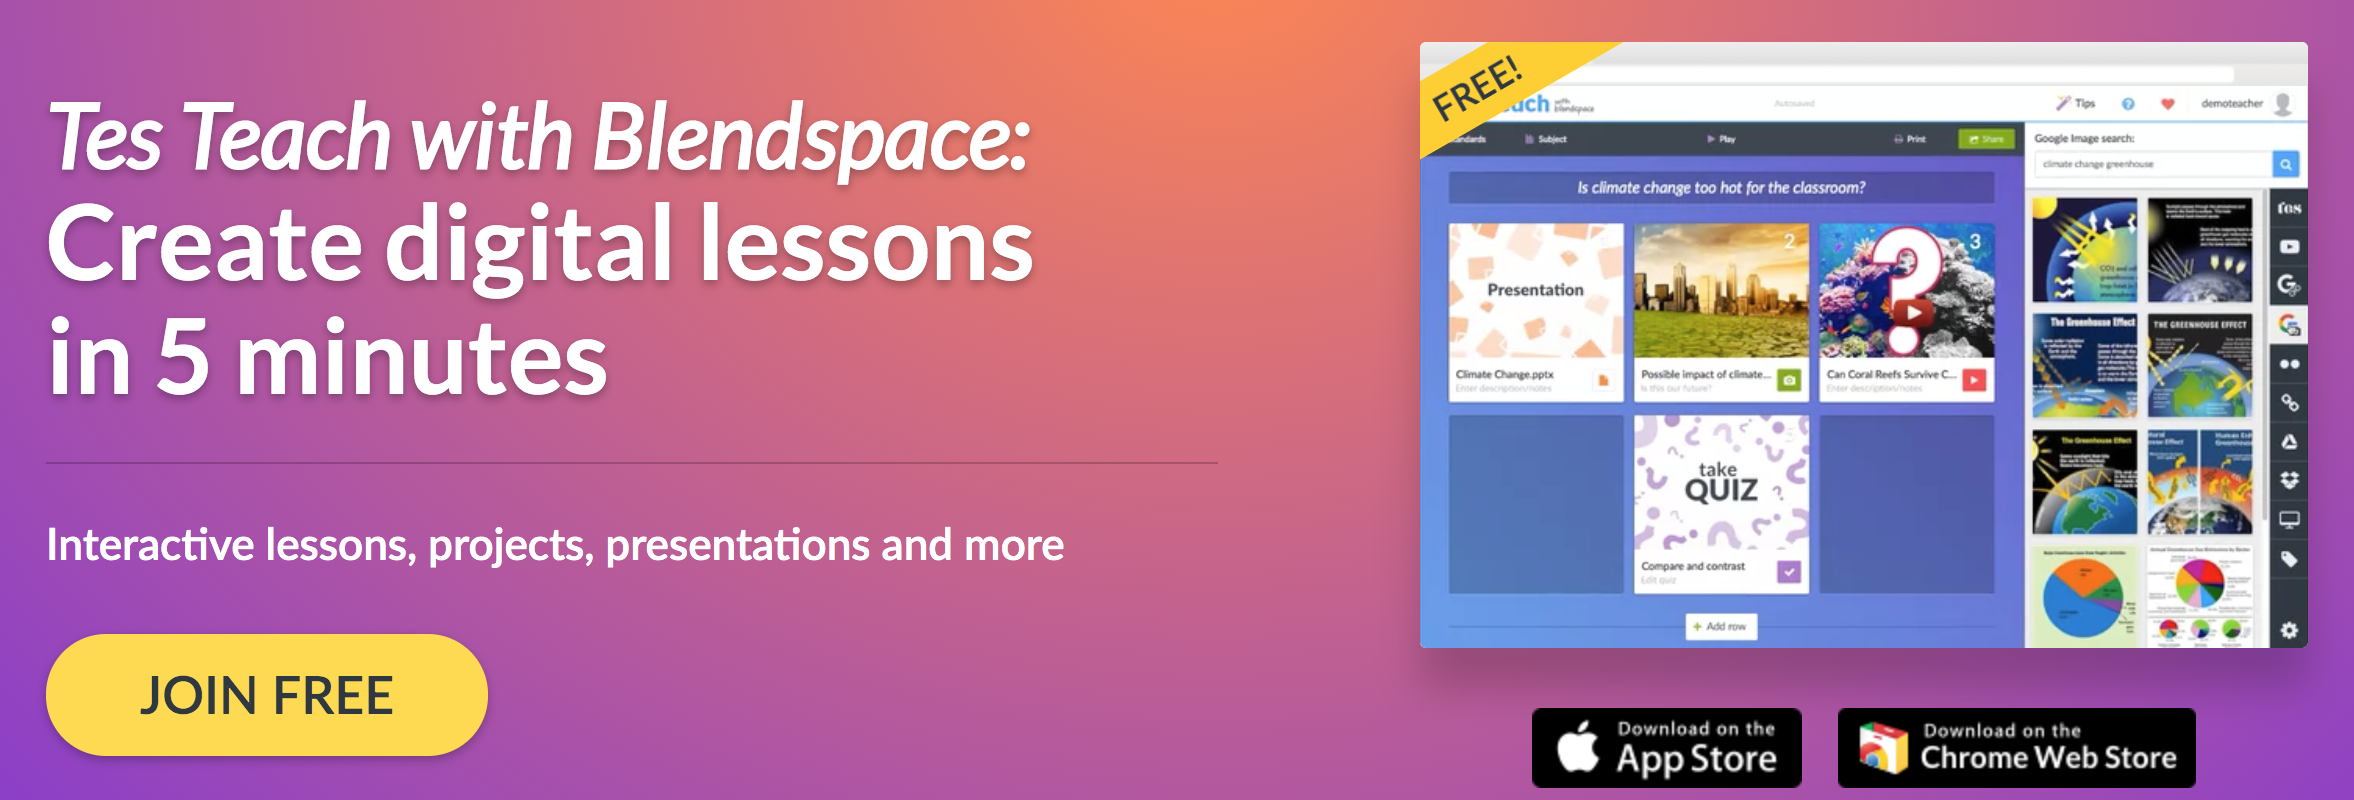
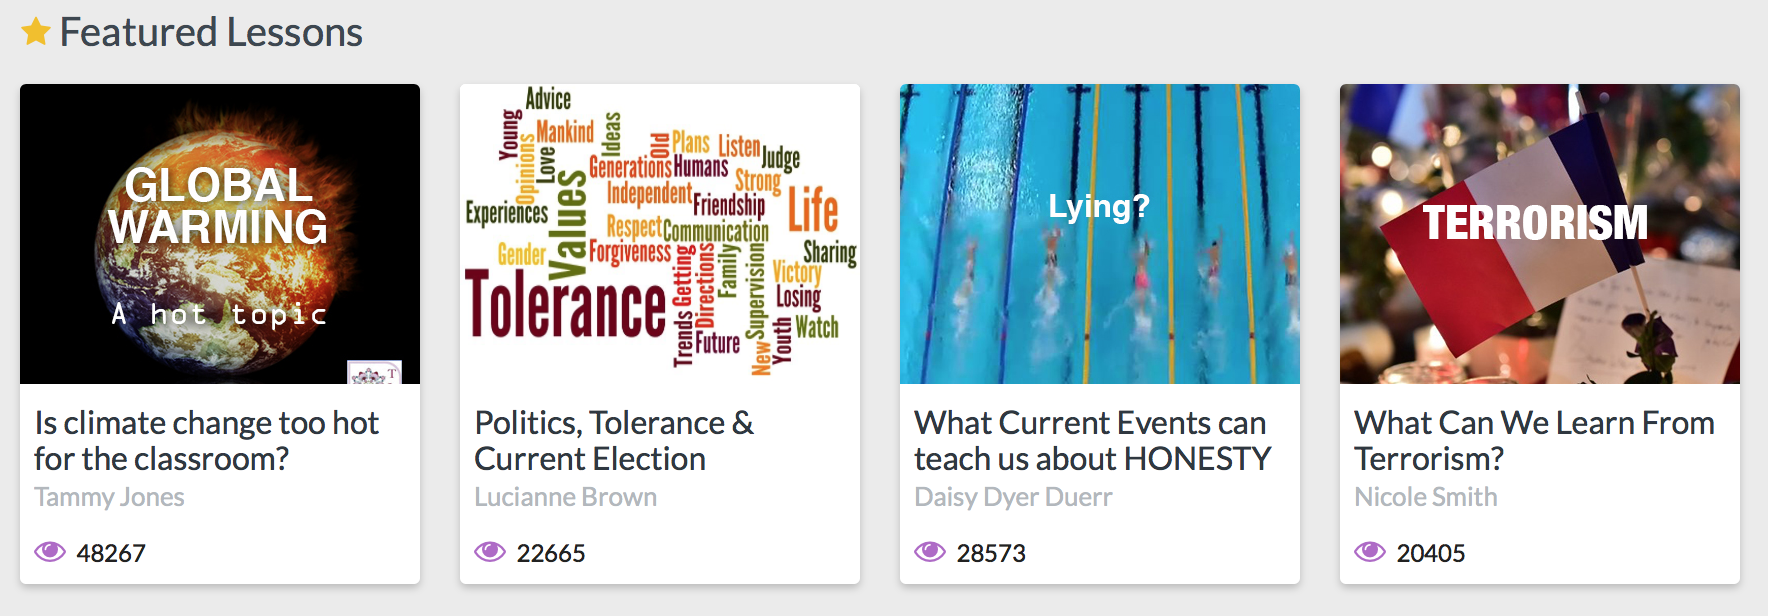
Now that you have your account, you can create. Honestly, when TES Blendspace says this can be done in 5-minutes, they aren’t exaggerating. If you aren’t sure where to begin, check out their Featured Lesson area towards the bottom of the page.
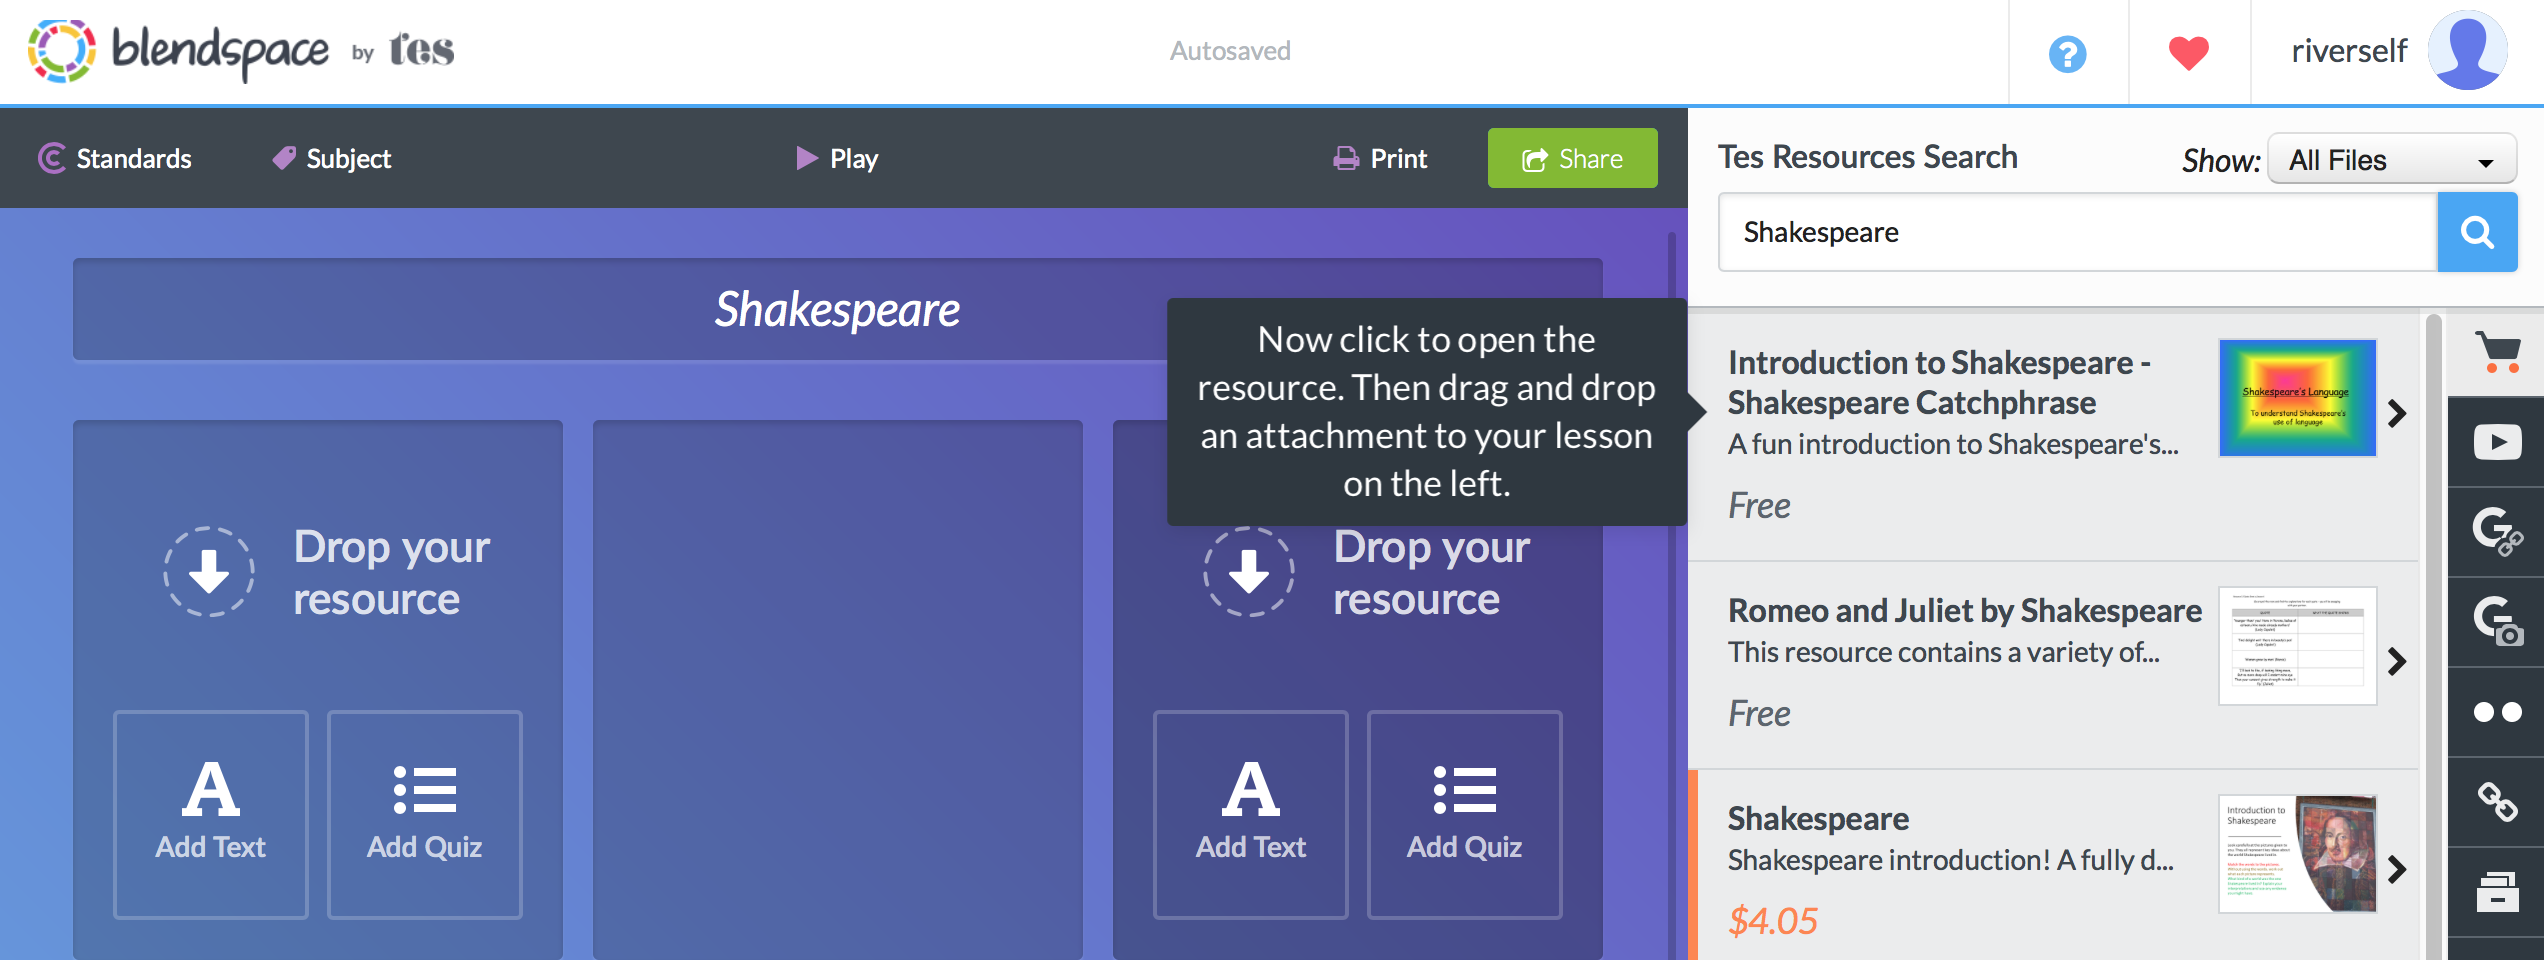
Once you have chosen your topic, click the large button to Start a New Lesson. This will take you to the grid. Put the title of the grid on the top, and begin to explore for content and activities to add. The right-side toolbar offers many options. First, you can search through all files for the specific topic (by using the search box at the top), Shakespeare in this example. You can also scroll down and look specifically for YouTube videos, search your Google Drive, upload web links, and much more. When you are ready, you click the resource and drag-and-drop it to the grid on the square that you wish to use. You can also click within the blue box to “drop your resource” if it is a file on your device. Other options at this point include to Add Text or Add Quiz. You will notice that most resources are free, but a few documents have a fee.
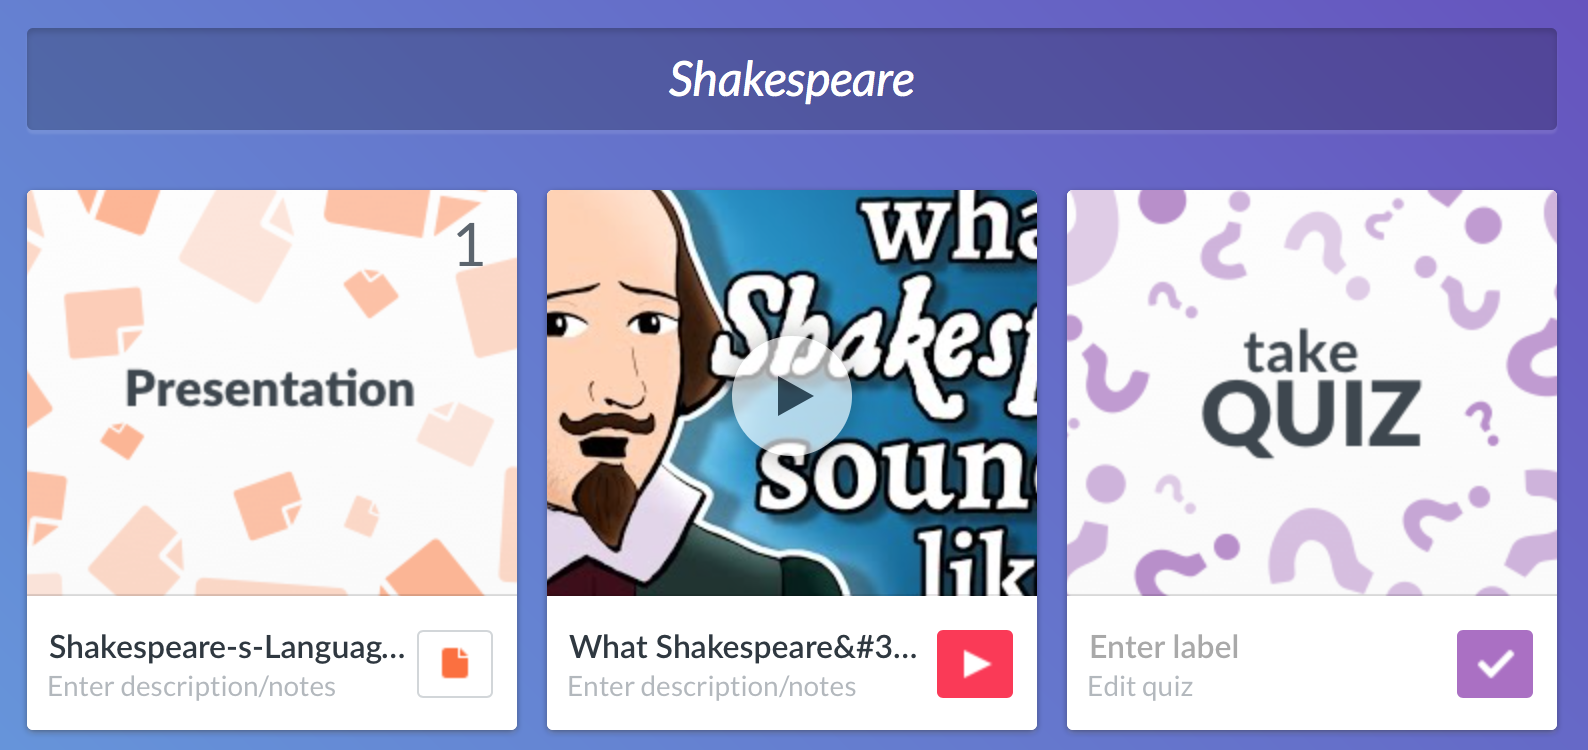
For my first activity, I chose a ready-to-go PowerPoint lesson that I found from a search. I did the drag and drop option, and it appeared immediately. Next, I added a YouTube video that I also found during a quick search. For my final spot in row one, I created a simple quiz. I found the quiz creation to be very user-friendly. This was all done in the 5-minutes, as promised. Here is my finished row 1.
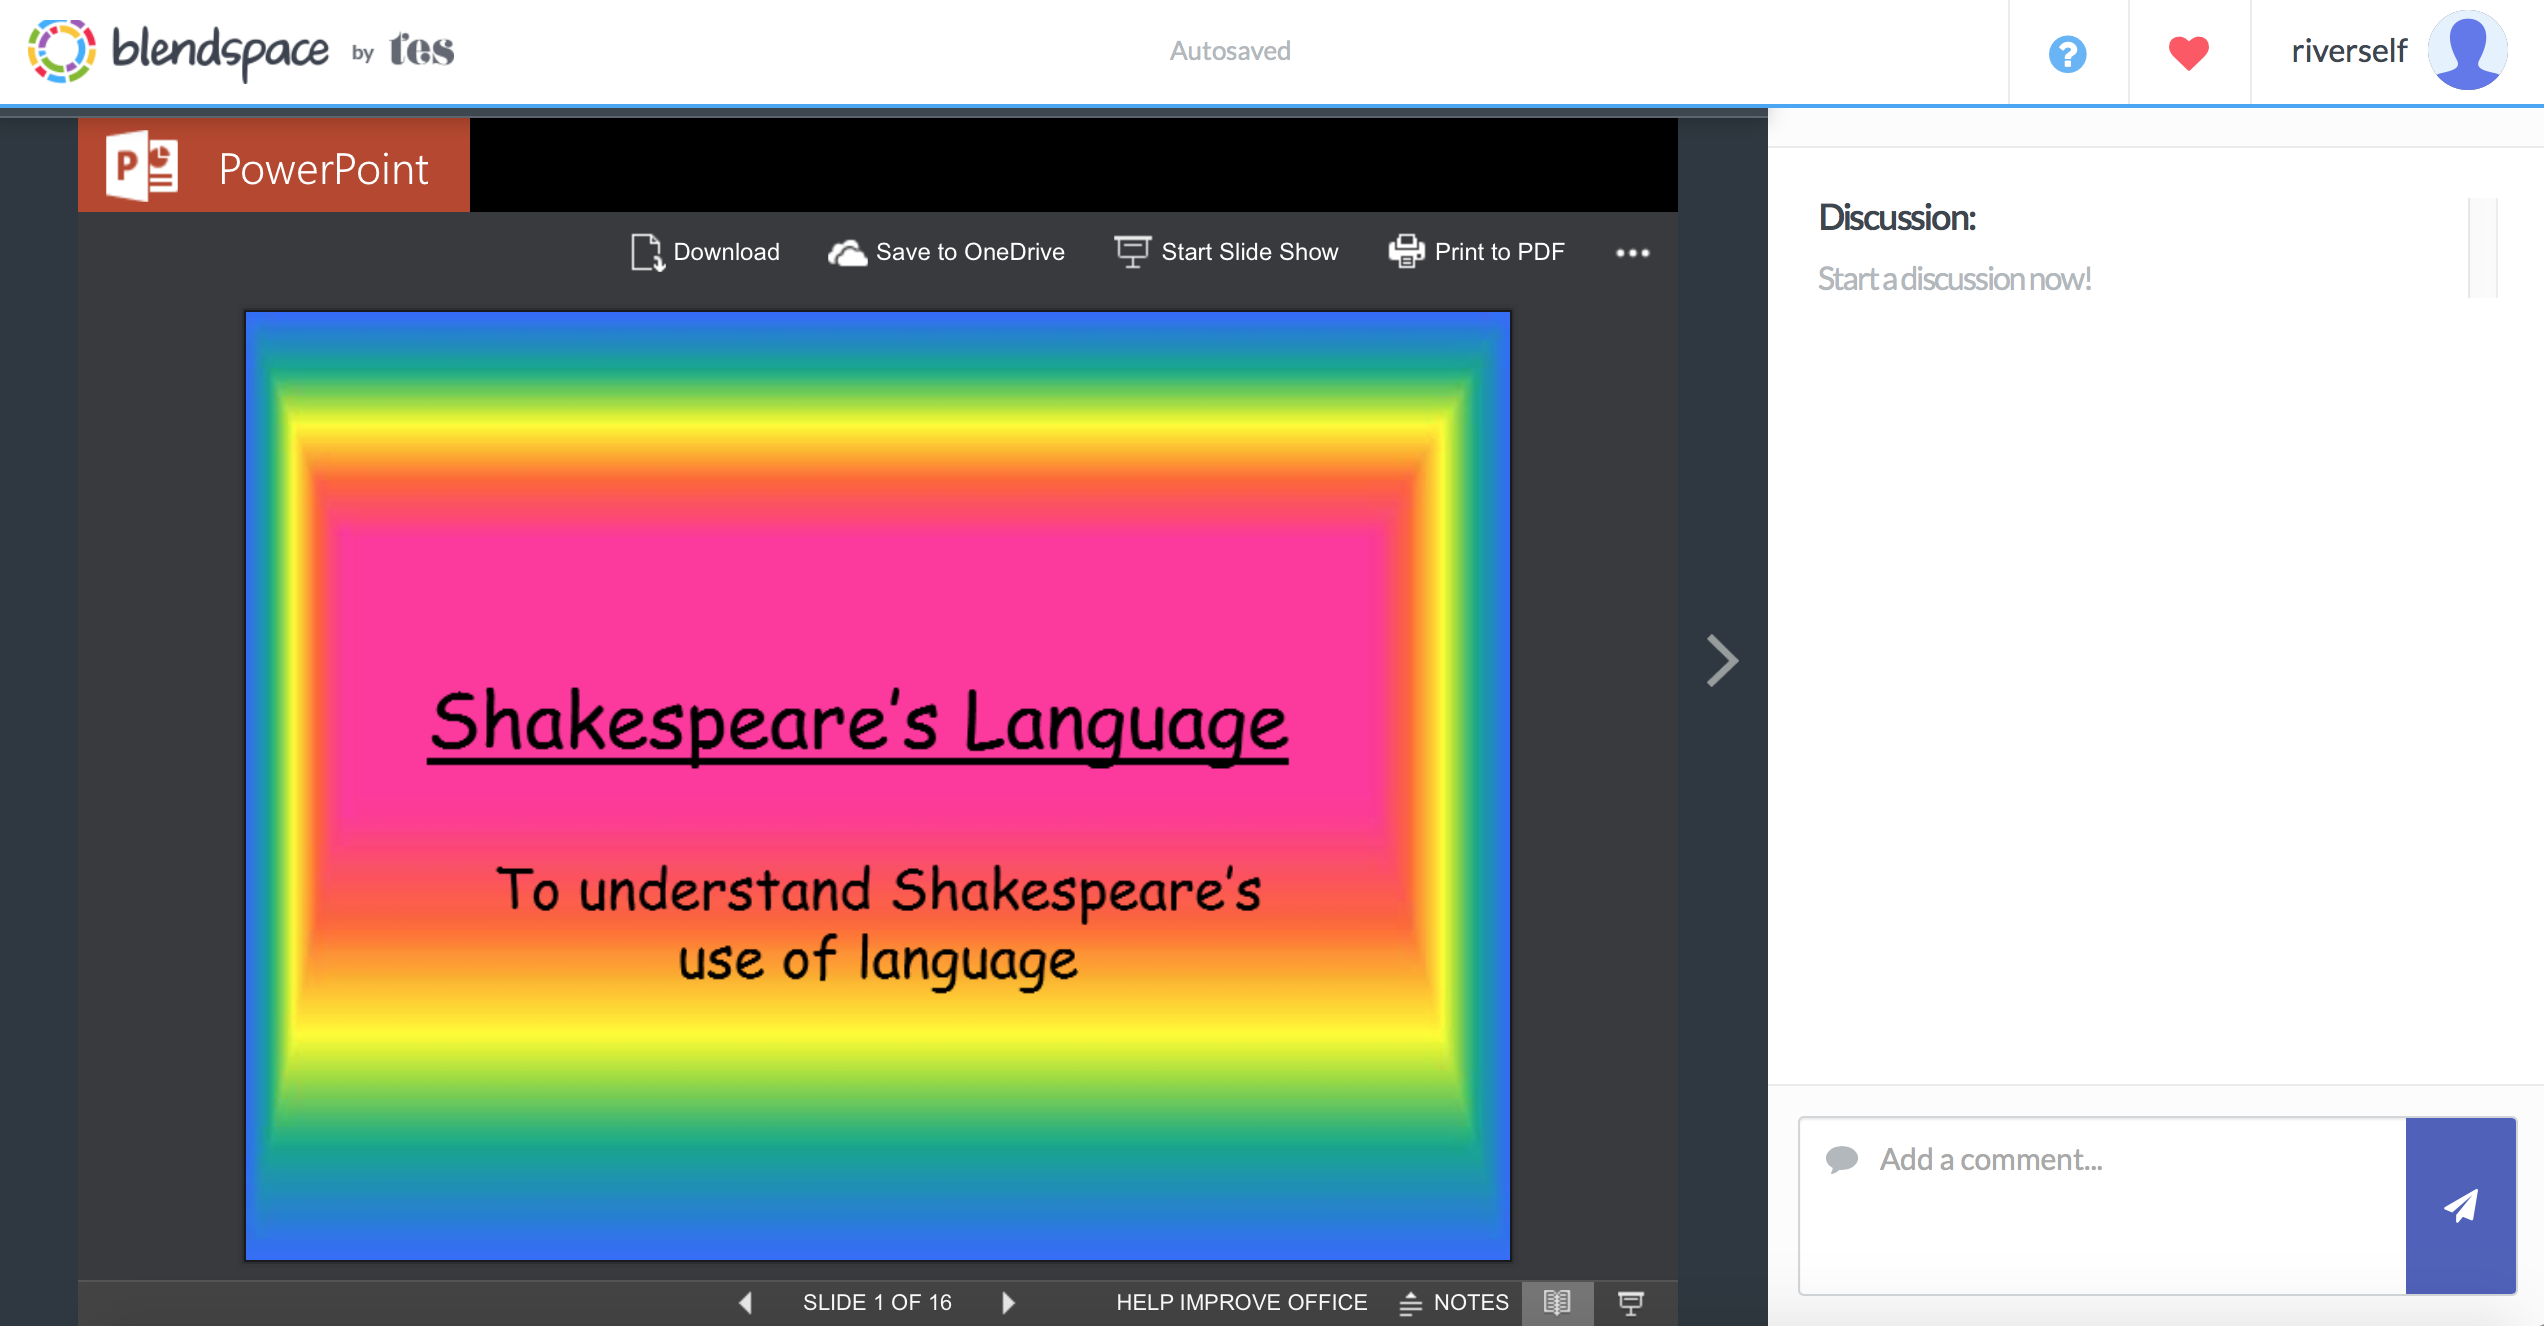
One of my favorite features of the TES Blendspace is the ability for students to be able to take notes (called Discussion) and leave comments. I could see teachers adding their own notes to the resources, students adding comments/questions that peers could view when they did the activities, and even a place to take notes of things to remember from the materials. The comment option is great for teachers to reply to any questions that students may put in the note space. Here is the PowerPoint that I loaded. The Discussion area is always to the right of the material. The teacher or students can start the discussion.
The Quiz page does not offer a discussion area. I appreciated how this could be used for instant feedback, and students could view results. This would be a great tool to use for formative assessment during the lesson.

As you can see, this tool was very easy to manage and could serve multiple purposes in the blended, flipped, or traditional classroom. You can make your grid as simple or complex as you wish. Students can click to “play” the entire presentation and complete the activities in the order that you inserted them onto the grid, or you may prefer students to choose specific activities based on their interests or abilities. There are so many options here!
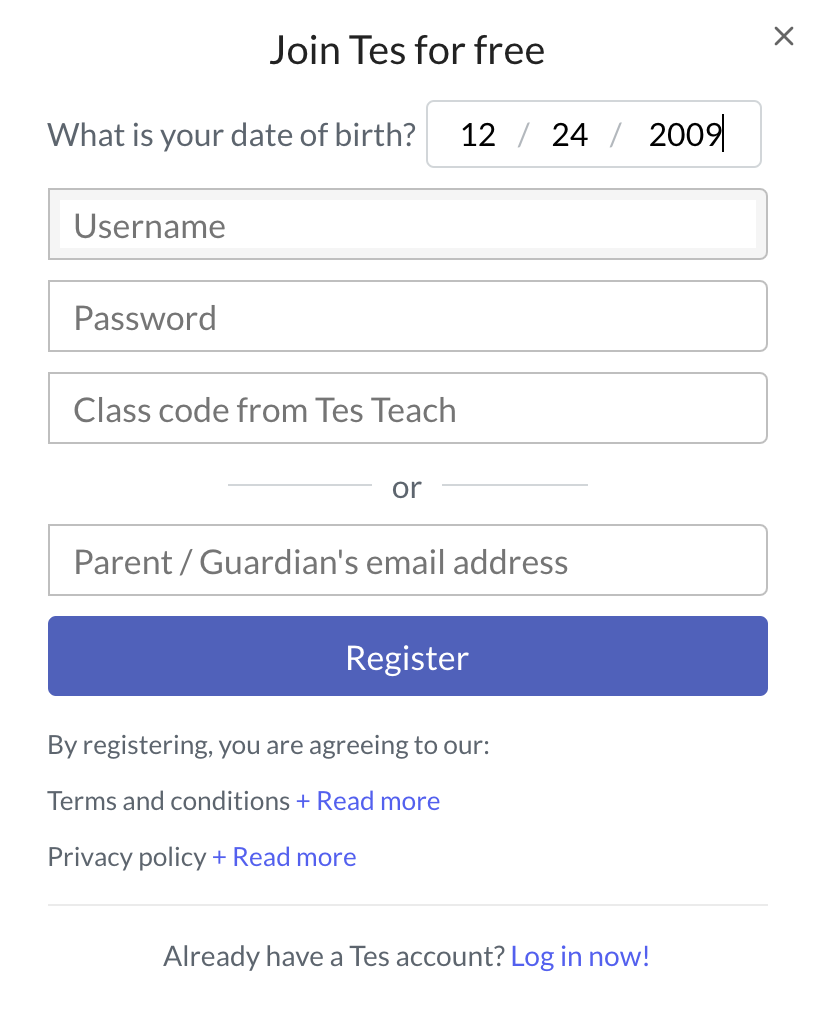
I did want to take a moment and talk about student registration, which looks a bit different. When students log-on to register, they must put in their birthdate and class code from their teacher, OR they can use a parent’s email address. Students do not need to supply their real names; a username could be a number or a combination of letters and numbers. This keeps the kids’ identities private.
Classroom Use Ideas
The classroom use ideas for TES Blendspace are only as limited as your imagination. Any subject that you are studying could be used to create a grid. You may want to create grids that students complete pieces for homework. I did want to share some of my favorite ideas for several content areas. These ideas could be done by the teacher for the students to explore. However, the students could also create their own grids on TES Blendspace. We would love to hear what ideas you may have, share them in the comment box at the bottom of this post.
Social Studies:
- Create a grid about your hometown or state.
- Create a grid about a famous person.
- Create a grid about famous women during Women’s History Month.
- Create a grid about elections during election season or a unit about elections.
- Create a grid about a specific time in history that you may be teaching: Civil War, Civil Rights, World War II, the Great Depression, etc.
- Create a grid about latitude and longitude in geography.
- Create a grid about a foreign country.
- Create a grid as a culminating activity after any research project.
- In secondary classes, create a continuing grid that you add to throughout the year. Add topics as you are studying (videos, interactives, PDFs that you create, and more). Use this grid as a study guide for the final.
Science:
- In STEM, create a grid to record (and investigate) the weather in your area.
- In STEM, create a grid to describe the lifecycle of a butterfly.
- In STEM, have students create drawings and descriptions related to simple labs or experiments. Share the files on a grid for the entire class to discuss and comment on the results of the labs/experiments.
- Create a grid about levers and pulleys during a physics unit.
- Create a grid about clouds and the atmosphere.
- Create a grid for your MakerSpace area to share videos and activity ideas for students to complete.
- In secondary classes, create a continuing grid that you add to throughout the year. Add topics as you are studying (videos, interactives, PDFs that you create, and more). Use this grid as a study guide for the final.
Math:
- Create a grid that teaches and offers practice of basic math operations.
- Create a grid related to the various shapes in geometry.
- Create a grid about the metric system.
- Create a grid as a class, having each student contribute one block of content that they find related to your current math lessons. Challenge students to find videos or interactives to share with the class. Have each student use the description area of the grid to explain how the activity relates to the current topic of study in math class.
- Create a grid to use as a study guide for additional practice and review before the test.
Language Arts:
- Create a grid about poetry and types of poems. Share students’ examples using PowerPoint slides.
- Create a grid about Shakespeare’s life and works.
- Create a grid about a story that your class is reading.
- Have students create grids, rather than traditional book reports, as a final project after reading a book.
- Create a grid about parts of speech, sentence structure, or other topics related to your class.
- In secondary classes, create a continuing grid that you add to throughout the year. Add topics as you are studying (videos, interactives, PDFs that you create, and more). Use this grid as a study guide for the final.
Creative Arts:
- In art class, create a grid about a type of art or a specific artist.
- In music class, share a specific genre of music with students and challenge them to create their own music and record using a simple tool, like Synth. You could include links to their Synth podcasts on one of the grids.
- In world language class, add grids as new topics are introduced throughout the year (or unit). Add videos, links to interactives, quick quizzes, and more.
- In world language class, have students research a country that speaks the language and create a grid about that country,
Additional Tutorial Videos and Articles:
- TeachersFirst Review of TES Blendspace
- TeachersFirst OK2Ask Session: Technology Integration Made Easy with Blendspace
- Video Tutorial for using TES Blendspace
- Video Tutorial for using TES Blendspace with Google Classroom
Have you used TES Blendspace in your classroom or for professional learning? Share in the comments what types of activities you have done.
One thought on “Tech Tool of the Month: TES Blendspace Part 2”