
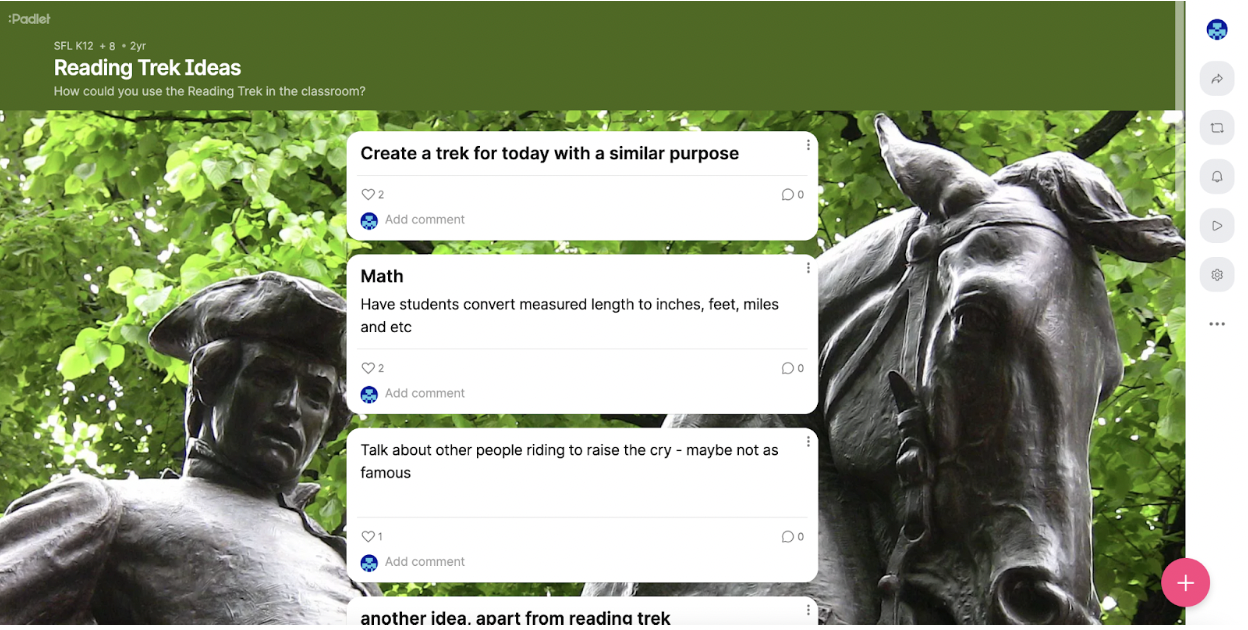
In Part 1 of this blog, we introduced you to Padlet and discussed applying the SAMR Model and the Triple E Framework using Padlet in your instruction. This simple web application allows you to create digital bulletin boards from seven easy layouts. Users can add images, links, videos, texts, drawings, and more to their virtual sticky notes. Users can also comment on other responses (if the original creator enables that option). A free account allows you to make 3 Padlets per email address that registers to use the site. In addition, you can delete older Padlets to create new ones. Today’s post offers detailed instructions for using this tool and shares classroom ideas.
Padlet:
When you arrive at the site, click Sign up for Free (for a new account).

Log in using your email, Apple, Google, or Microsoft account.
Click to Make a Padlet.

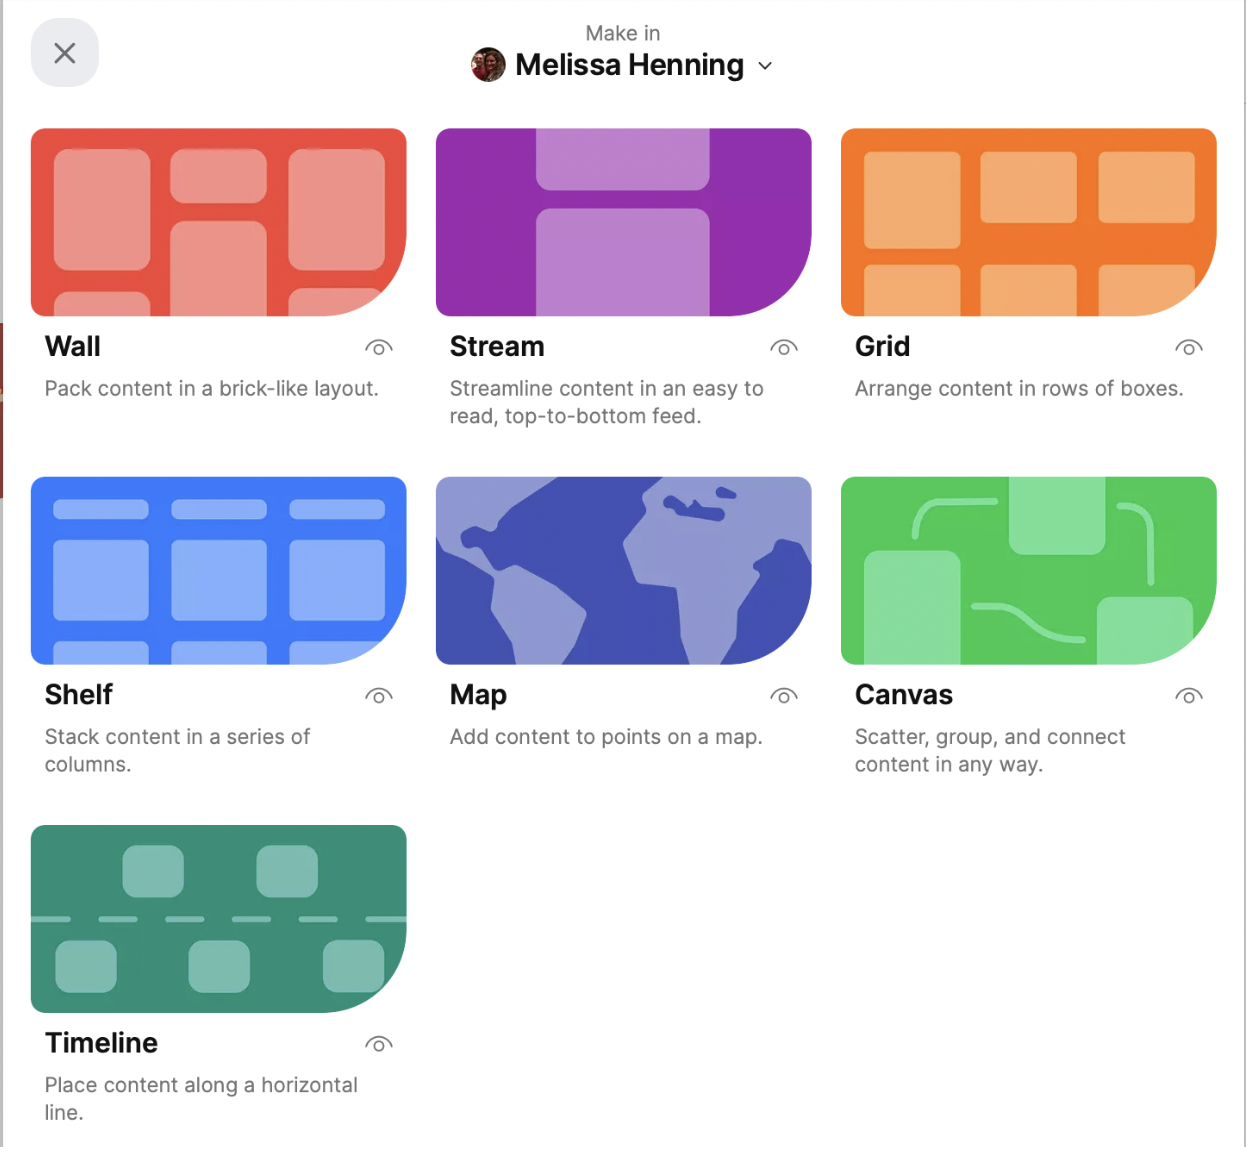
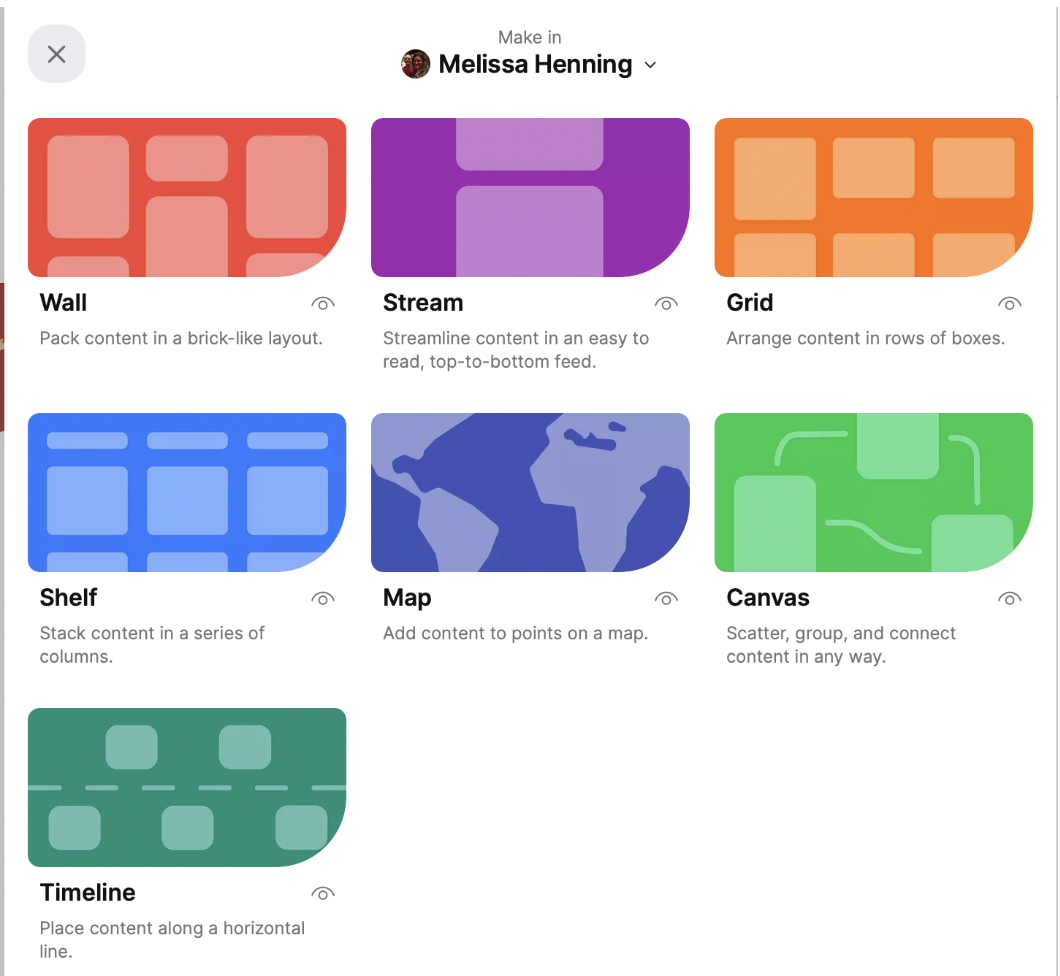
Once you click to make a Padlet, you can choose seven layouts. Each layout is briefly explained in the image below. The Wall layout is more random than the other options. The Stream layout puts the content in one straight feed top-to-bottom. The Grid layout arranges the content in neat rows of boxes. The Shelf layout allows you to add titles to columns. Content can be organized by column. The Map layout offers a blank map that you can click to add content to your desired locations. The Canvas layout is more scattered but connects the chunks of content. And finally, the Timeline layout is an easy way to put content in a neat horizontal stream and into a timeline format.
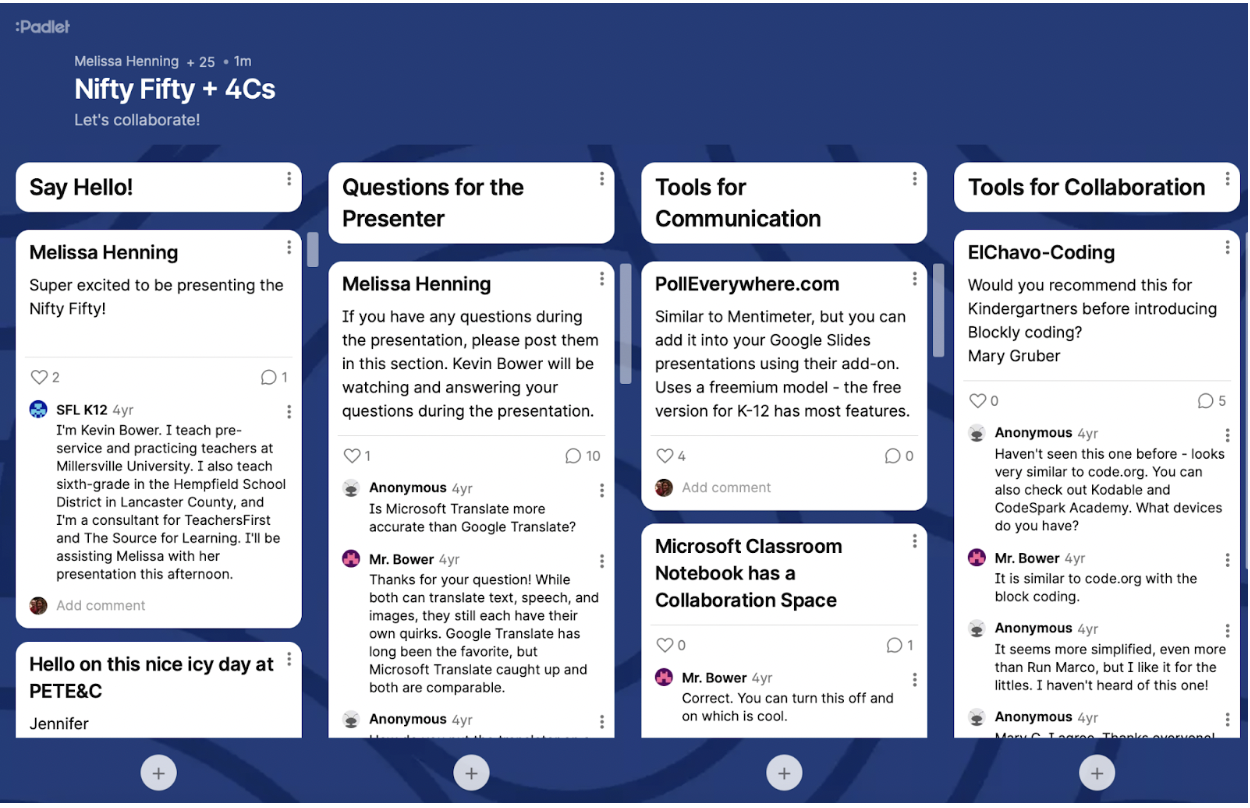
What follows are a few examples of different layouts. The first one shows a Shelf layout. Participants add comments and posts under the title of each column.
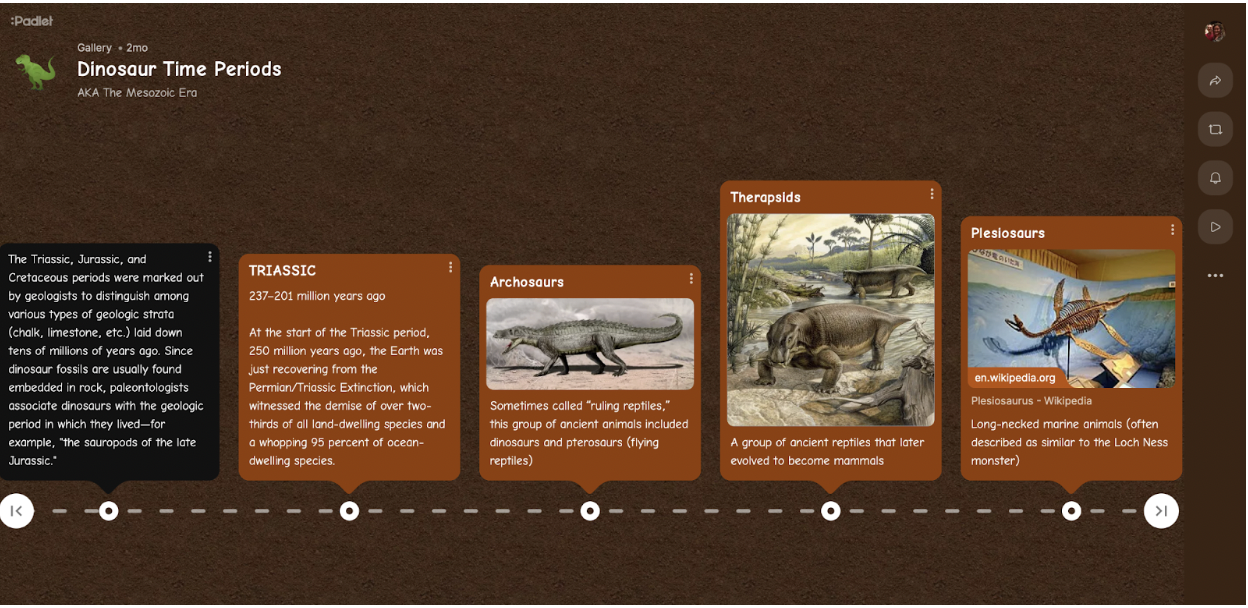
This is an example of the Timeline layout. First, you click and add the information. Then, you click and drag it to the new position if you want it moved.
This final example is the Stream layout, a very clean look that posts the items vertically. You can put the most recent on the top or the bottom.
To create your own Padlet, choose your layout (the choices are posted below again).
On the right side, there are many options to personalize the Padlet. First, add a name and description, and choose your wallpaper, color scheme, and font.
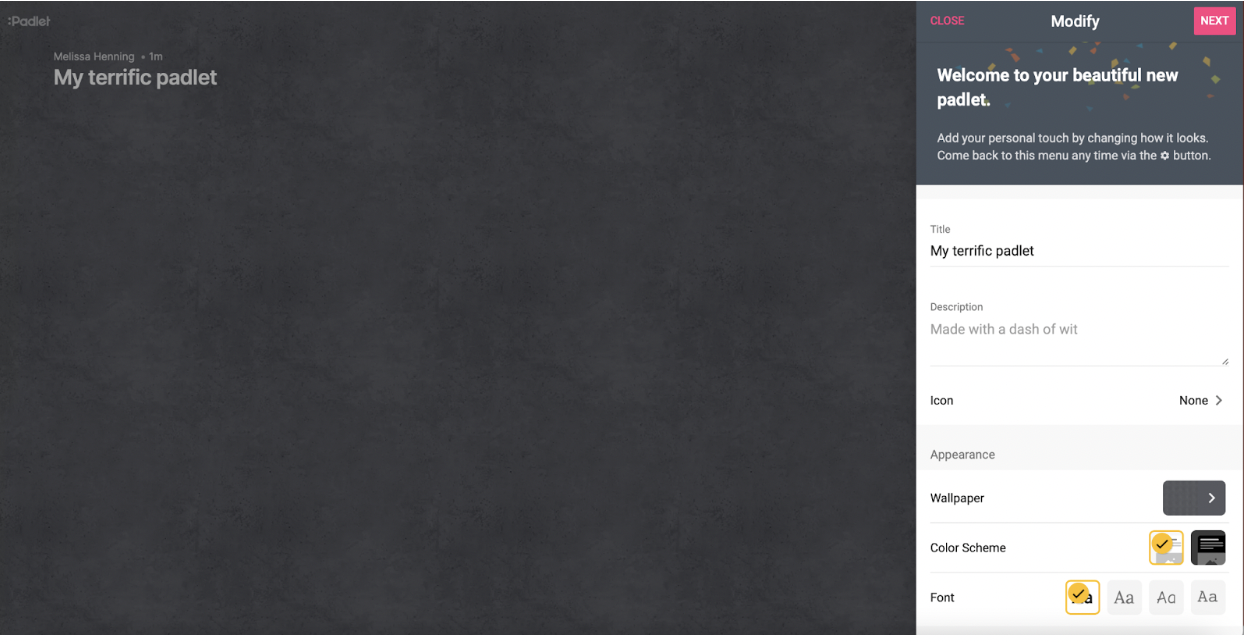
Here is a close-up of the options at the top of the choices. Click to change the items to your preferences. All of these are included in the free option.

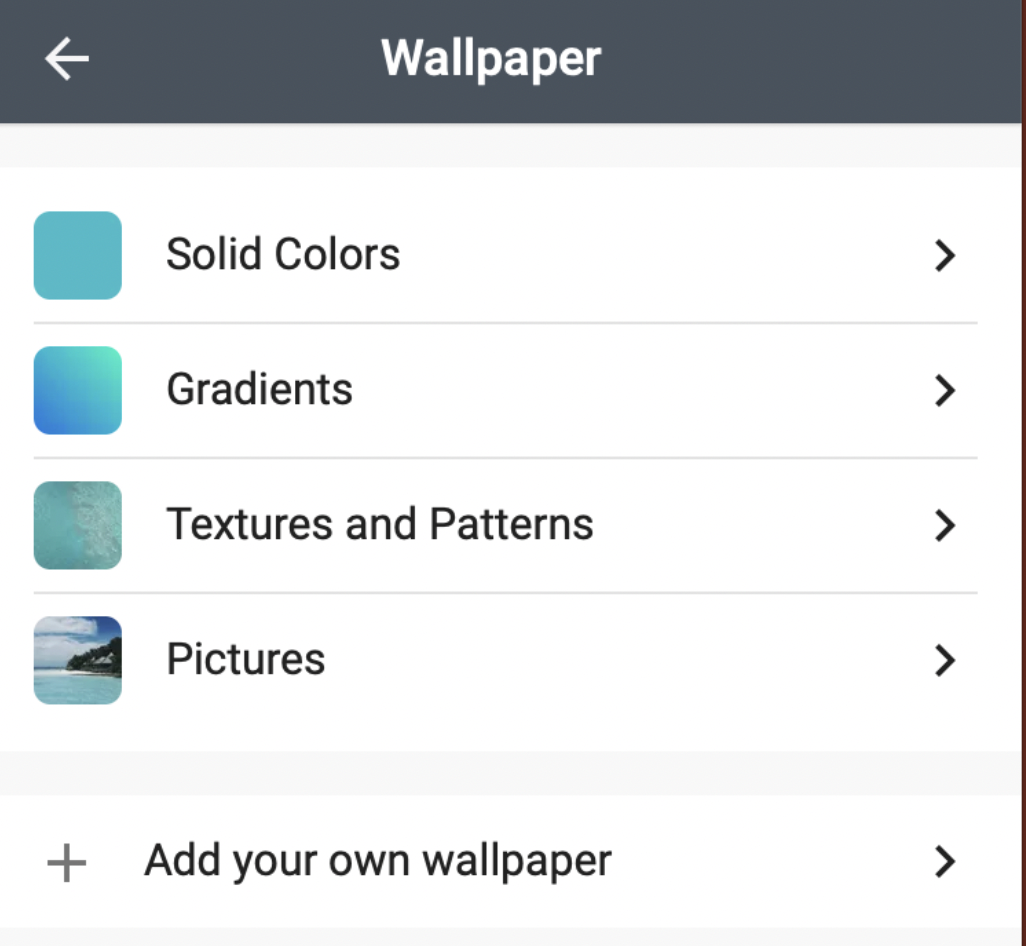
There are many options for the wallpaper/background. You can make a solid color, gradient, texture, patterns, and pictures or upload your images.
Next, on the right side of the screen, you will find the Posting options. There are many options. Add attributions so the authors’ names can be shown or not. Next, decide on posting new posts at the top of the bottom of the thread. Next, choose to allow for comments from users on other postings. There are also options for reactions (such as liking a post). And finally, you can mark the post to require approval from the Padlet creator.
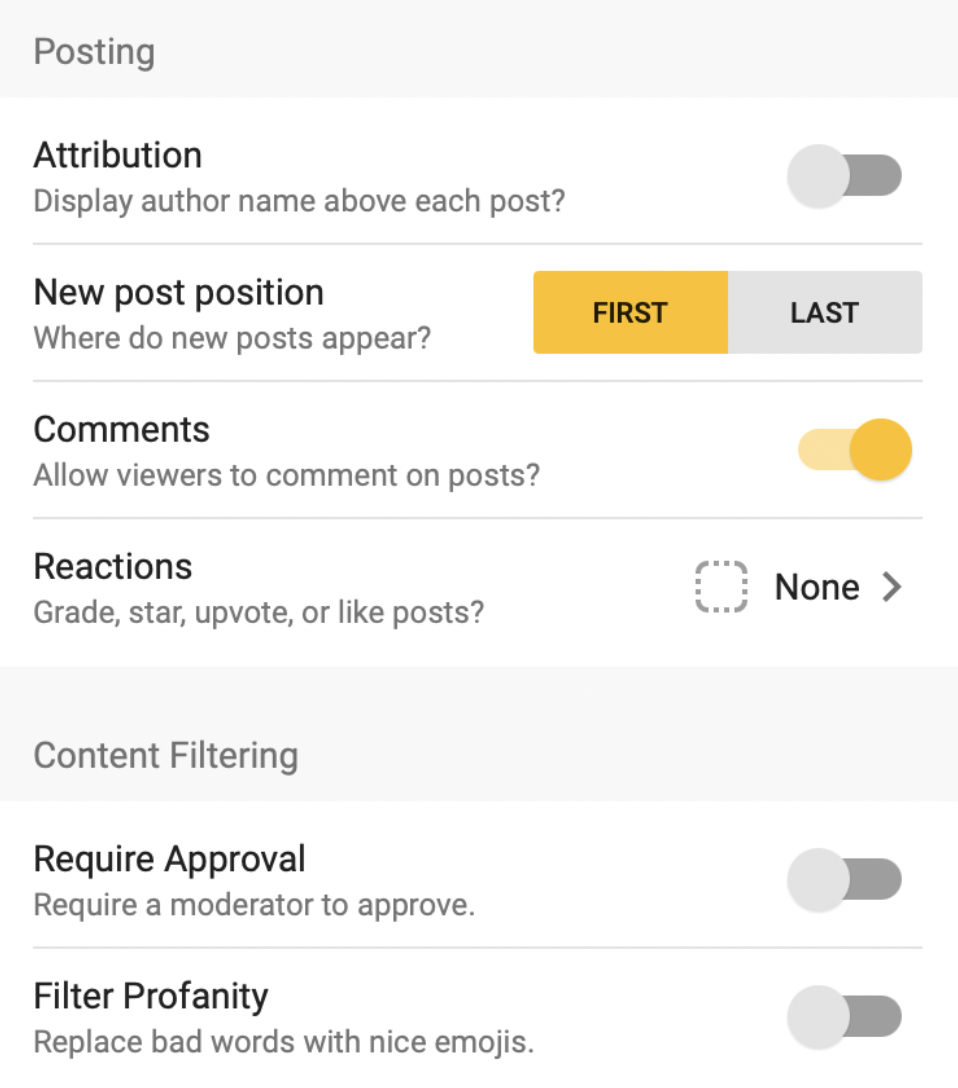
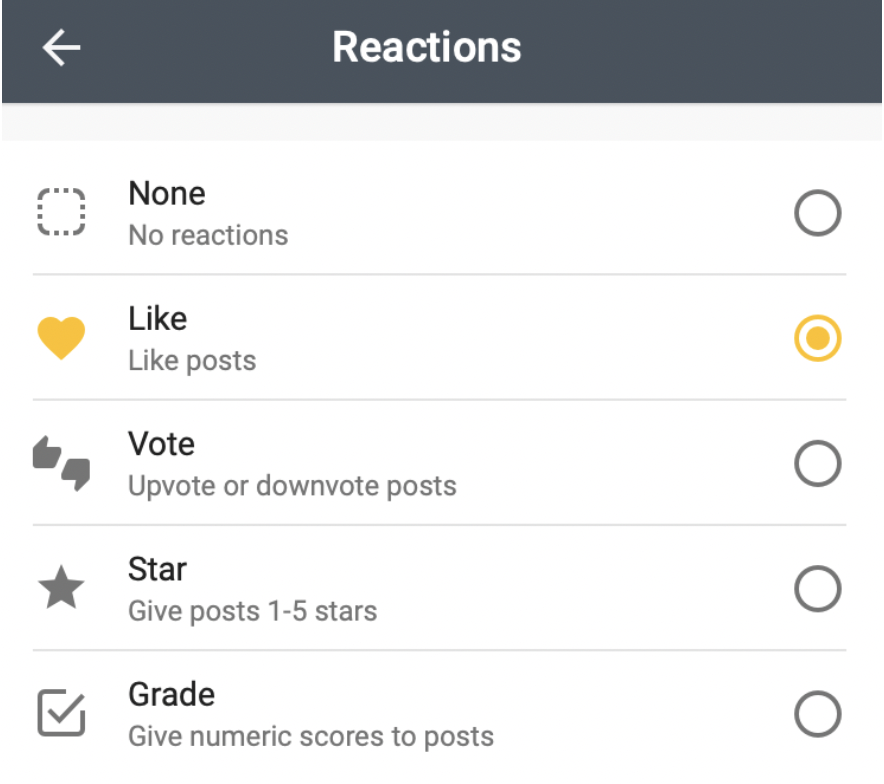
Under reactions, the options include None, Like, Vote, Star (give posts 1-5 stars), or Grade (give numeric values to the post).
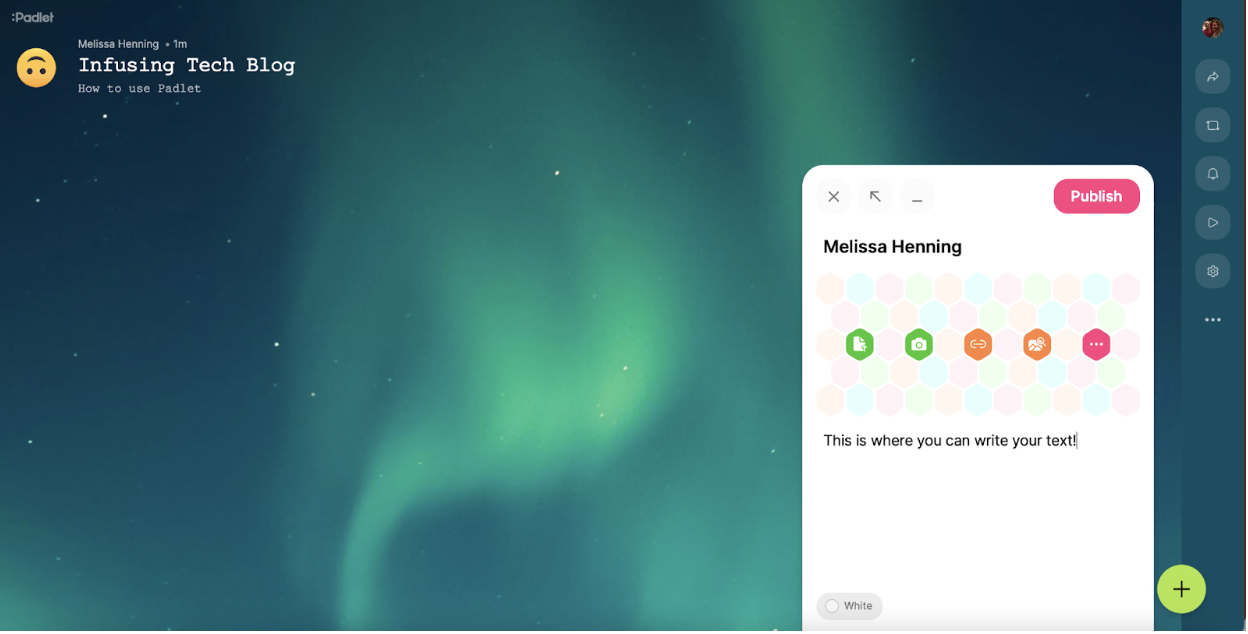
Now the post is ready for participants. Click the + Sign (bottom right) to add a sticky to the Padlet.

Once you click the + Sign, you can add the title and description. Again, many options exist, from text to URLs, images to drawings, and more.
This image provides a close-up of the many options you have to add to your post on Padlet. You can upload a document, include a link, use your camera, do an audio recording, draw, or I can’t draw (they will draw it for you!). You can also search for images, YouTube videos, GIFs, songs on Spotify, and more!
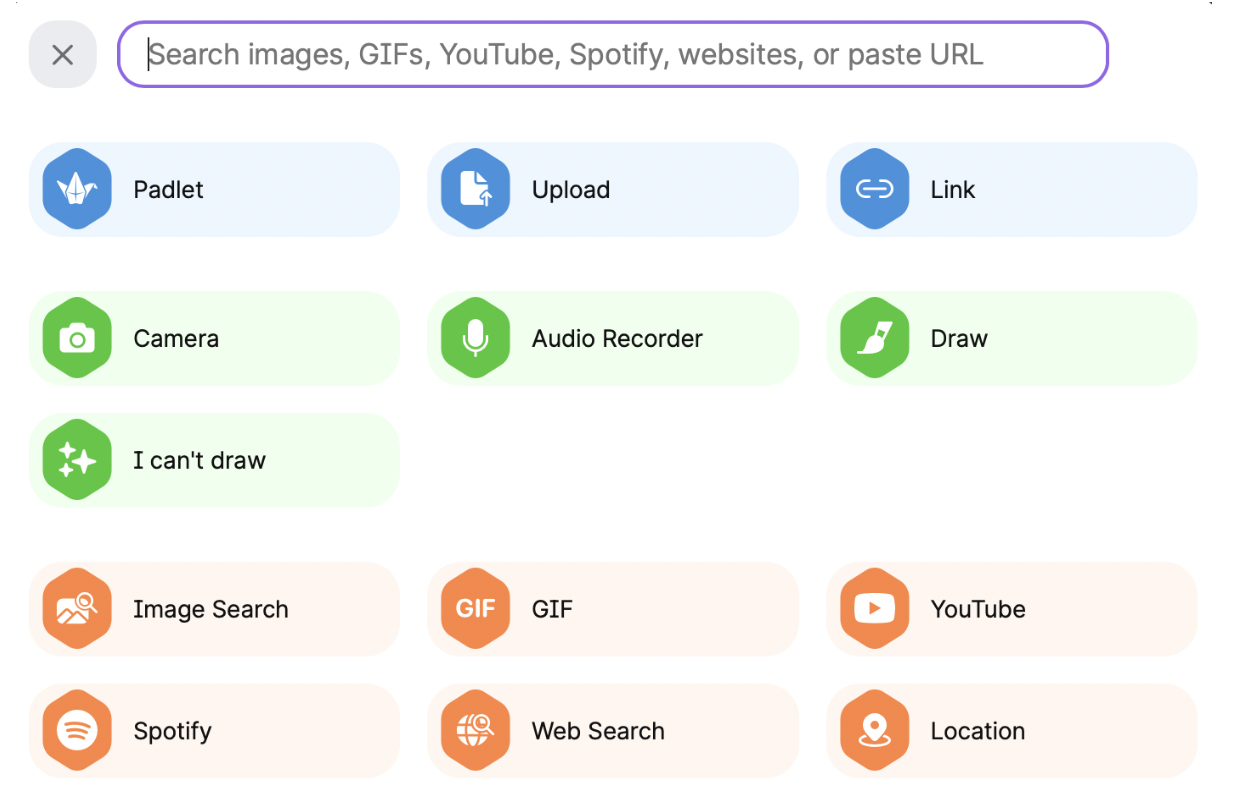
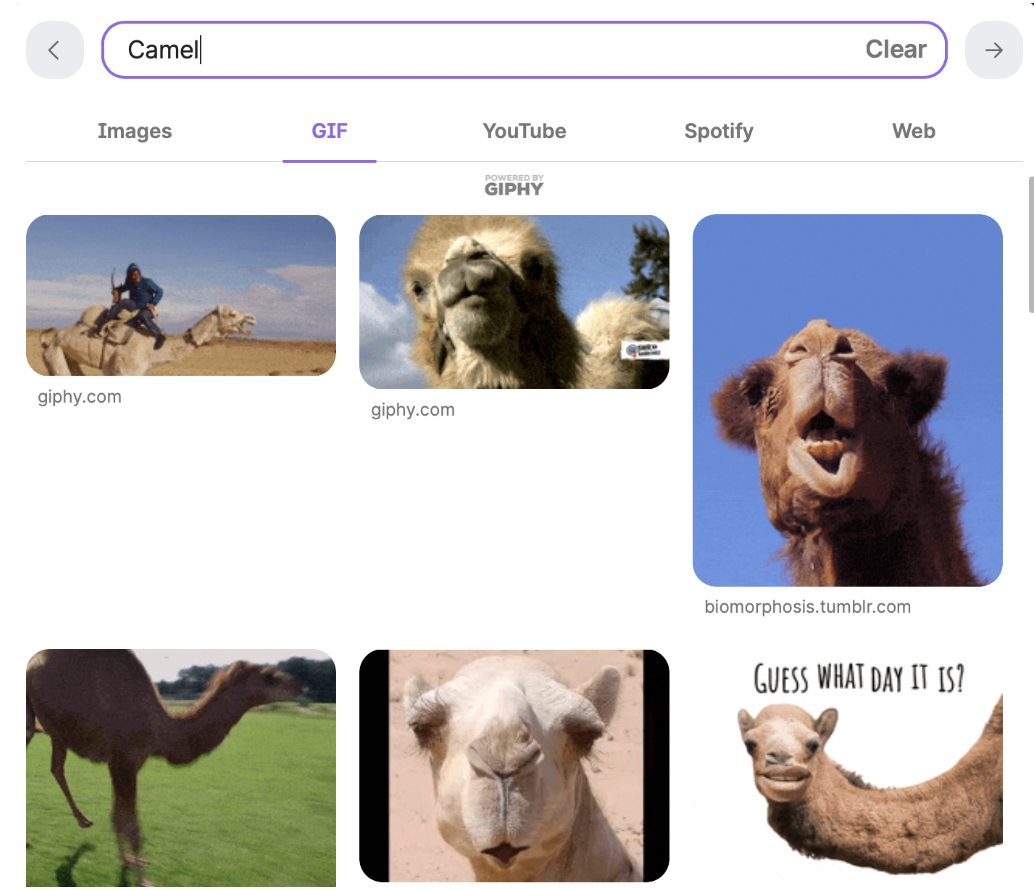
Below, you can view a few of these options. Here is the search for the GIF. When you find one, click to add it to your Padlet. This is also where you search for images, YouTube, Spotify, and the Web.
Another neat option is the ability to Draw or have the site Draw for Me. Below, you will see an example of the Draw for Me option.
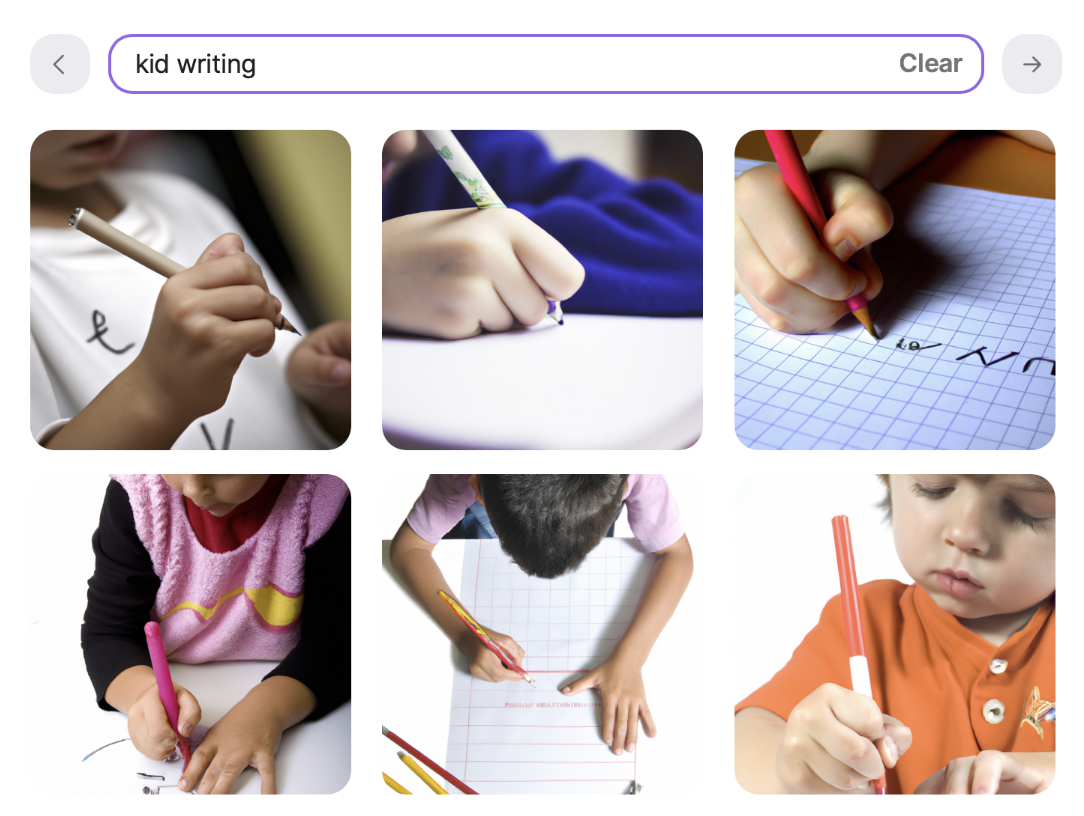
Here is a screenshot of three stickies added to a Padlet. The one in the middle shows what the URL link option looks like. This option offers a preview of the website, not just a title. This is very helpful to students to see what they will be looking at.
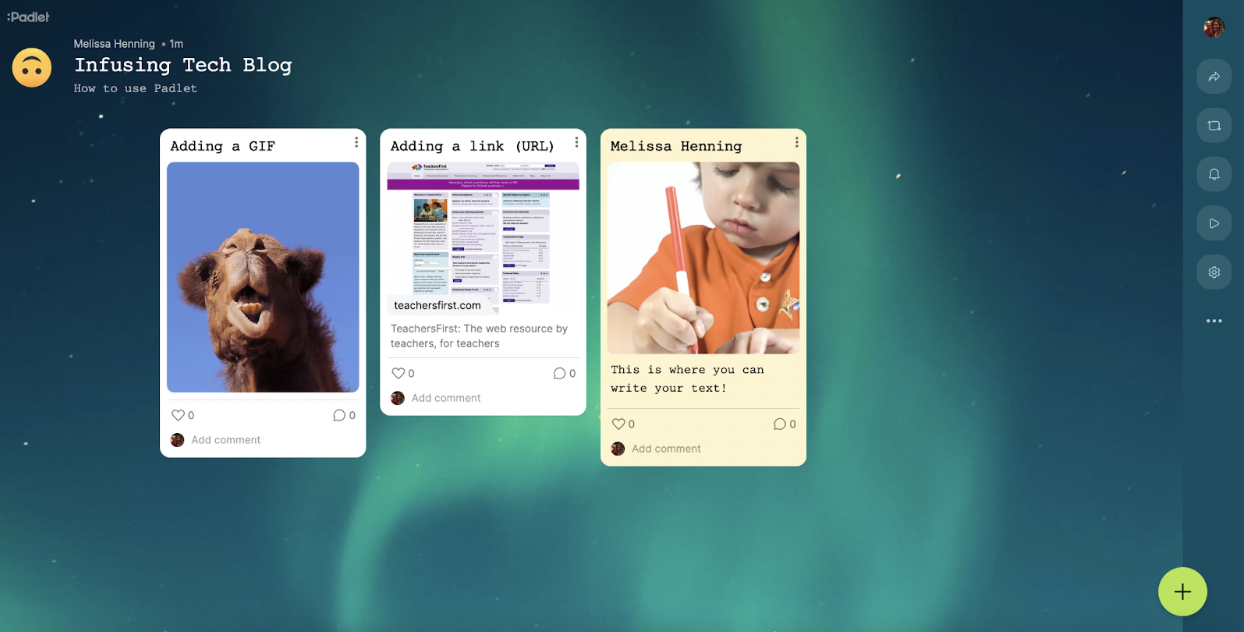
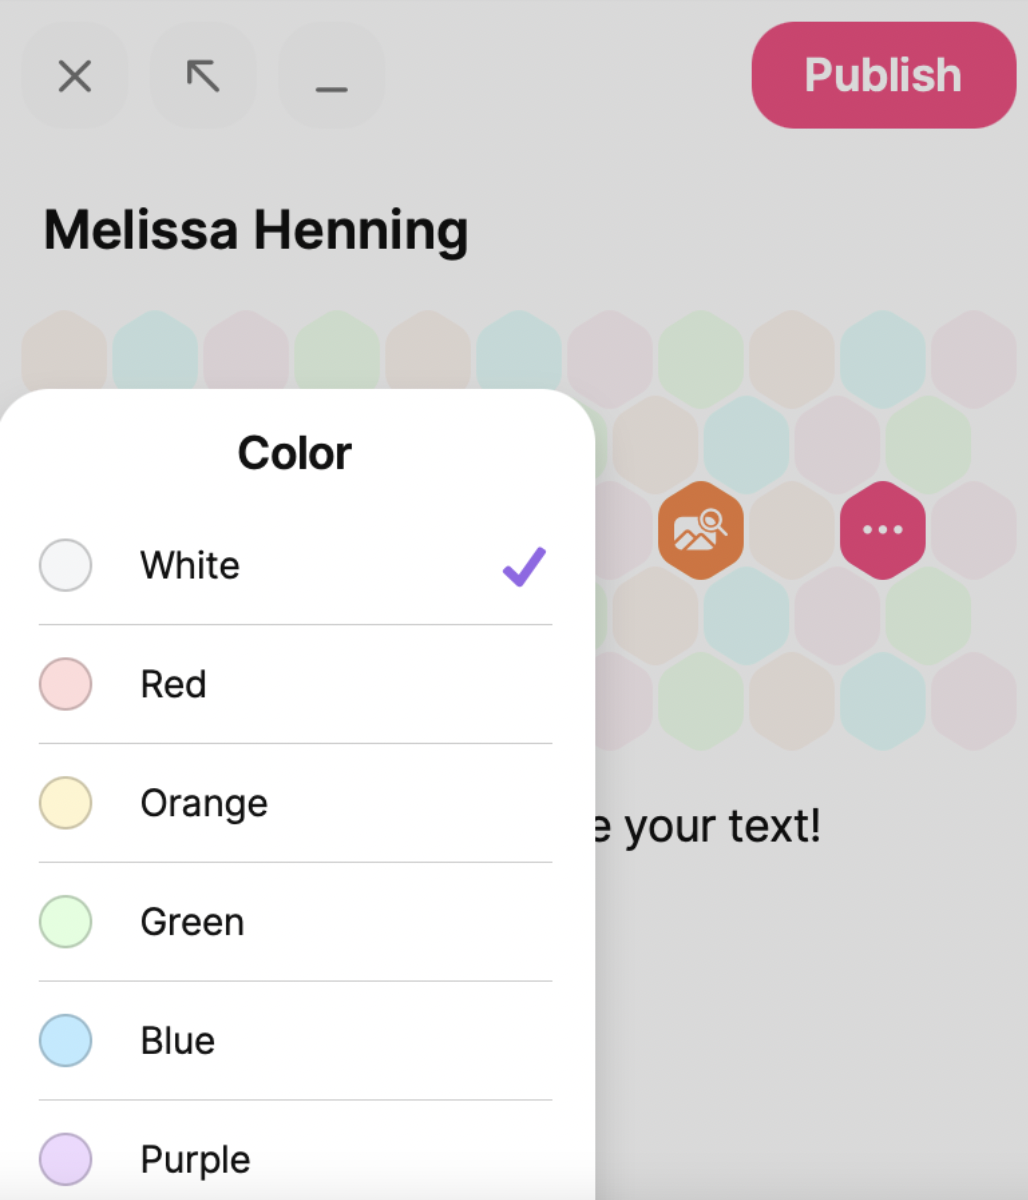
The background color is one final feature you can change in your post. Notice in the screenshot above that the image of the child writing has a light orange background. To do this option, click the word White at the bottom of your post. Then, click the color you desire for your post’s background. When finished, click Publish.
Now that we have added our stickies, we are ready to share the Padlet and get students’ responses. Notice the arrow at the top right side of the screen; this is how you open the sharing options.

Once you click the arrow to open Sharing, you have many options. The first choice you will need to make is if you would like to Invite Members (this is to collaborate – with editing rights, not just to post on the Padlet). Next, decide if you want to keep the Padlet Privacy Secret and hidden from the public. We recommend keeping Padlets private when used in the class.
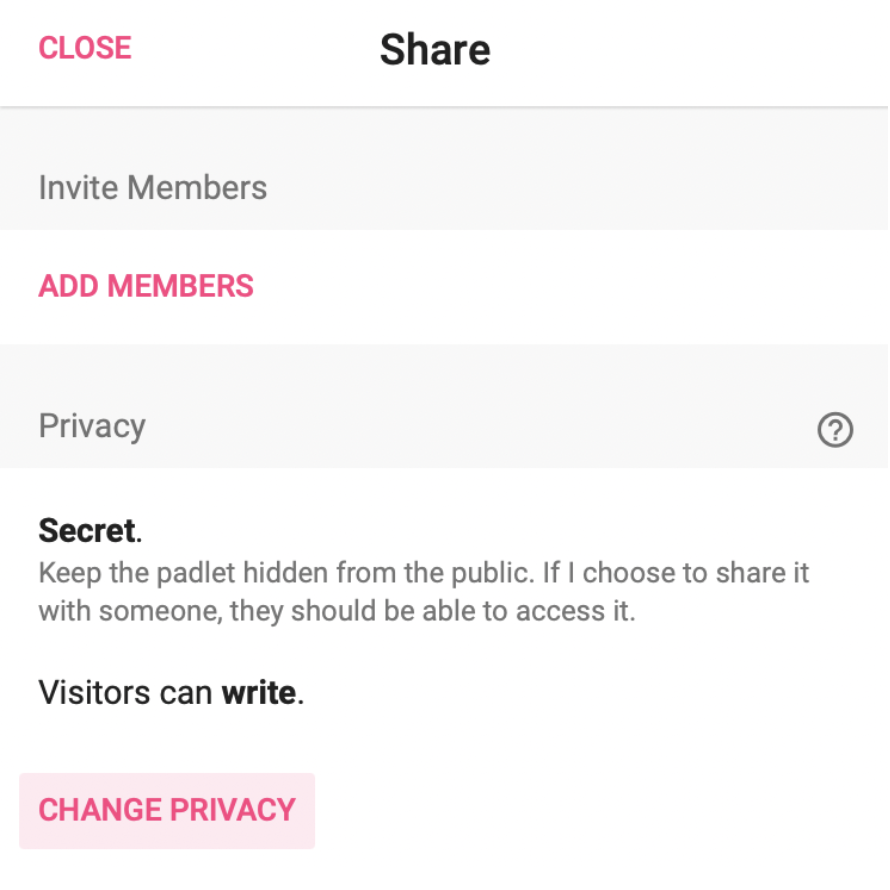
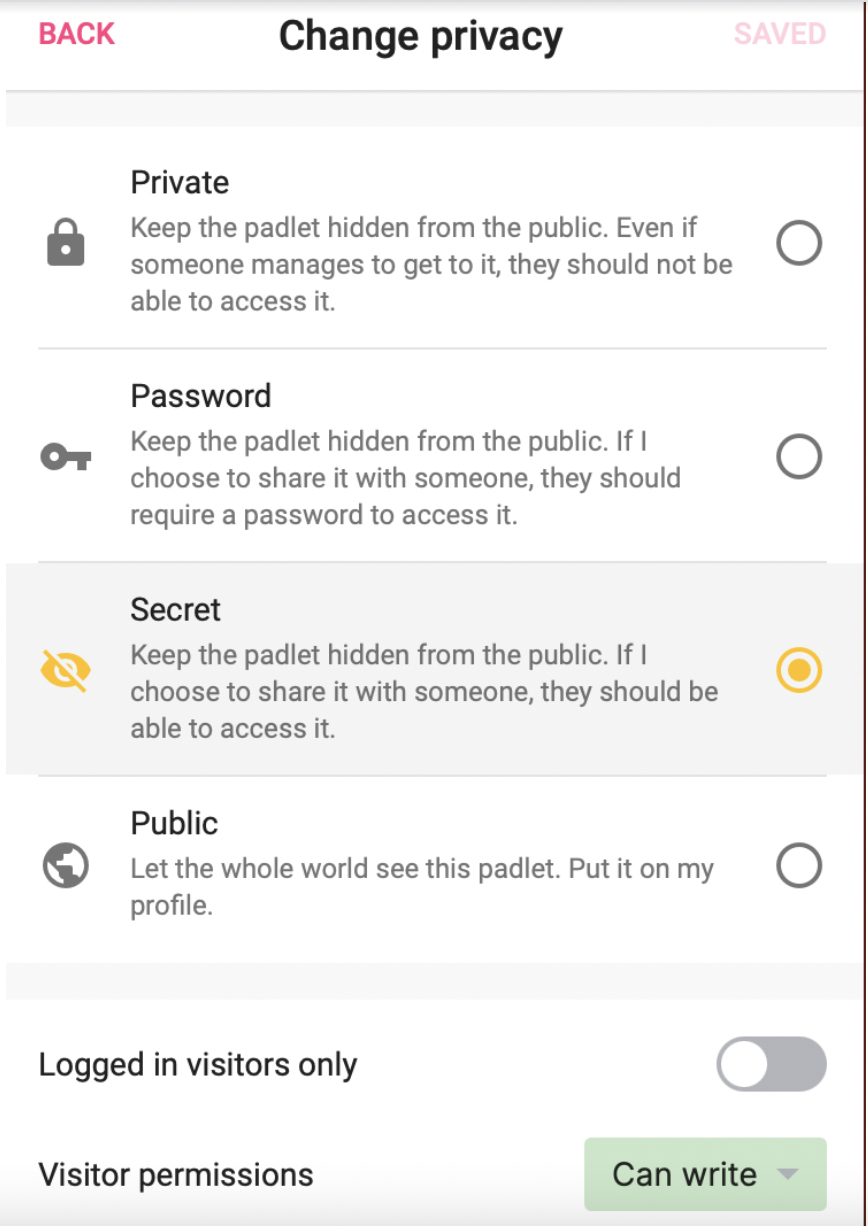
If you wish to change your privacy settings, the options are below. You can keep it Private with no one able to access it. You can add a Password. The Secret option is usually the top choice when working with students because this allows you to have the opportunity to share the link with someone, and only those folks can access the Padlet. We do not recommend making Padlets Public. We also suggest keeping the Visitor Permissions set to “Write” and not “Edit” – so your Padlet is not changed without your permission.
Now that the privacy is situated, you have many sharing options (copy the link, embed it in your blog or website, or share it on social media or Google Classroom).

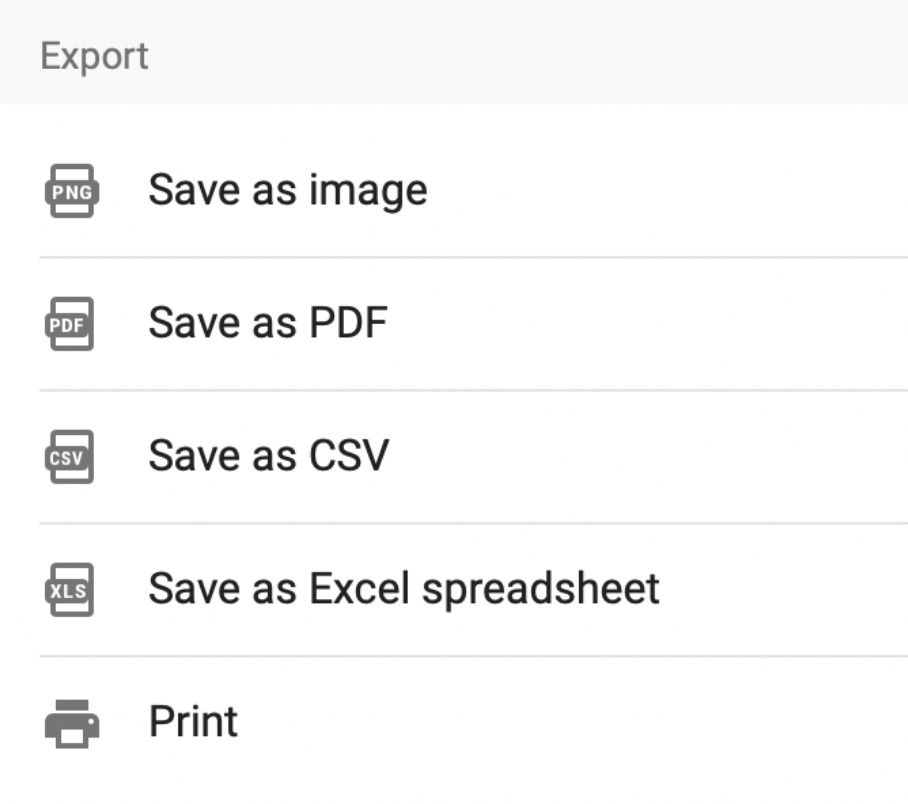
One final option at this robust site is the ability to Export. You can Save as an Image, Save as PDF, Save as Excel Sheet, and more!
Padlet is a simple web application that allows you to create a virtual bulletin board to display information on any topic. Users can also comment on other responses (if the original creator makes this an option). One of the best features of Padlet is that it is device agnostic and available on the Web or as an app (on Android and iOS). Students do not need to register to add comments on an already created Padlet. Padlet is supported in over 40 languages.
Below, we share several suggestions for using Padlet in several subject areas.
General lesson ideas for any subject:
- Use Padlet to color-code shared resources for differentiation and then tell students which color to explore.
- Create an introduction Padlet where students can say hello, tell a bit about themselves and share a photo of something important to them.
- Create a class Padlet with “Class Happenings and Highlights.” Share the link with families and students. Visitors can post their own items and add comments to your stickies. (We suggest taking advantage of the moderate content option in this situation).
- Create a Padlet as an exit ticket related to any lesson’s content. You could also save time by creating one Padlet for the entire week (or even month) in a Shelf layout putting each daily question in a separate column.
- Share a Padlet to use for collaboration during remote learning lessons.
- Create a Padlet for student reflection after a lesson in any subject.
- Create a timeline Padlet sharing the order of steps in an assignment. Students can ask questions about each step by adding comments to those specific stickies.
- Use the Shelf layout for group work. Each group can have a shelf to collaborate on, share questions, or learn information.
- Use Padlet to organize information by units (in any content area). Use whatever layout works best for you to share links to websites, games for practice, project options, videos to learn additional information, and more.
- Use Padlet as a brainstorming board for any new topic that is introduced. See what your students already know about the subject. Add additional stickies throughout the unit as more information is learned.
- Use Padlet as a Q&A board in your class. Rather than stopping mid-lesson or sending an email from home, students can post any questions to the Padlet, and you can address the questions with the entire class or individual students.
Social Studies:
- Sequence historical events from the Battle at Gettysburg (use the timeline layout).
- Identify various countries using the map layout (add images, videos, and text).
- Sequence events during the Holocaust (using the Timeline layout).
- Landmark Supreme Court cases (students can add stickies of their learning).
- A stream layout to highlight the life of a famous psychologist.
- The three branches of the US government (use the Shelf layout and create three columns for the information).
- Sequence how a bill becomes a law (use the Timeline layout).
Science:
- The butterfly’s lifecycle (use the Timeline layout).
- The food chain (Timeline layout).
- The results of a science experiment.
- Sequence the phases of the moon (Timeline layout).
- Causes and effects of hurricanes on a Grid layout (be sure to have students label if it is a cause or effect).
- Sequence the steps of the Scientific Method (Timeline layout).
- Use the Shelf layout to share various types of animals. Students can list animals in the appropriate columns (such as reptiles, amphibians, or mammals).
Math:
- Have students create math problems for the class to answer and have the questions shared on a Wall layout. Students can use the comment features to answer math problems.
- Share sites for math learning groups to use for practice. Use the Shelf columns to differentiate for each math group.
- Assign students different types of shapes and have them find images representing them and explain the shape during a unit in geometry.
- Add vocabulary words for algebra (or another math course) and assign students to fill in the definition for 1-2 of the terms for homework (be sure they include their names!).
- Create a Math Help Board where students can post questions about nightly homework and help one another.
- Have students use the Draw option to respond to math problems you post on a Padlet.
Language Arts:
- Sequence events of a story (Timeline layout).
- Have students identify the difference between the homophones hear and here by writing original sentences using the words and drawing images.
- Demonstrate an understanding of an oxymoron by finding an image and writing a post on your Grid layout.
- Use the Shelf layout to create columns to discuss novels. For example, add a column related to the characters, settings, themes, and other literary concepts you teach.
- During a media literacy lesson, challenge students to use background colors to add facts, fiction, and media bias examples.
- Review vocabulary words.
- Use the Shelf layout with young students to sort beginning sounds and add easy words. Do a column for a few letters each week and have students add a word to every column.
Arts & Humanities:
- Use the Map layout to highlight Spanish-speaking countries (in Spanish class).
- Create a musical instrument Padlet and have students add images and descriptions of instruments during music class.
- After viewing a piece of artwork or a collection from a specific artist, have students use Padlet to share their thoughts.
- Challenge students to find music from the 1930s and add the URL to a Padlet.
- Create a Padlet about a famous artist using the Shelf layout. Create columns for the artist’s major life events, the artist’s work, the artist’s family/personal life, and more.
- Share students’ artwork on a Padlet to be shared with families. Students can take a photo of their artwork and then do a brief text description (use real names or student ID numbers).
Additional Video Tutorials and Review:
- TeachersFirst Review: Padlet
- Blog Post: Rediscover Padlet
- Article: What is Padlet and How Does it Work?
- Video: Padlet
- Video: How to Teach with Padlet
Have you used Padlet? Then, share your activities in the comments below!
I have used padlet in the past when I taught 4th grade and was virtual for students to post their work to, but now that I am in-person teaching 7th/8th grade math I have not integrated padlet into my classroom. However I have been really trying to think of a good way to build students vocabulary in math and padlet would be the perfect way to do so. Students could access the vocabulary any time they needed to because it would be digital and they would continue to have access to it through out the entire school year. Thank you so much for sharing this!
This post was extremely informative. How easy could I incorporate this within a classroom of relatively inexperienced students in a Web Design class. I have students who have not really used computers, Chromebooks, or iPads that often. Once students come to my class, we use all of these things but prior to seeing me, they do not use them much. Would this be easily embedded into a website, using HTML code? Again, thanks for the information and I look forward to hearing back.
Hello Michael,
Thank you so much for your comment and questions. I think Padlet is an excellent tool for students just getting comfortable with technology. They can add a comment with a simple click of the + sign. Also, after a brief teacher tutorial (maybe on your projector), students will likely learn by viewing your example.
Padlet is super easy to share. If you scroll up in this post, an image shows you the sharing option. On the right sidebar there is a share option. You can get an embed code or a QR code, or a link – your choice 🙂 I hope that helps to address your questions and I can’t wait to hear how you have used Padlet!
~ Melissa Henning