
In Part 1 of this blog, we introduced you to Image Annotator and discussed applying the SAMR Model and the Triple E Framework using Image Annotator in your instruction. Image Annotator allows users to add virtual hotspots to uploaded images. The hotspots appear as red dots on the image. A title, description, or URL (such as a video link) is shared when you click on the dot. Today’s post will offer more guidance about using this web tool and provide suggestions for classroom use.
Image Annotator:
When you arrive at Image Annotator, you may notice some advertisements. To access the Upload Your Image button, you must close all advertisements. They do not reappear once you click to close.
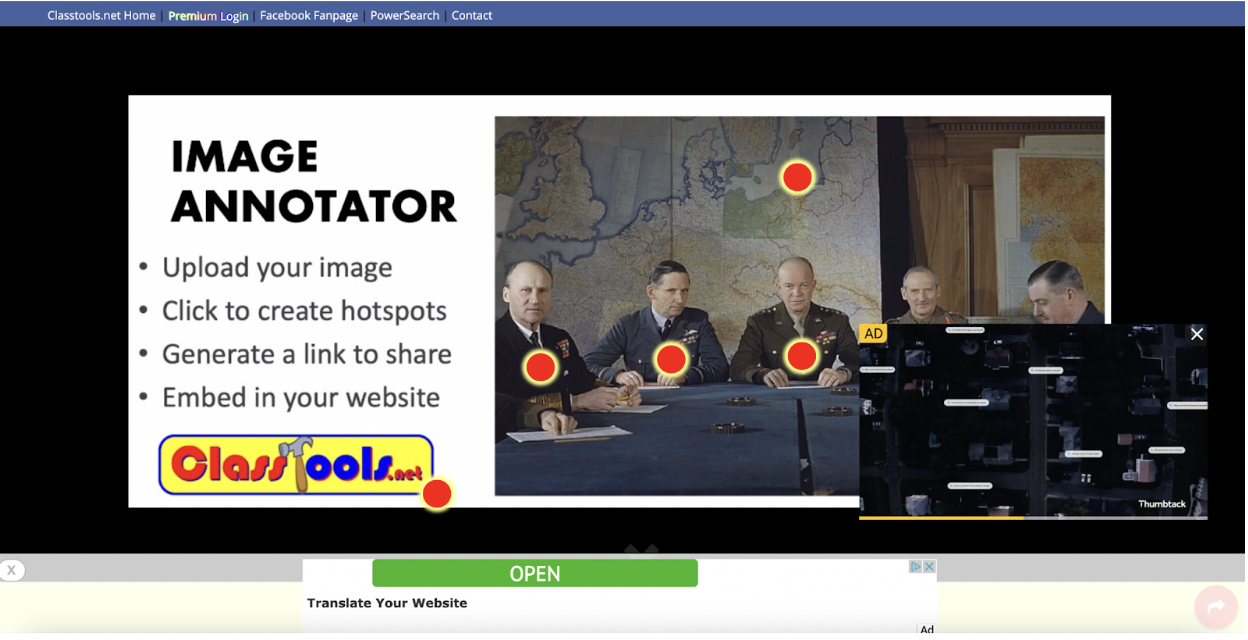
Now that the advertisements are gone, you can upload an image. Click the purple Upload Your Image button.

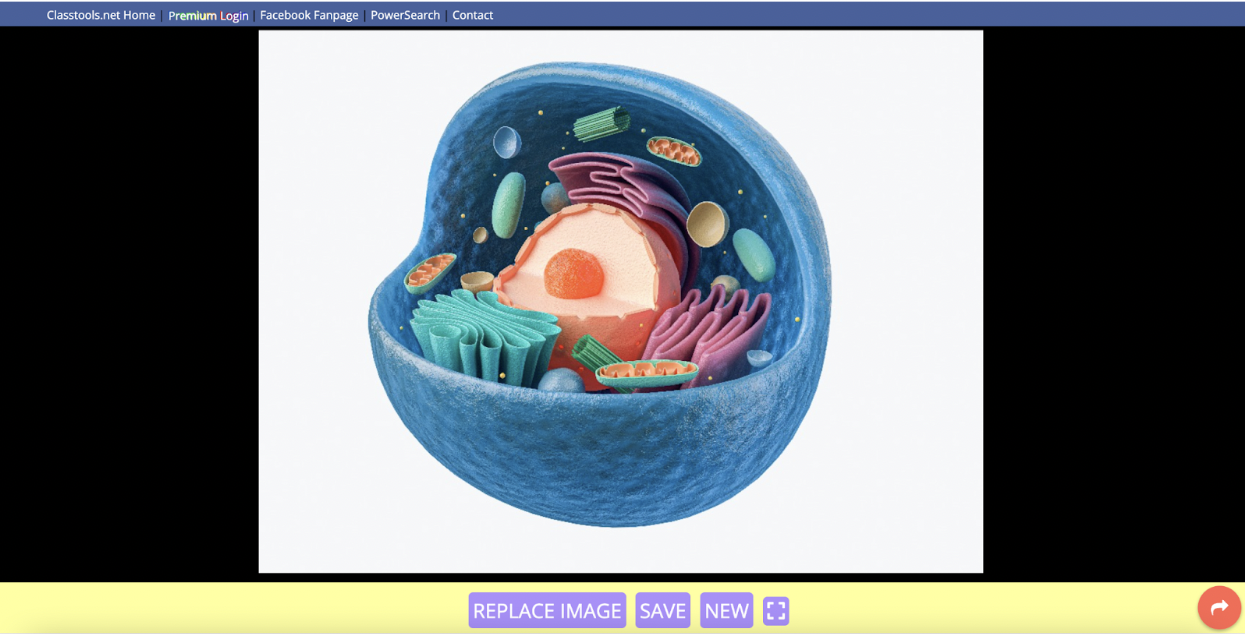
Find the image that you would like to upload. Once uploaded, you will see four options below the image (Replace Image, Save, New, or the icon for viewing full screen).
Click on the image, and a dialog box will appear. Fill in the title, description, and URL (you do not need to fill in all the information; you can choose how much to include.
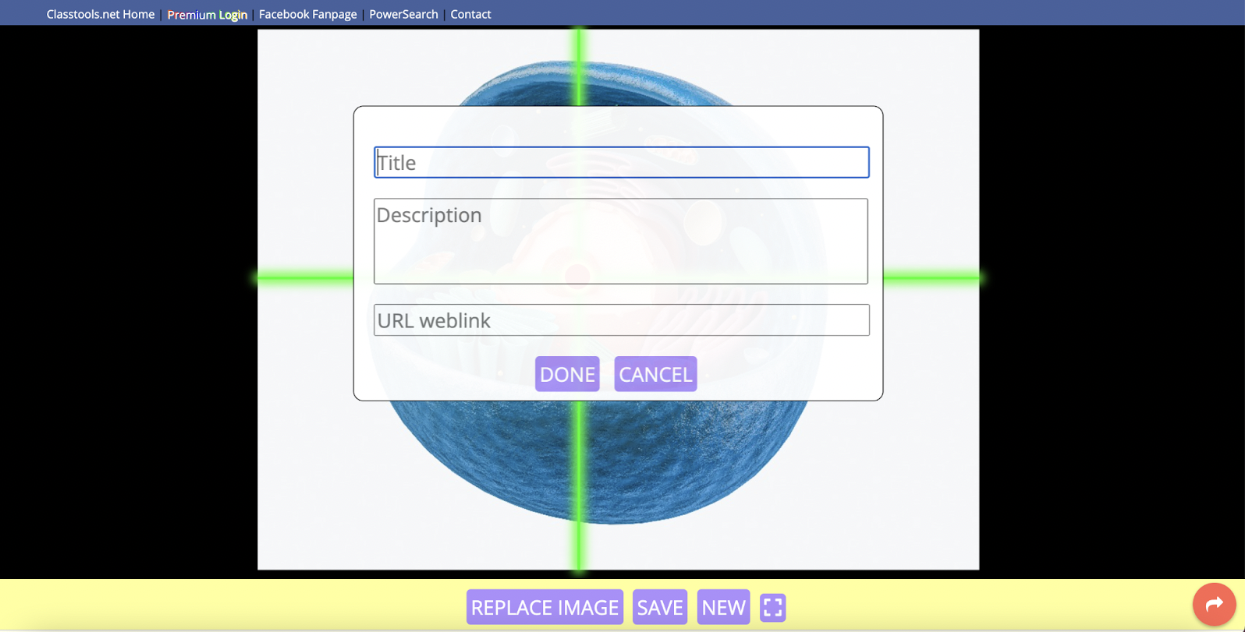
Fill in the information and click Done.

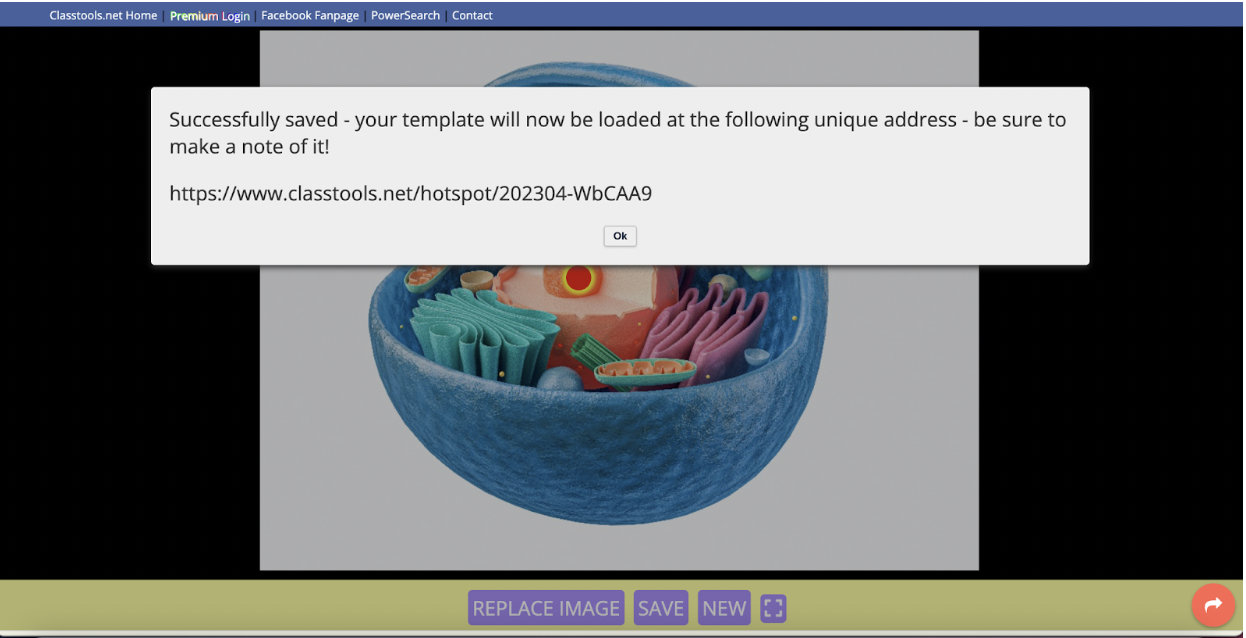
Once you are finished, you have the option to save the image. Please note that the main reason to save an image is so that you can go back to edit it later.
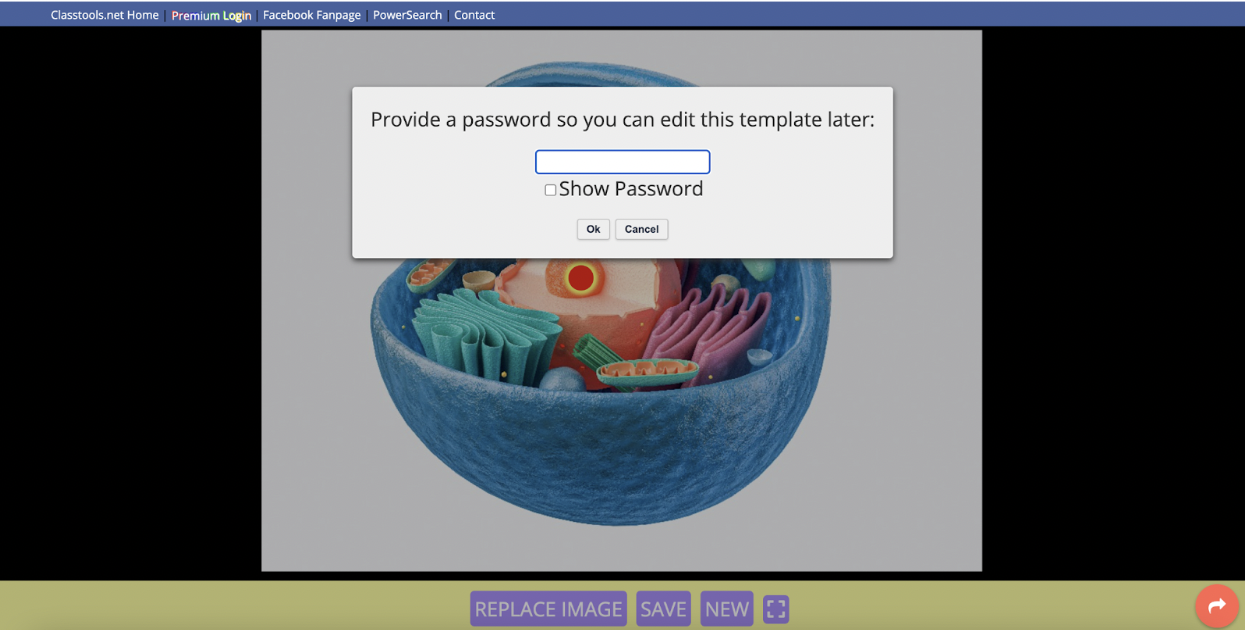
You do not need to save the image to share. However, it is always wise to save your work. An additional benefit to saving is that you are provided with a unique URL. A collaborator could use this URL to add additional information to your image!
Click OK and then click on the red circle with the white arrow in the bottom right corner of the page to learn the many sharing options.
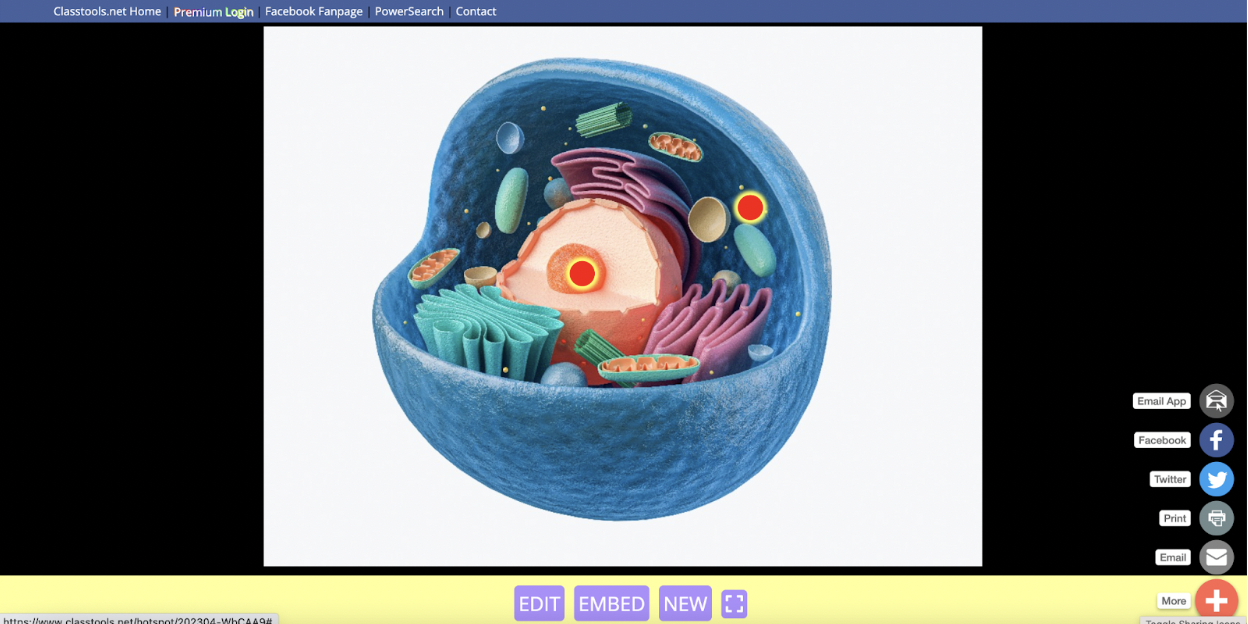
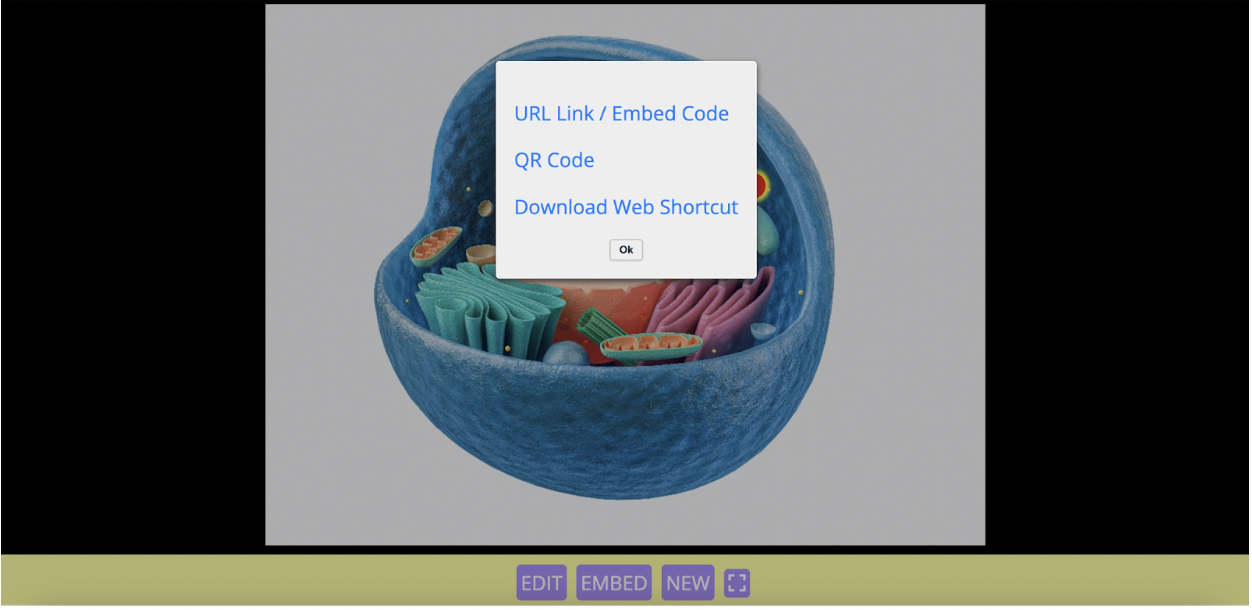
Now it is time to share your image. You have many sharing options on Image Annotator! As the image above shows, you can share on social media or email or get an embed code. When you click Embed, you can get the URL Link/Embed Code, QR Code, or Download a Web Shortcut.
You are ready to share your project once you click the URL Link/Embed Code!
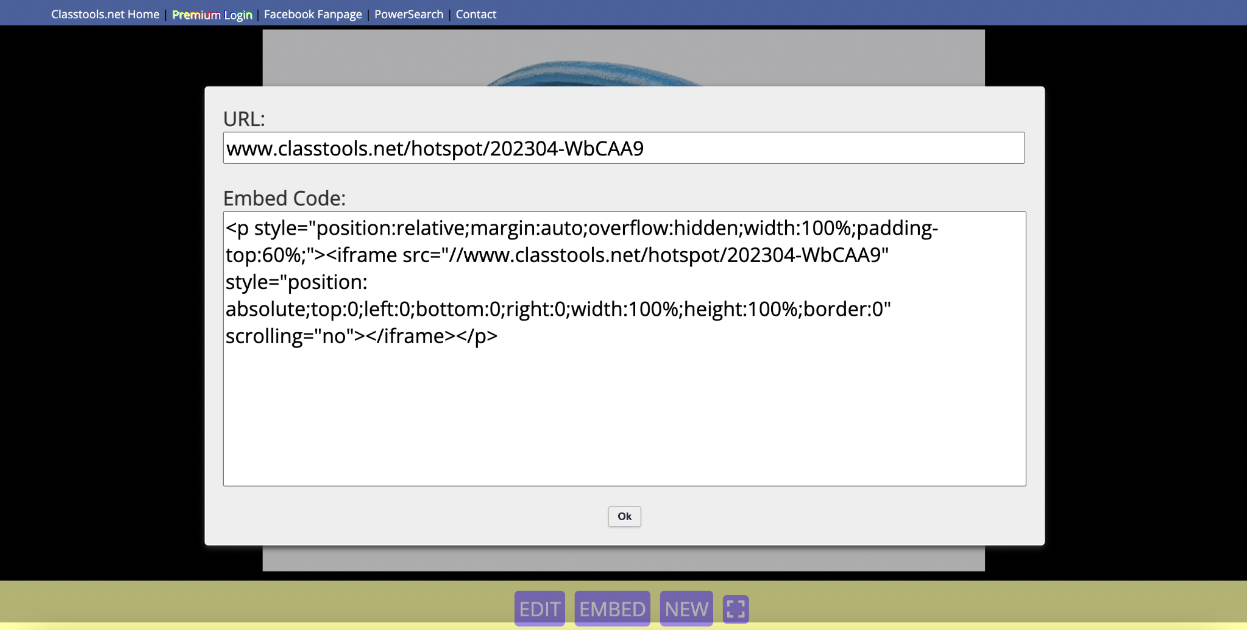
Image Annotator is an engaging and simple way for students and teachers to share content. In addition, teachers can use Image Annotator as a show-what-you-know formative assessment. This site would be ideal for the BYOD or 1-1 classroom. The activities are also suitable for blended and distance learning, as the images are easily shared. Below, we share several suggestions for using Image Annotator in several subject areas.
Create an annotated image about…
Social Studies:
- Any historical figure or president (include links to videos of or about the person).
- Election candidates (use the hotspots to include basic platform information).
- Famous buildings in Washington, D.C.
- Flags from other countries (use the hotspots to explain the symbols on the flag).
- Presidents (include links to videos of or about the president).
- Map of the continents with hotspot labels of famous landmarks, capital cities, or large mountain ranges.
Science:
- The Ring of Fire.
- Images (with explanations) from a science experiment.
- Parts of an animal or plant cell.
- The butterfly’s life cycle (with description using the hotspots).
- Phases of the moon.
- Images (with explanation) of different equipment from the science lab.
Math:
- Shapes in geometry.
- Graph with hotspots explaining the data.
- Images (with description) to show how to find area and perimeter.
- Math problem with text explaining the correct order of PEMDAS.
- The difference between a line and a line segment. Upload the image, and students can use the hotspots to show the differences.
Language Arts:
- Teaching parts of speech using a random photo with adjectives, adverbs, and more.
- Characters from a book can “talk” about a story’s ending (or climax) through the hotspots. Each character in the image has a hotspot with information explaining who they are and their role in the story.
- The main characters from a story can share a short description of themselves (and possible web links to more information about the character or the story.
- The difference between two, too, and to (using images).
- Figurative language (for example, find an example of an image representing an oxymoron such as organized chaos). The hotspots can explain what the oxymoron means (or another form of figurative language.
- Image depicting a poem (use the hotspots to analyze lines from the poem).
Arts & Humanities:
- Famous places to visit in Spain (in Spanish class).
- Images with hotspot explanations in world language classes (using new terms or cultural items).
- Practice vocabulary words in world language class by using images and creating hotspots in the new language.
- Instruments from the band with a short description.
- Any famous singer with information about their life.
- A famous artwork and a description of who created it and when.
- Upload Student-created artwork and include hotspots with additional information.
Additional Video Tutorials and Review:
- TeachersFirst Review: Image Annotator
- Video: Image Annotator
Have you used Image Annotator? Then, share your activities in the comments below!
I have not used it yet.