
Part 1 of this blog introduced you to Google My Maps and discussed applying the SAMR Model and the Triple E Framework to using it in your instruction. Today’s post offers detailed instructions for this tool and ideas for using it in the classroom.
Google My Maps:
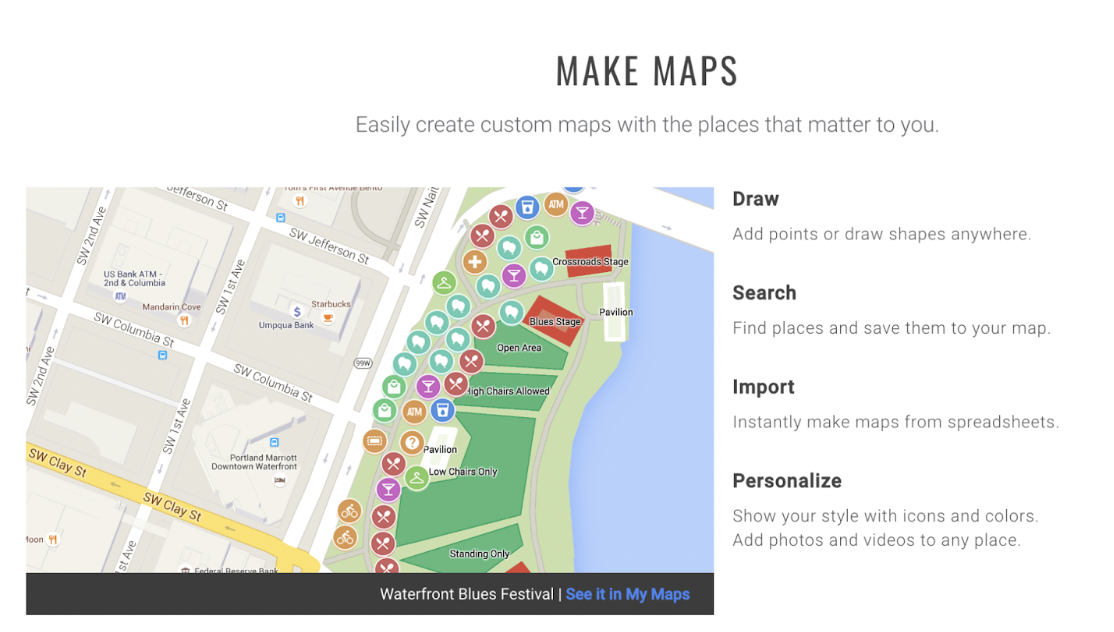
The main page shares essential information about making custom maps using Draw options, Search, Import from a spreadsheet, and Personalize with colors and videos. We will highlight some of these options later in this tutorial.
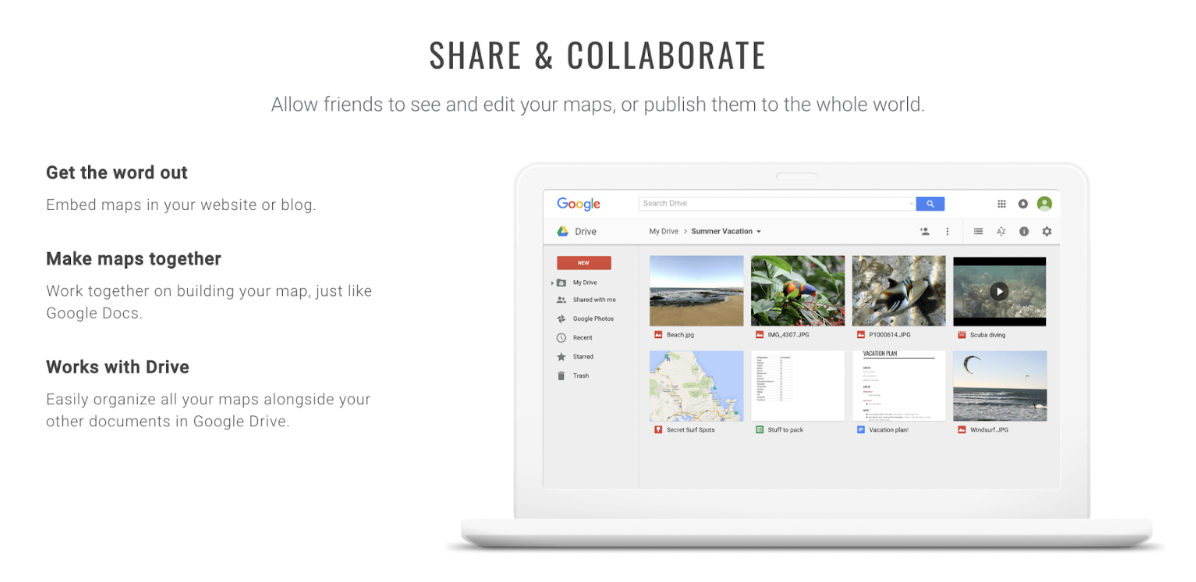
It also shares ways to collaborate and share your finished maps. These options will be highlighted later in this tutorial.
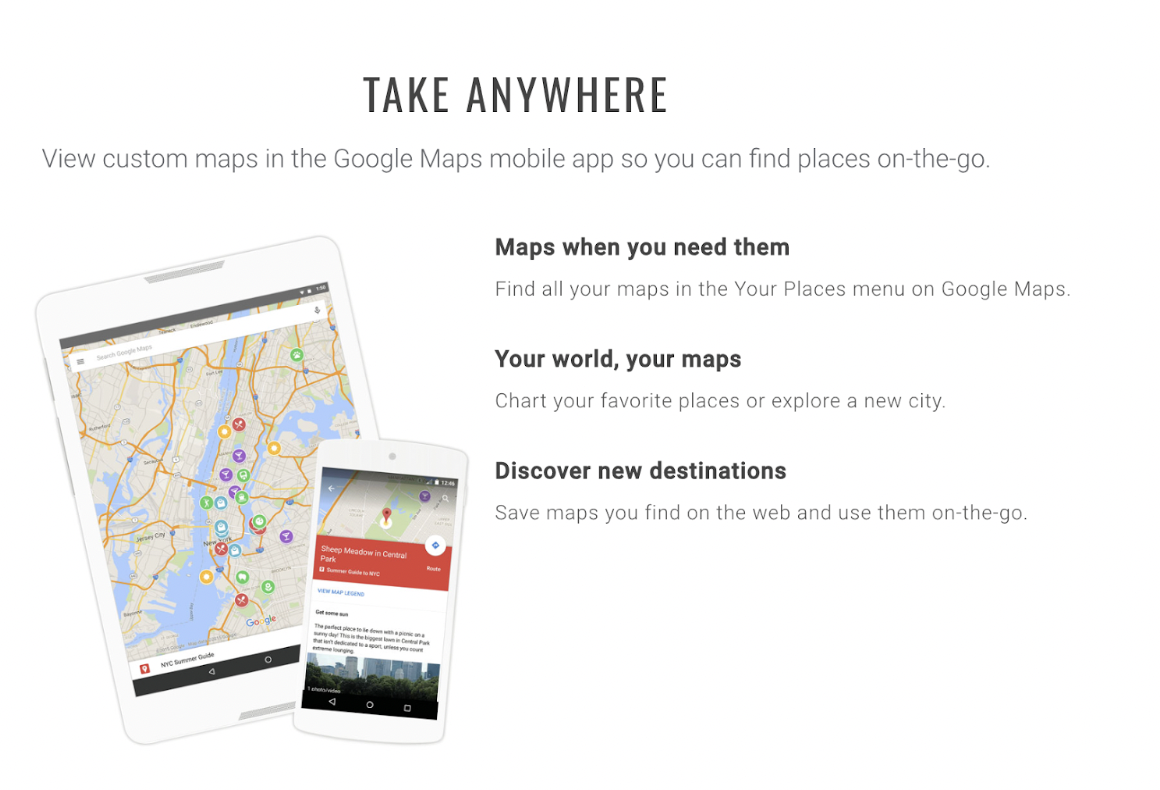
While creating maps isn’t an option via Android or iOS apps, completed maps are viewable from any device..
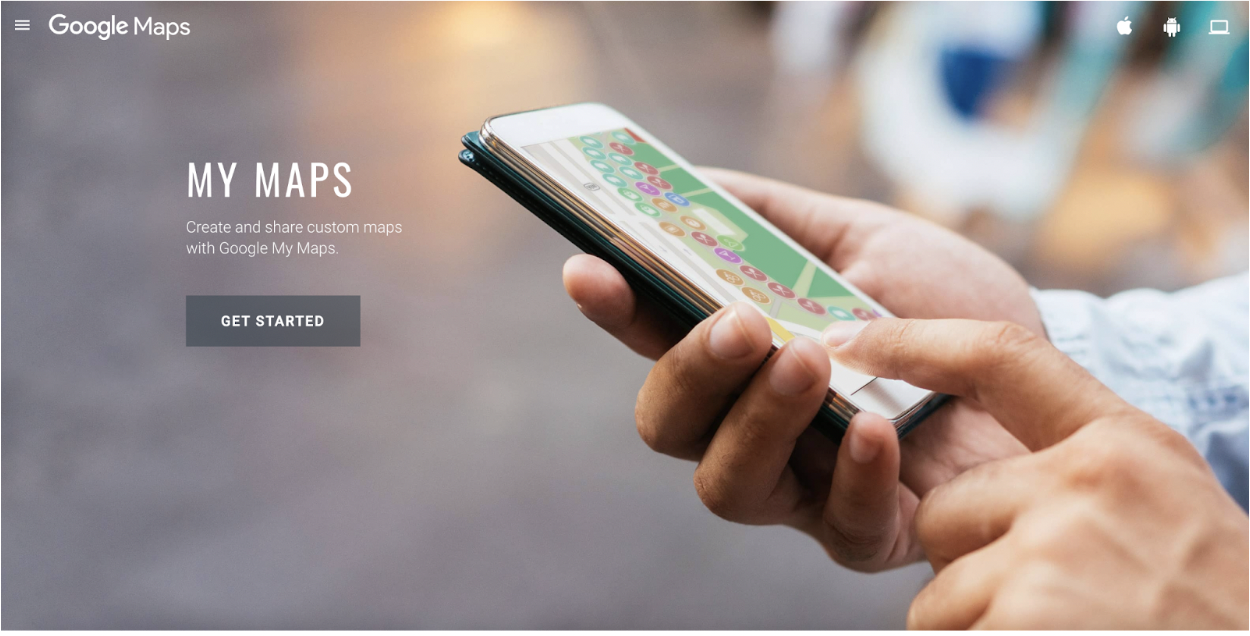
When you arrive at My Maps Click Get Started.
Once you click to Get Started, click on the red button + Create a New Map.
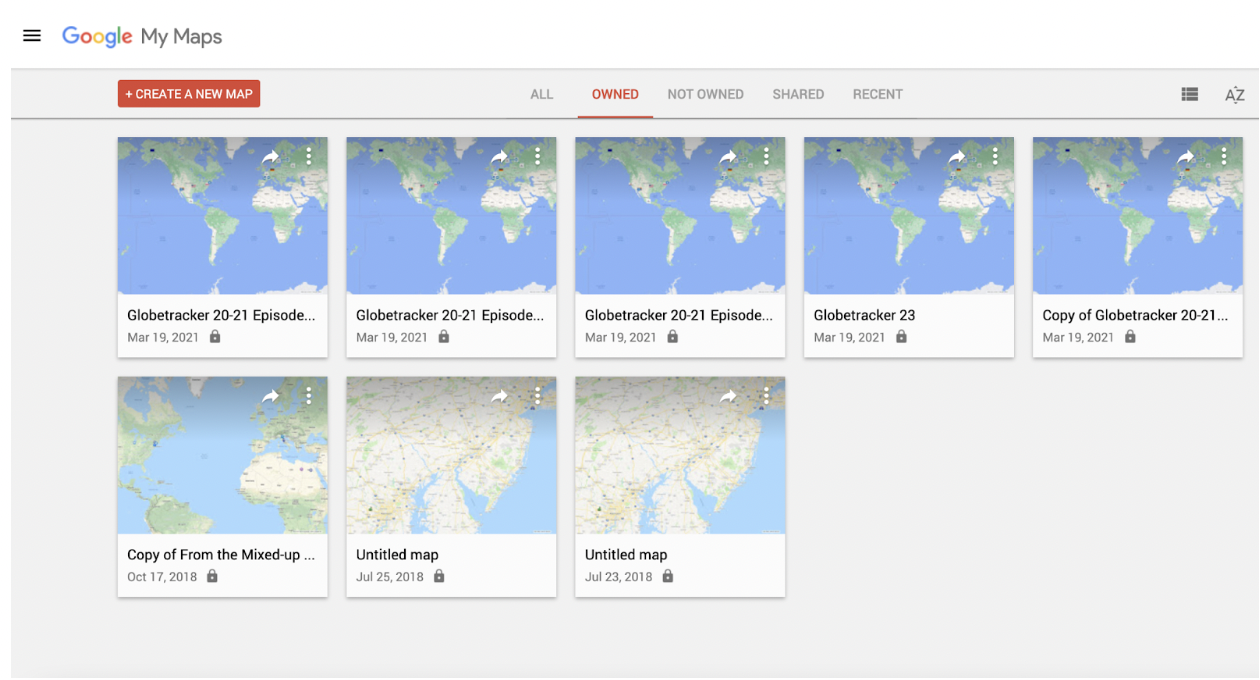
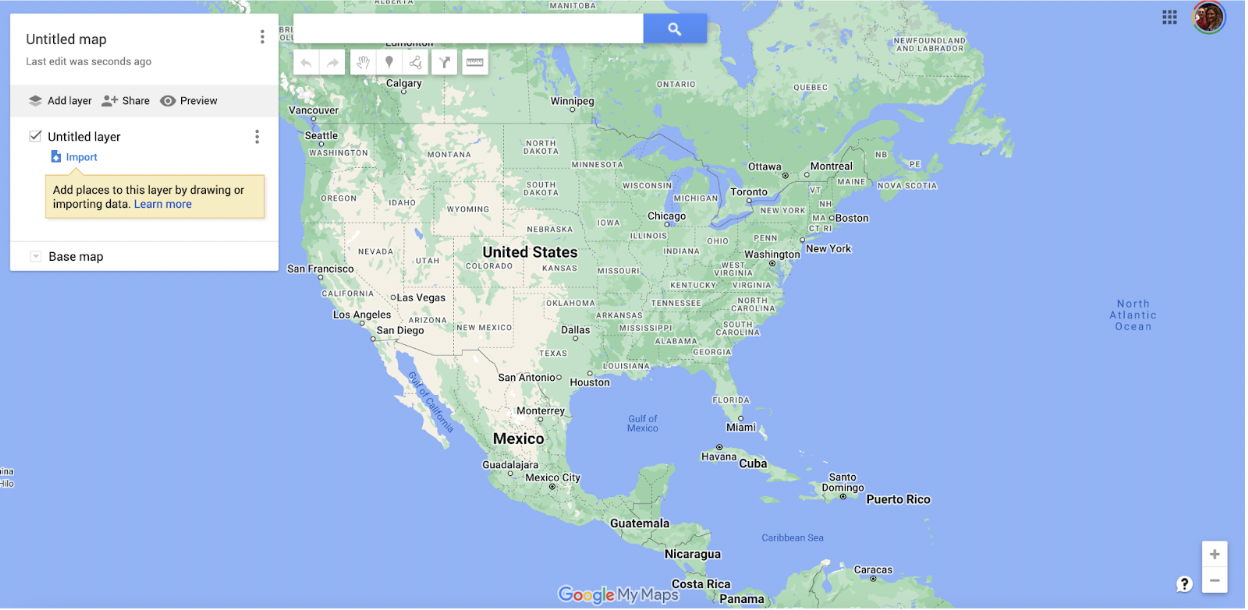
You will be presented with a blank map to create your My Maps. Change the title of your map by clicking on Untitled map.
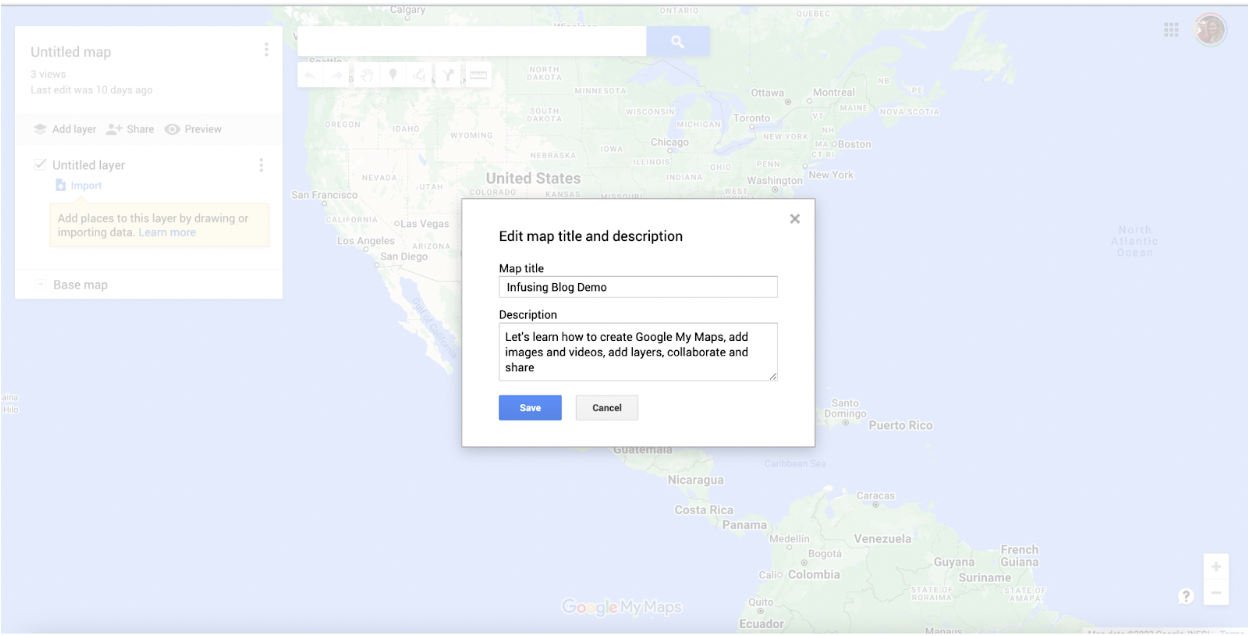
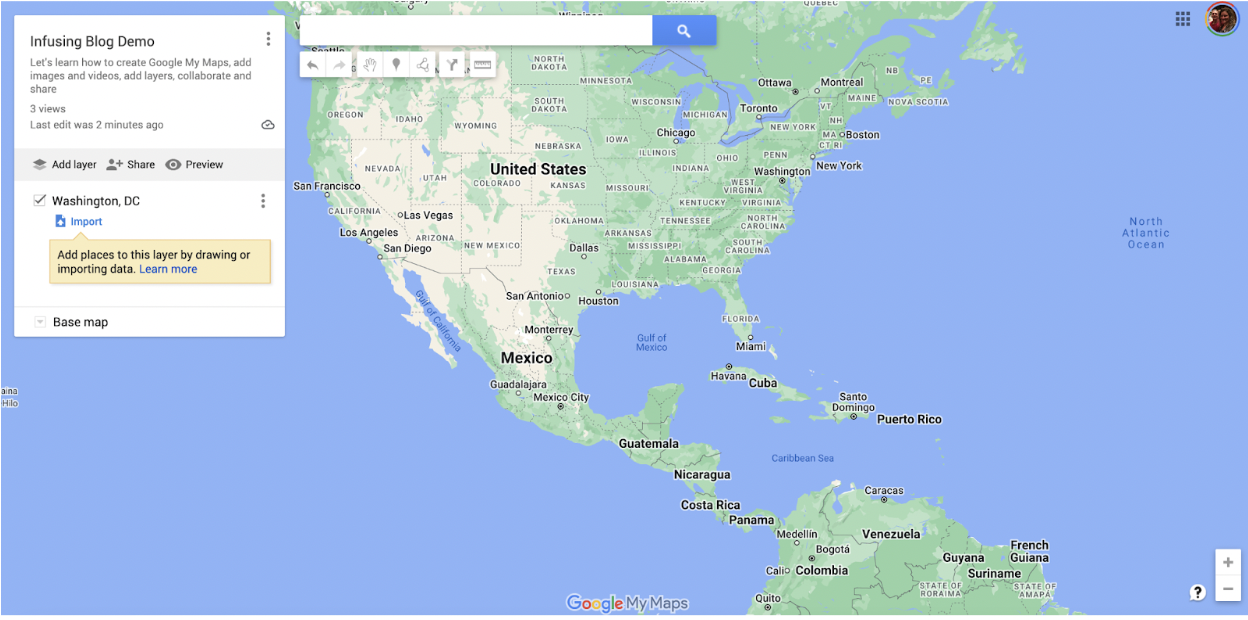
Add your title and desired description. Click to Save when finished.
Directly under the title and description are options to add, share, and preview layers. Let’s begin by adding some layers. Maps are created with one layer, but you can have up to 10. This offers a great way to collaborate, as students can each add their own layer. There are many additional uses for layers (a different layer for each state or country, layers from different chapters in a book, a separate layer about various historical figures from the same period, and many more!).
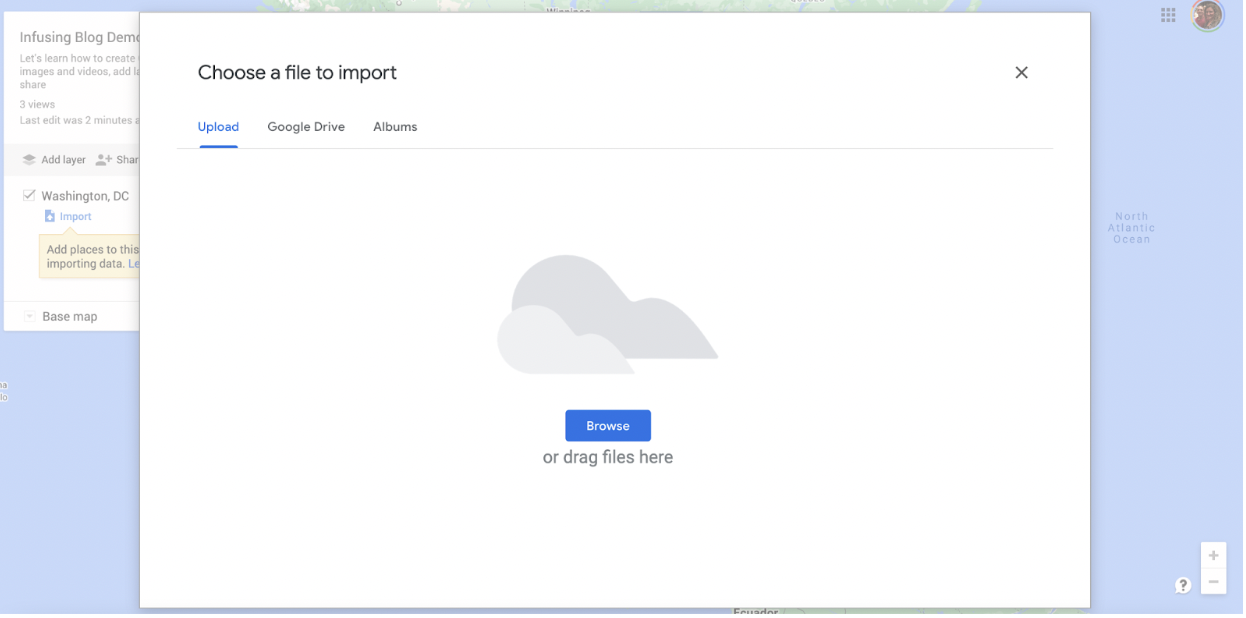
Directly under the buttons to Add Layer, Share, and Preview – take note of the bottom to Import. This allows you to add your own saved files directly. The options include dragging and dropping a file from your device, searching your Google Drive, and uploading from your device or an album.
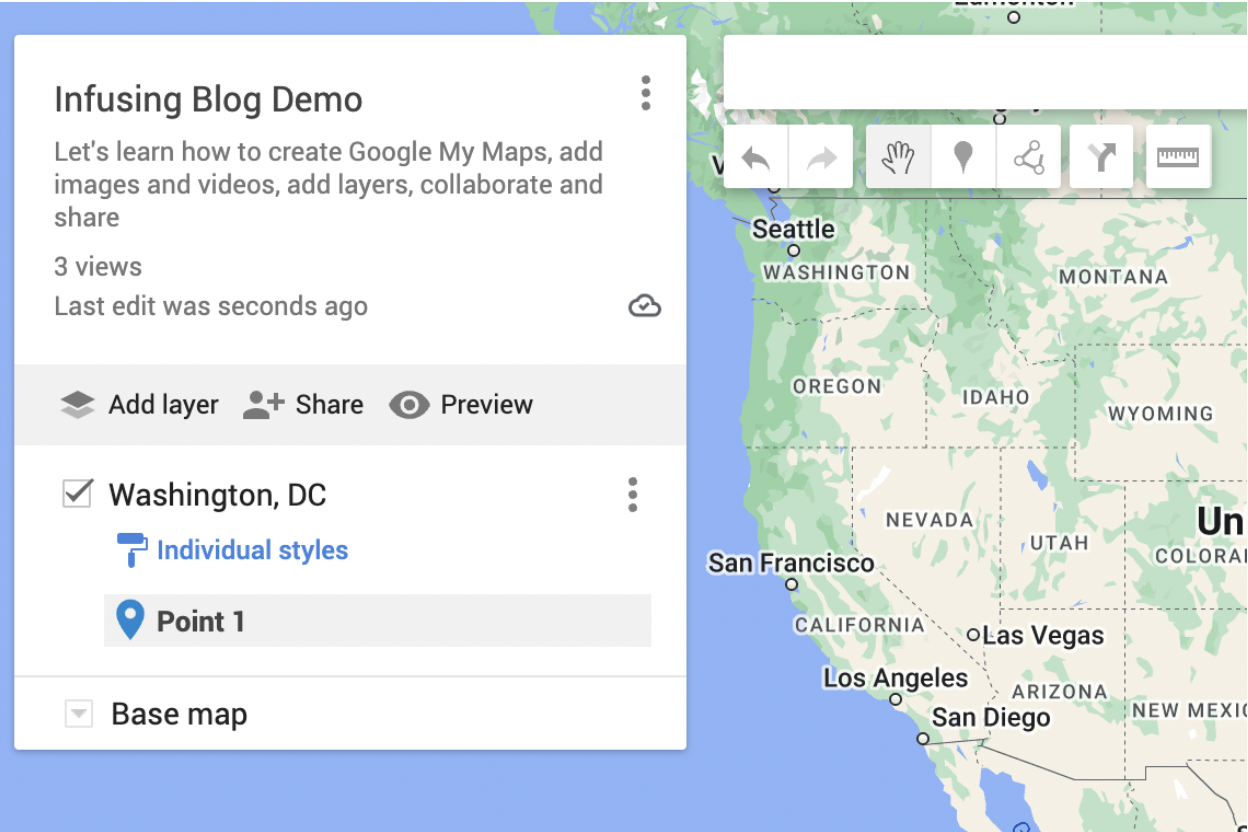
Now, let’s take a closer look at this box. Beginning with the Add layer option, you can click on that and add your own title for this map portion. If you look at the icons on the top of the map, these allow you to do even more neat options! Moving from left to right, you can Undo, Redo, Select an Item, Add a Marker, Draw a Line, Add Directions, and Measure Distances. We will not focus on all of these options in this blog post. However, additional instructions for these options are included at the end of this blog post (under Additional information). Let’s start with one of the most important – Add a Marker.
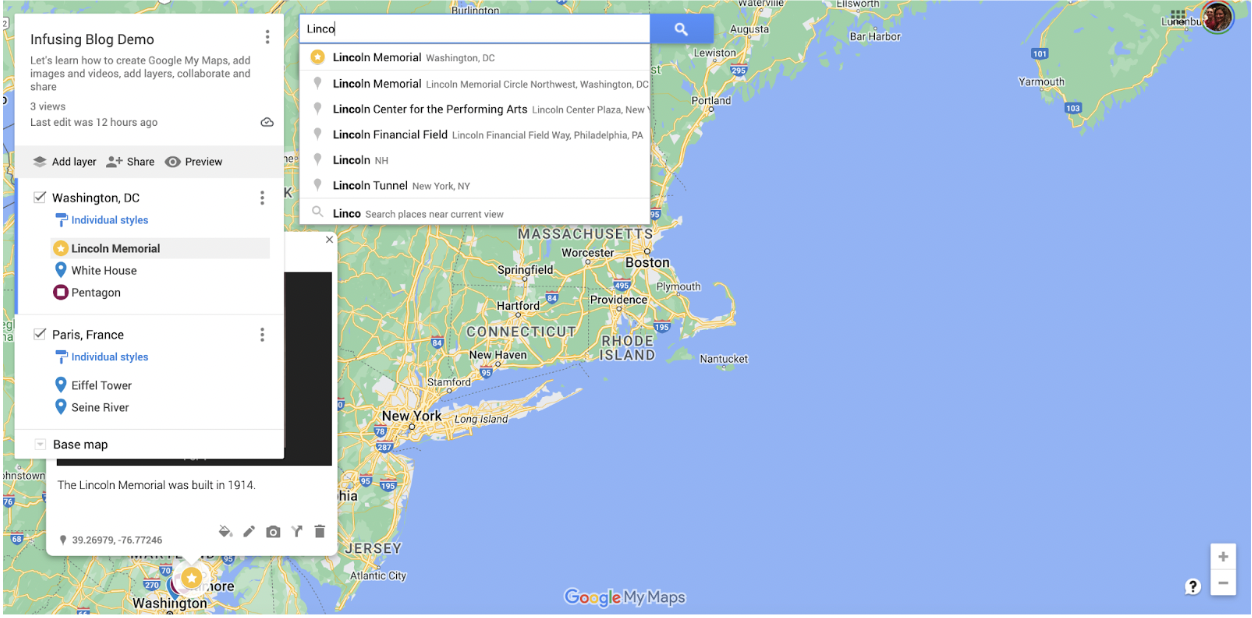
You can click to add a marker where you would like it – or – you can use the search box at the top of the map to find the exact location (including longitude and latitude information).
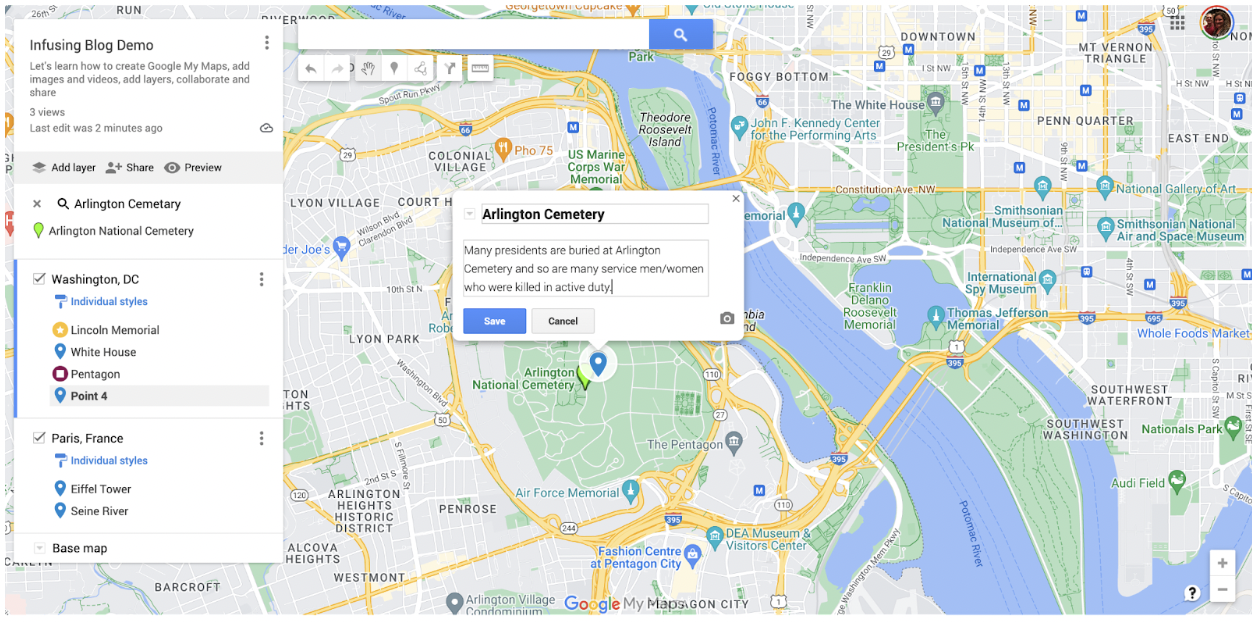
Once your marker is in the location, you have many options. For starters, add the title and description you want to include. Next, take note of the camera icon on the bottom right side of the text box. Click on this icon to add photos and videos.
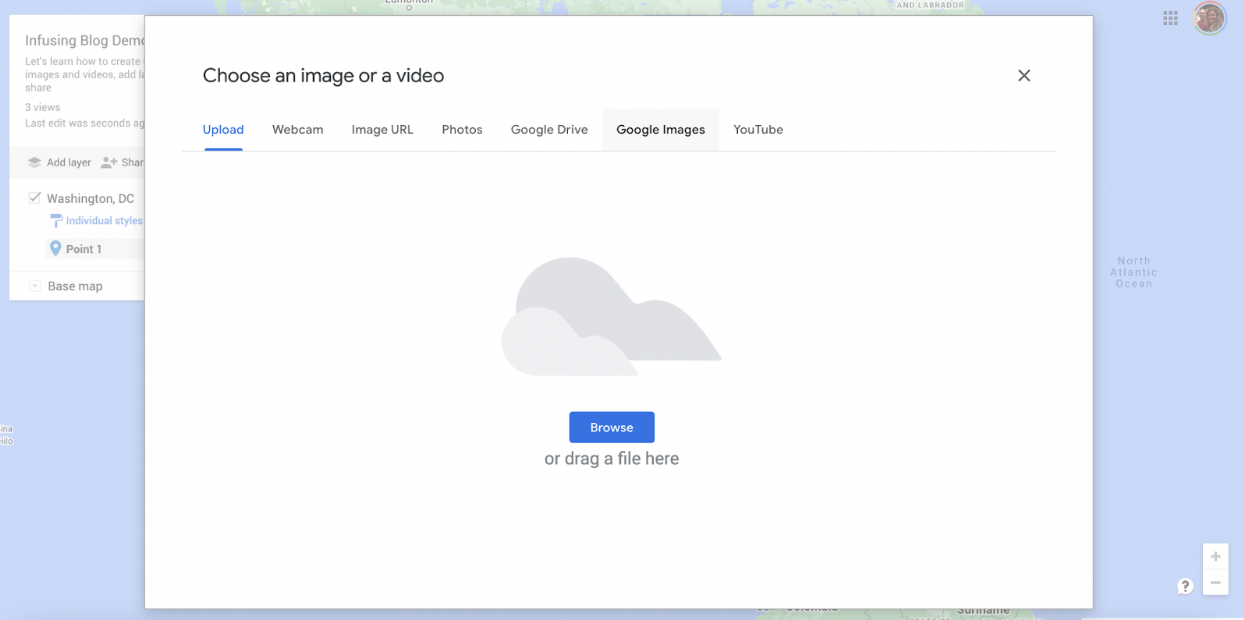
A fantastic option of Google My Maps is how easy it is to add images and videos. This screen is what pops up when you click on the camera. You have many options: Upload an image, Webcam (maybe you want to take a video of you talking about the location), Image URL, Photos, Google Drive, Google images, and YouTube). Click on your option to upload.
For example, Google Images gives you many options to use. As always with images, be sure you are following Copyright laws. The photos in Google Maps are allowed for non-commercial use with no issue.
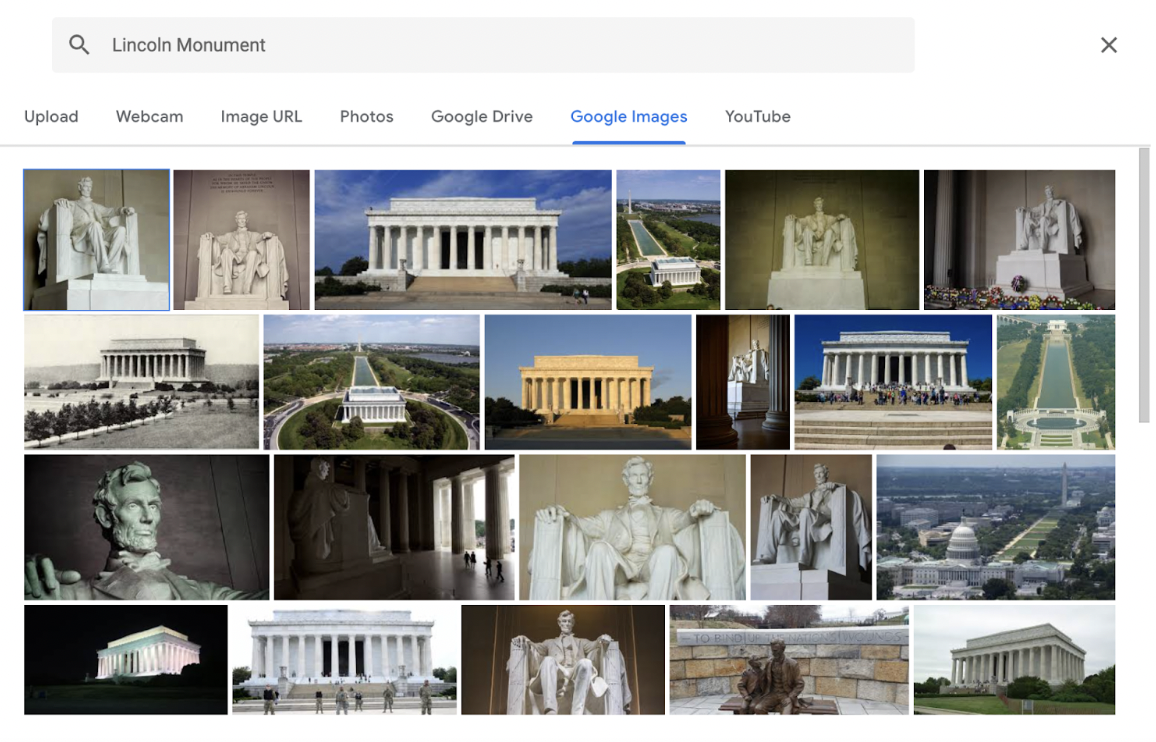
Once you find the image, click to add and then Save.
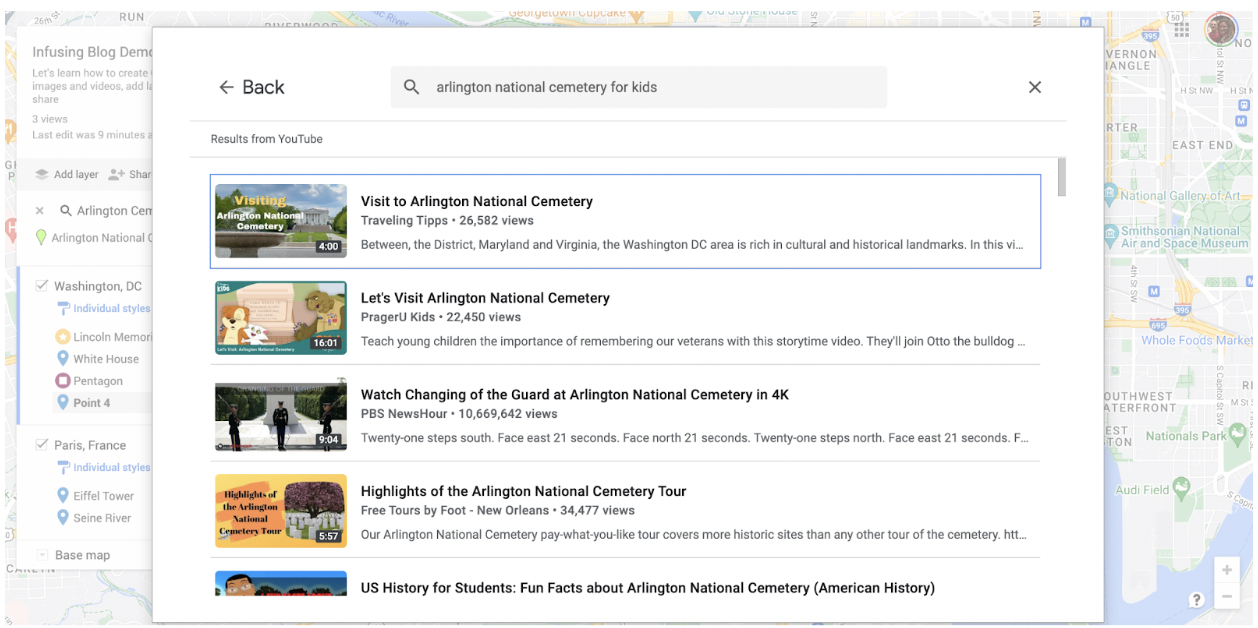
The YouTube option is just as simple to use; type in what you are searching for, and YouTube provides many options. Once you find what you want, click to add the video to your marker.
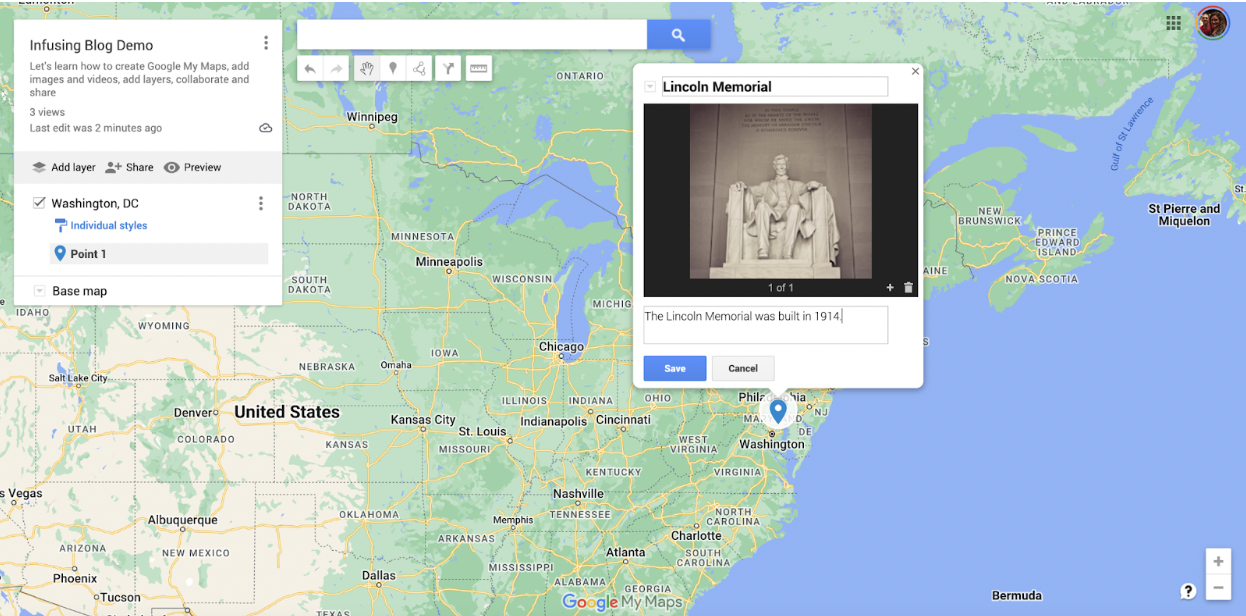
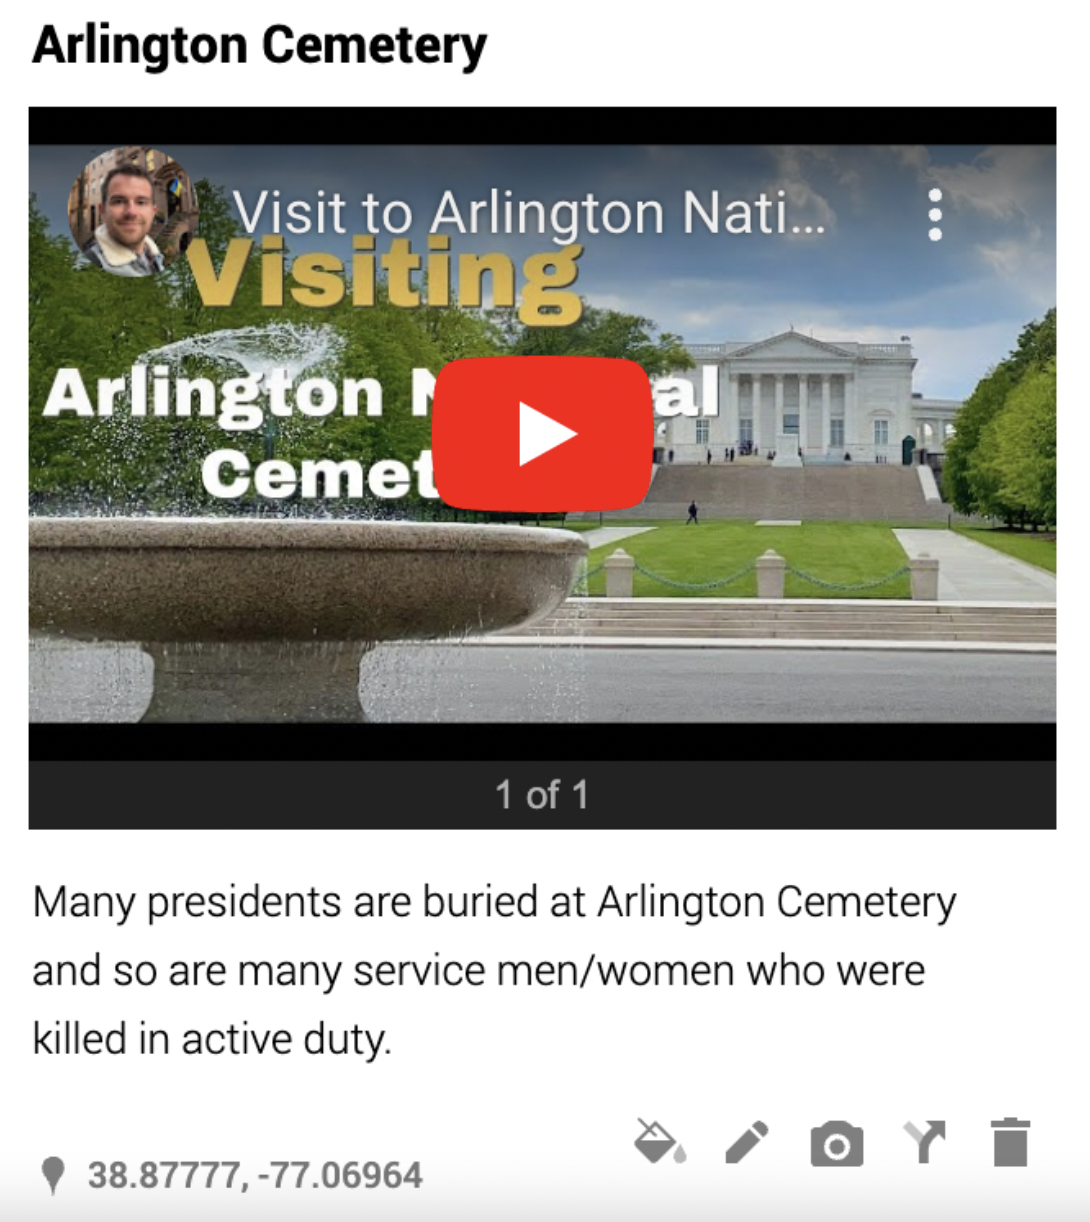
This is what your information will look like once the video is added. Please note that two small buttons are directly under the image or video (directly under the photo on the right side). There is a + sign and a trashcan. The + sign allows you to add videos or images to the same marker; this is an excellent option if you want to include both videos and photos or if you’re going to show the exact location at different periods.

Let’s look at an example of that marker information box/images once you click to save. Here is a bit closer view of the options. Starting from the left side, the first icon is to change the style of the icons and colors. This option is shown in more detail in the following image. The second icon is to edit the text, the middle icon adds more pictures or videos, the fourth icon adds directions to the location, and the final icon is to delete.
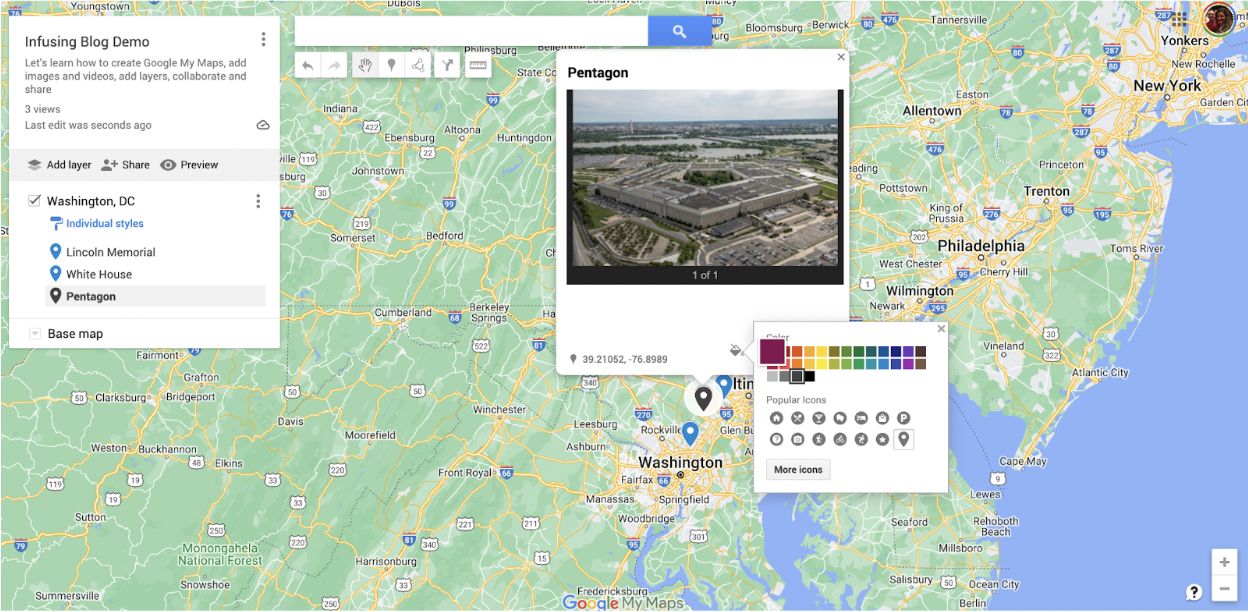
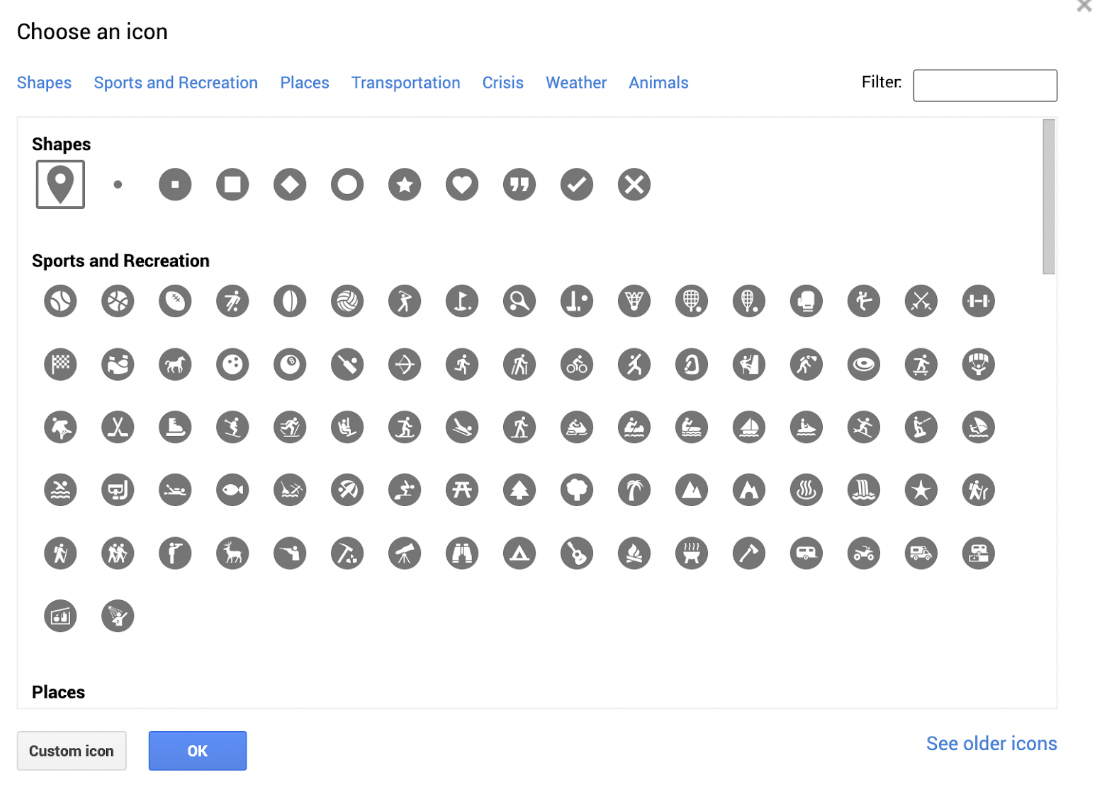
Now, let’s dig deeper into the options under that first icon for style. For starters, you can decide on the color of your marker. This color will show on the map, and the map key/locations will be on the top left. Note how the Pentagon icon is now dark red and not blue as the others. The other option under the style button is the many icons you can use. The next photo in this tutorial will show the possibilities of icons. The icons will also show on the map, and the map key/locations on the left top.
As you can see, there are many icons. This is a great way to personalize your map. For example, you could have your students each research a different state and add stars to represent the capital, heart to represent large hospitals, skier to represent large mountain ranges, and so on.
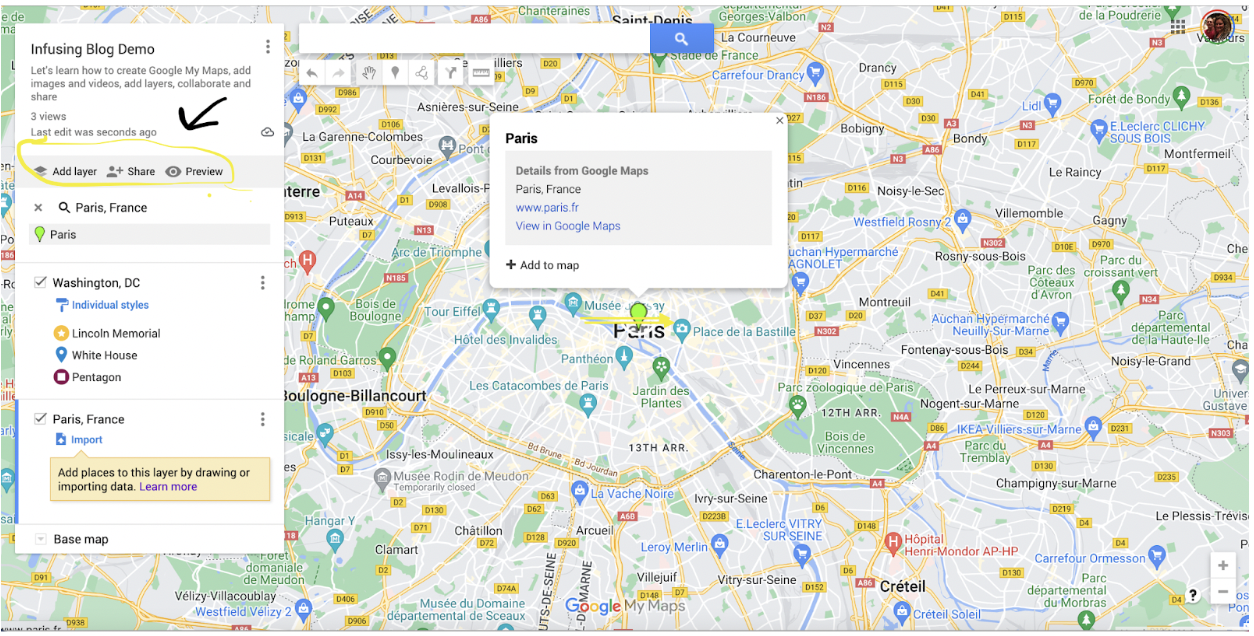
We discussed adding markers, images, videos, and icons and changing the colors. Now, let’s look further in the layers. The area circled in yellow below highlights three essential features of Google My Maps that we will discuss next. The first icon is the Add Layer. The second icon is what you click to share your map (great for collaboration), and the final option allows you to Preview your map in a non-editing format.
The Add Layer option is straightforward. Click to add layer; the new layer will be listed under your original one. In this example, the second layer is Paris, France. Now, we can add images, markers, and more, just as we did in the first location. You can continue to add layers until you are finished. No limit exists to how many layers can be added to a map.
Now, we will move on to the sharing option. This has benefits for two reasons. First, by sharing the link or the map file from your Google Drive – peers can collaborate on the same map. Second, this is the way for students to share their finished map with an educator or a teacher to share it with students.
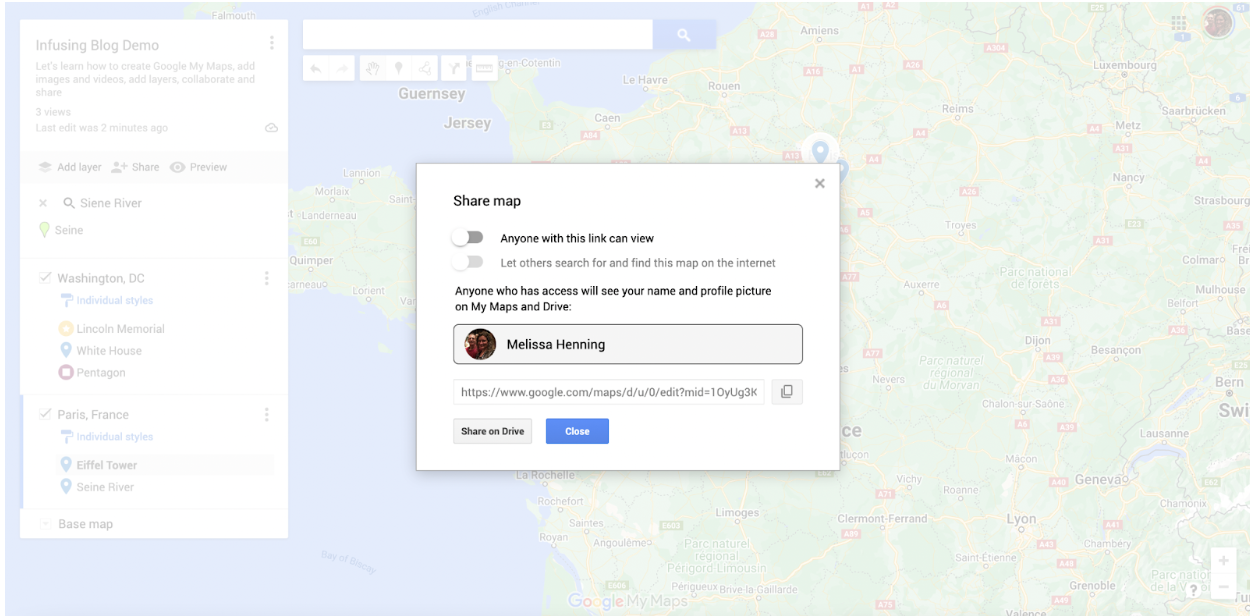
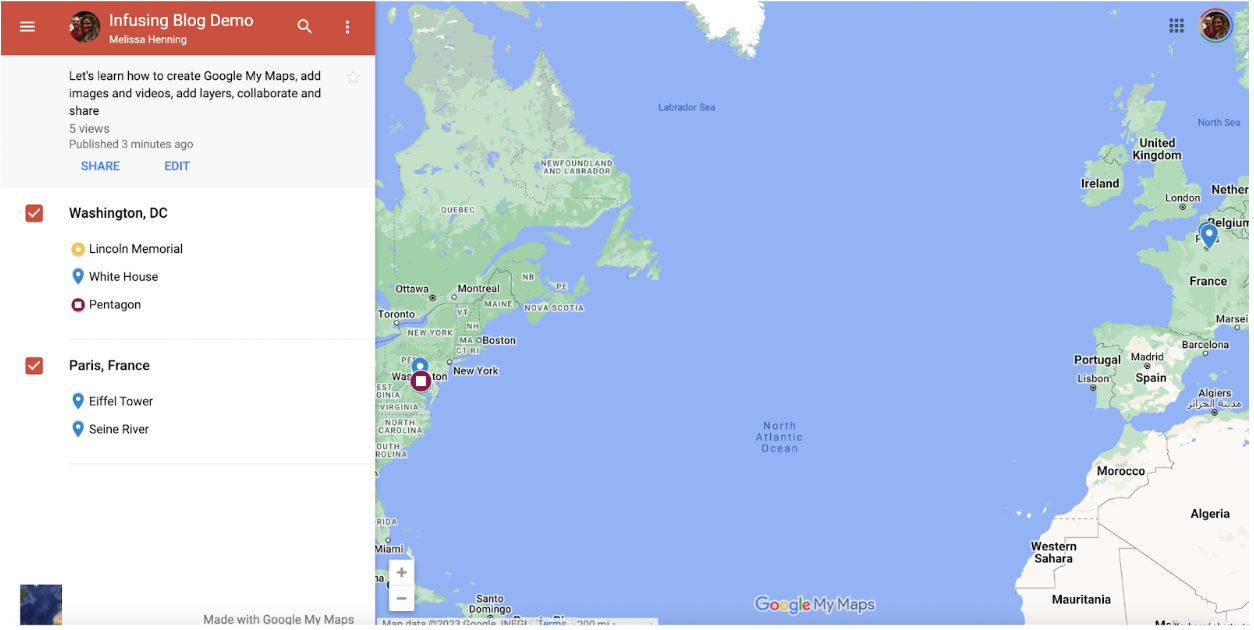
And finally, if you would like to see what your finished map will look like, you can always click the Preview button to see a cleaner-looking map. This map is not editable. So, no one can edit or collaborate if you share the link to this map.
Classroom Implementation Ideas:
Google My Maps allows students and teachers to create and share custom maps. My Maps also allows users to collaborate on the maps in real time. You can include markers to represent locations, shapes to personalize the map, and layers to help organize your map’s content. Layers create different maps that can be viewed or edited independently or together, making differentiating between various students’ work or topics easier. You can also add images, videos, URLs, and other information. Please note that while you cannot create maps using an Android or iOS app, you can view your created map on an app.
Google My Maps would be ideal for the BYOD or 1-1 classroom. This website is suitable for remote and distance learning. Below, we share several suggestions for using Google My Maps in several subject areas.
Create a Google My Map About
Social Studies:
- The timeline of historical events by placing markers on each map (such as battles of the Civil War). Students can add details, videos, images, and more.
- The continents and add markers for key geographical features, cities, and landmarks.
- The life and locations of a famous person from the past (such as Dr. Martin Luther King, Jr). Include where he grew up, famous marches and speeches, and more.
- Cultural heritage locations, artifacts, monuments, and traditions from different civilizations share a visual representation of the diversity of our world.
- The distribution of major religions around the world. The markers can include locations of significant religious sites.
- Famous buildings and monuments in Washington, D.C. – create a virtual field trip to share with your students. Or have each student research a different location and add their layer to a shared classroom cooperative map.
- Historical exploration and trade routes (for example, the Silk Road). The visual representations and images can help deepen students’ understanding of the connection of different cultures through trade or exploration.
- Current political events, geopolitical changes, or even election results. This would be especially ideal during a presidential election year, including markers for local polling locations.
- The local community – mark historical landmarks, points of interest, bodies of water, and more. Consider including historical images to show how the town has changed.
- The state capitals. Students can create their own map, or the teacher can share a map that can be used to study the capitals.
Science:
- Various ecosystems and their geographical location add makers for climate information, key animal species, and more.
- Include locations of volcanoes or earthquakes worldwide and discuss the geological implications.
- Geological features such as rivers, lakes, mountains, and volcanoes. Challenge students to add information about the formation of these features (including photos and science-related videos).
- Animals of Africa and their location, highlighting areas and which animals are more common.
- The most extensive coral reefs in the world and the species of fish that one would find in each location.
- The distribution of renewable energy sources (such as solar and wind farms). Map out areas that use these energy sources more than others. Discuss the advantages and challenges of each energy source in different geographical locations.
- The life and locations of a famous inventor from the past or present (such as Alexander Graham Bell). Include layers for where he grew up, prominent contributions, and more.
- The locations of historically significant weather-pattern phenomena, such as hurricanes, blizzards, or tornadoes.
- The environmental impact of human activity by mapping out areas of pollution sources, deforestation, and other ecological changes.
- Locations of famous inventors from the 1900s. Map out the birthplaces or adult living areas of famous inventors from the 1900s.
Math:
- The life and locations of a famous mathematician (Fibonacci). Include layers of where he grew up, mathematical contributions, adult life, and more.
- Create virtual field trips highlighting buildings around the world that have unusual shapes.
- Measuring the distance between two or more locations (such as monuments) while reinforcing concepts of measurement and scale.
- Represent data, such as population density, visually on Google My Map. Use different options under style to personalize (such as colors and icons).
- Create a scavenger hunt for students to find famous landmarks in specific geometric shapes (for example, the Pentagon). Provide clues about the location and place and have students search.
- Plan a dream road trip. Have students calculate distances, budget for expenses, estimate travel times, and add photos and videos of each stop.
- Design a game where students use the map coordinates to find hidden clues and solve mysteries. Each point of interest can include a marker with the clue and coordinates for the next stop on the treasure hunt.
- Help students understand the concepts of distance and scale using Google My Maps. Have students calculate and compare the scale and real-world distances of different locations or markers on the map.
- Have students create maps and plot points, draw shapes, and explore reflections, symmetry, and transformations.
- Create a math story problem using Google My Maps to find locations, distance traveled, and coordinates. Use your current math curriculum to make relatable questions, and add Google My Maps as a bonus to your assessment.
Language Arts:
- Plot the settings of a novel on a map. Add details about each location and layers for different chapters or even characters.
- The life and locations of a famous author. Include layers of where they grew up, literary contributions, adult life, and more.
- Ditch the traditional book reports and have students create interactive maps using Google My Maps. Students can add markers with crucial information, create layers for each character, highlight the setting, and even add images from that period.
- Encourage creative writing and have students use the maps to create their original story. They can add markers to share locations from the story, information about the characters, the plot, and more.
- Map the journey of a character in the story. Several students could collaborate, each adding a different character in an additional layer, adding markers for story locations and events that shaped the character’s development.
- Map the settings of some of your students’ favorite Shakespearean plays. Highlight and discuss the importance of the location and its influence on the plot and character, like in the plays Macbeth or Romeo and Juliet.
- The imagery and settings described in a poem. Have students add markers for locations mentioned in the poetry and discuss how the setting impacts poetic themes.
- Create a collaborative class, My Map, to explore the settings of books each student reads. Each student can add information about the stories they are reading, adding markers for critical locations from the stories.
- Map out literary landmarks mentioned in various works throughout the year on one shared map. Students can add markers with information and images about each book’s landmarks.
- Compare and contrast the settings of two or more books by creating separate layers on a map. Share the similarities and differences in the settings and environments of each story.
- Build a map to show the timeline of events from a book. Add layers as needed, and use the markers to share critical events chronologically.
- Have your students add one or two book trailers for different novels using the map features; the teacher should also add several book trailers using the map. Students can view these multimedia maps to get an idea of what they would like to read next as they read a quick summary and view images or videos about the books.
Arts & Humanities:
- In world language class, have students create a map with markers for places where the language is spoken (such as Spanish). Include photos, videos, and information about each location.
- In German class, explore the culture by mapping historical sites, museums, and landmarks. Be sure to write the information in German.
- In world language class, explore the culinary world of the language by marking restaurants that offer authentic cuisine. Have students add markers with menu items and reviews.
- In Spanish class, have students plan an imaginary trip to Mexico. Add markers to famous tourist locations, restaurants, and hotels – as the students practice travel-related vocabulary in Spanish.
- Add markers to map famous pieces of artwork and their locations worldwide. Create and share this virtual tour of art history.
- Showcase famous pieces of art from different regions around the world. Add markers to each location, highlighting museums.
- Show the origins and development of various art styles such as Surrealism or Renaissance. Add a layer for each art style and include key artists and significant artworks offering examples of each artistic style.
- Chart and map the life of a famous artist (or musician) using markers to show locations of significance.
- Map the origins and evolution of different music genres (such as Motown or the Blues). Add other layers for each genre included on the map. Add markers for locations of significance, influential artists’ hometowns, and performing centers that were pivotal in the genre.
- Plot the birth locations of famous musicians on a map. Make connections and discuss the geographical diversity and how locations can impact musical styles.
- In music class, have students explore the origins of various musical instruments and add markers to where the instruments were invented. Be sure students add images, videos, and information about the instrument.
- In PE class, have students map the locations of sports teams in a league. Consider making layers and including a variety of sports. Discuss with your students how geography impacts various sports and competitions.
- Explore sports venues in your country. Add markers for large stadiums or other recreational areas.
Additional Video Tutorials and Review:
- TeachersFirst Review: Google My Maps
- My Maps Help: Create or Open a Map (Google)
- My Maps Help: Add Places to Your Map (Google)
- Article: How to Create a Custom Map in Google Maps
- Video: My Maps Tutorial – Everything You Need to Know about Google My Maps
- Video: Using Google My Maps in the Classroom
Have you used Google My Maps? Then, share your favorite activities in the comments below!